Tools
AgriBot kits come with five tools to cover the basics of food production, as well as multiple toolbays and various seed containers.
The following documentation pages explain how to assemble and install all of these tools and more.
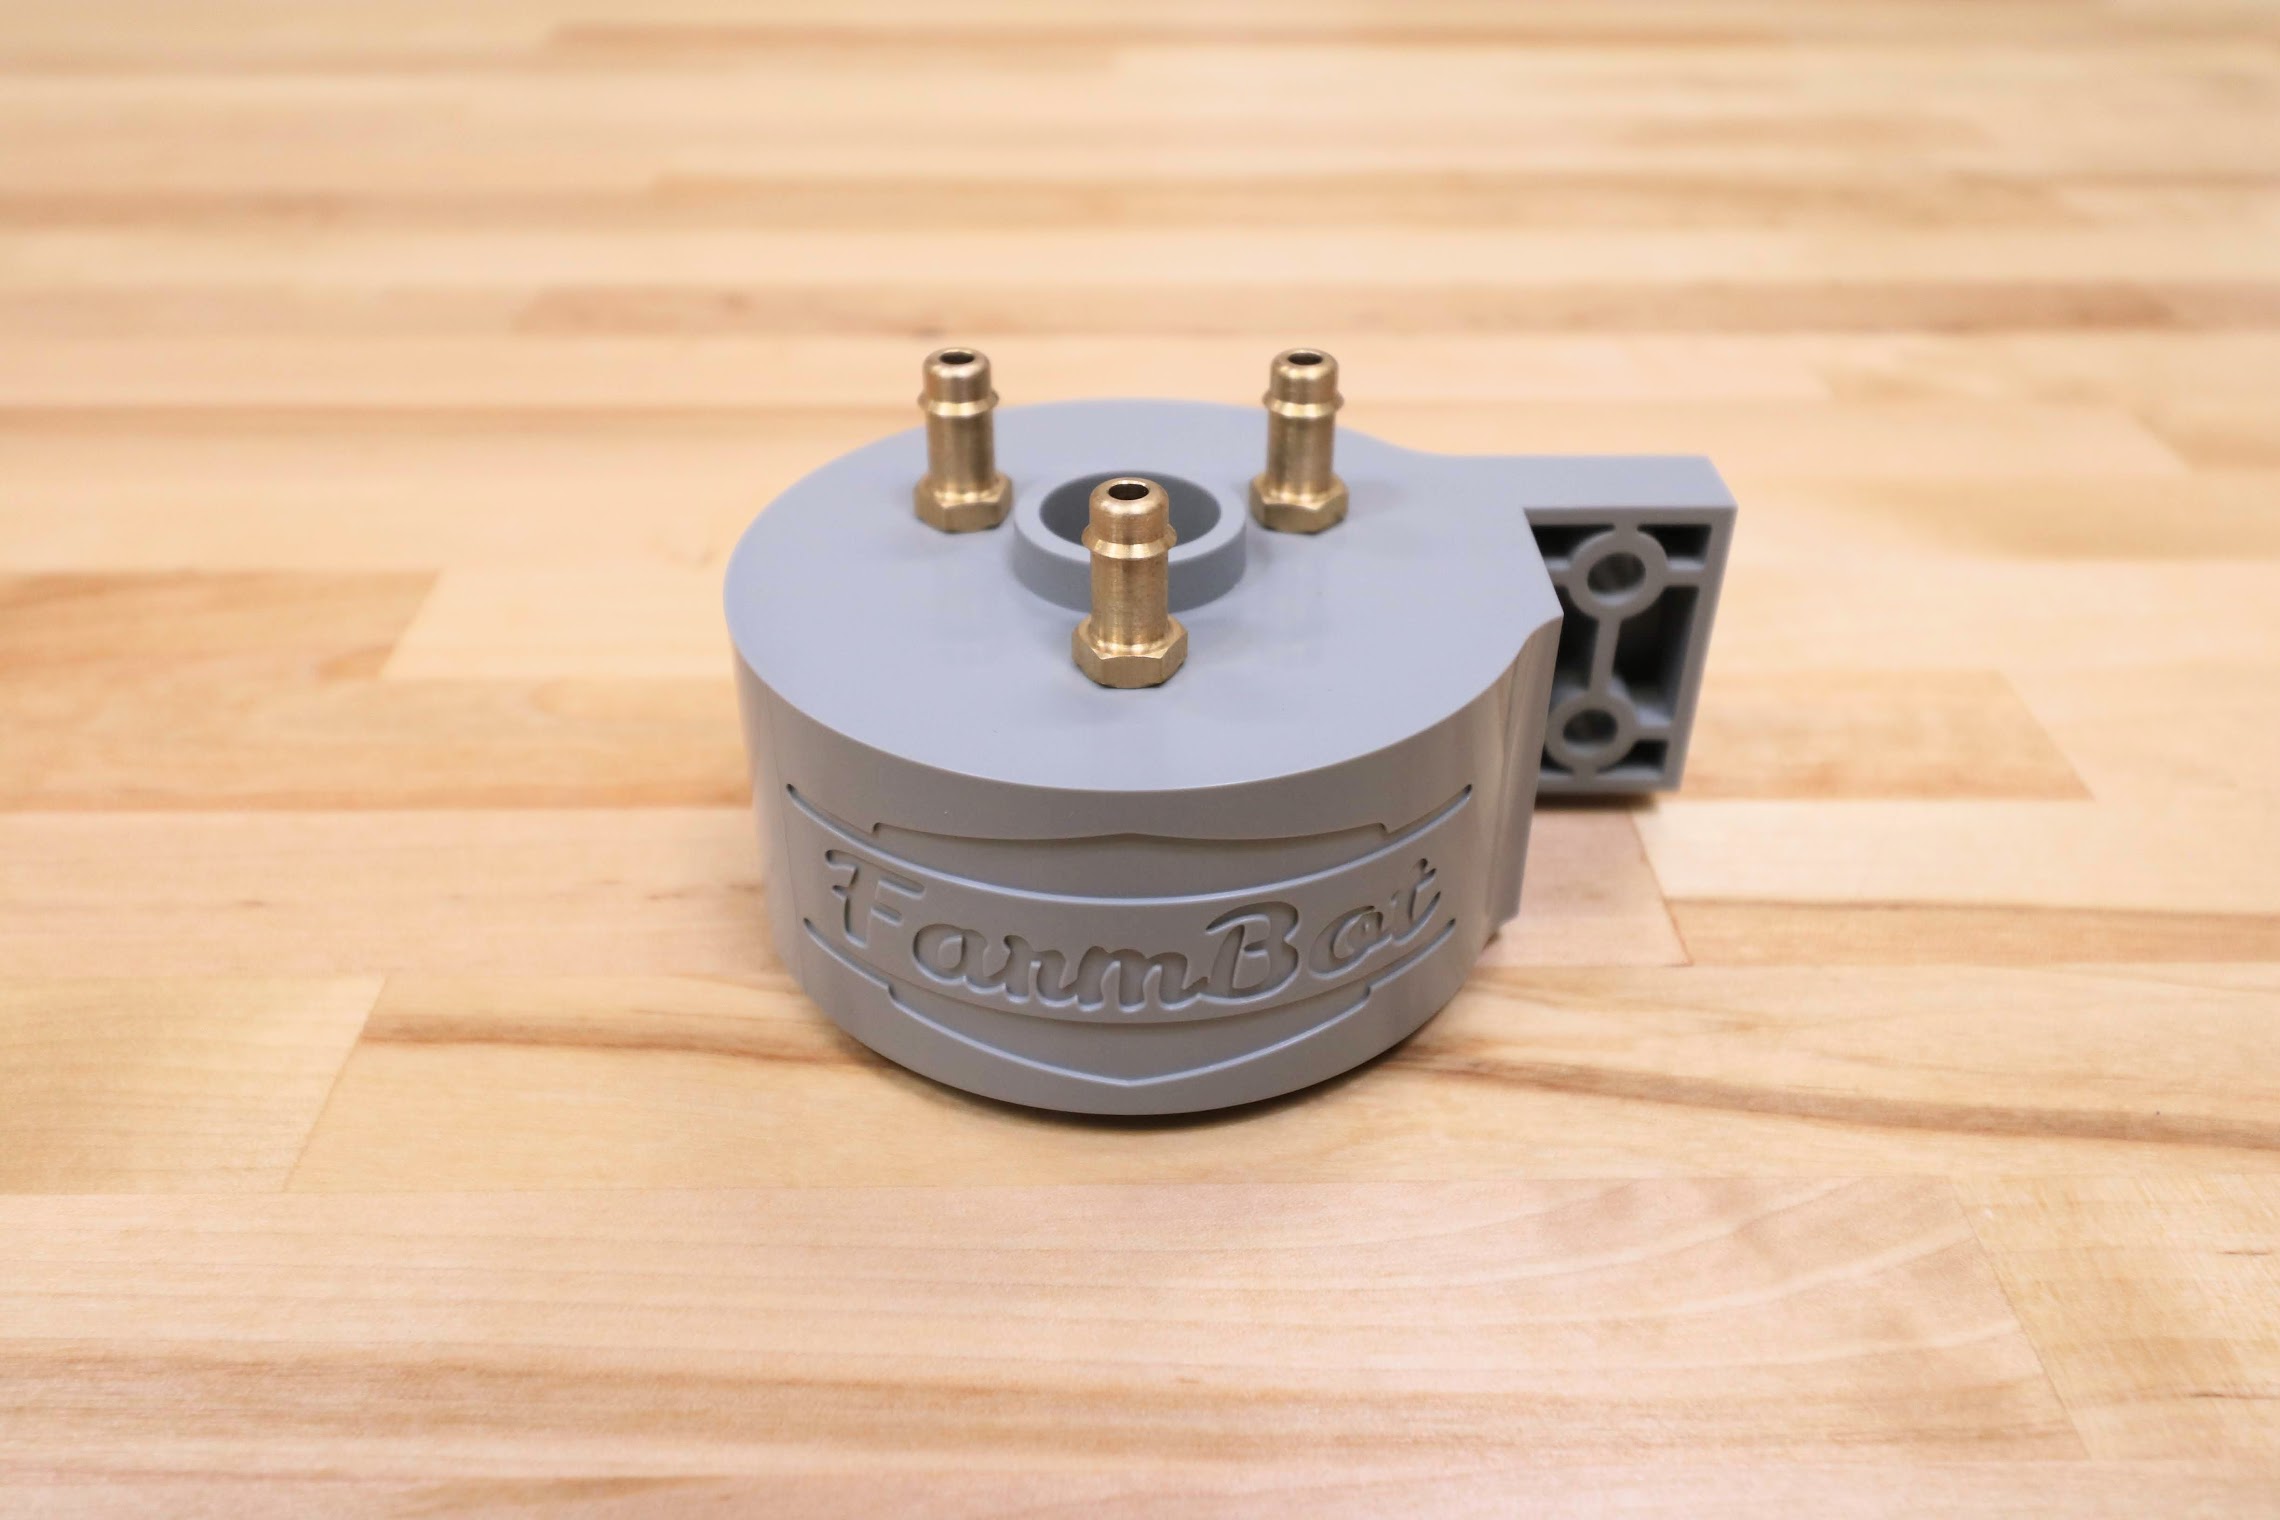
Universal Tool Mount
The Universal Tool Mount (UTM) allows AgriBot to automatically switch tools in order to perform different operations.
It is a plastic component that mounts to the z-axis aluminum extrusion using two M5 screws and tee nuts. It features:
3 strong neodymium ring magnets to magnetically hold tools in place via other magnets placed in the same configuration on the tool.
Passageways for water, liquid amendments (eg: fertilizer), and vacuum or compressed air to pass through from the UTM (and the rest of AgriBot) to the tool.
12 pogo pins that make electrical connections with tools.

Pin mapping
UTM Pin |
UTM Wire |
Agriduino Pin |
Use |
|---|---|---|---|
A |
RED |
+5V |
Soil sensor power |
B |
YELLOW |
GND (0V) |
Ground |
C |
GREEN |
D63 - Digital-In |
Tool verification |
D |
BLACK |
D59 (A5) - Analog-In |
Soil sensor readings |
E |
WHITE |
(GND or 24V via DRV8876) |
Rotary tool motor |
F |
BROWN |
— |
— |
G |
BLUE |
— |
— |
H |
GREY |
(GND or 24V via DRV8876) |
Rotary tool motor |
I |
ORANGE |
— |
— |
J |
PURPLE |
— |
— |
K |
PINK |
— |
— |
L |
CYAN |
Protected Earth ground |
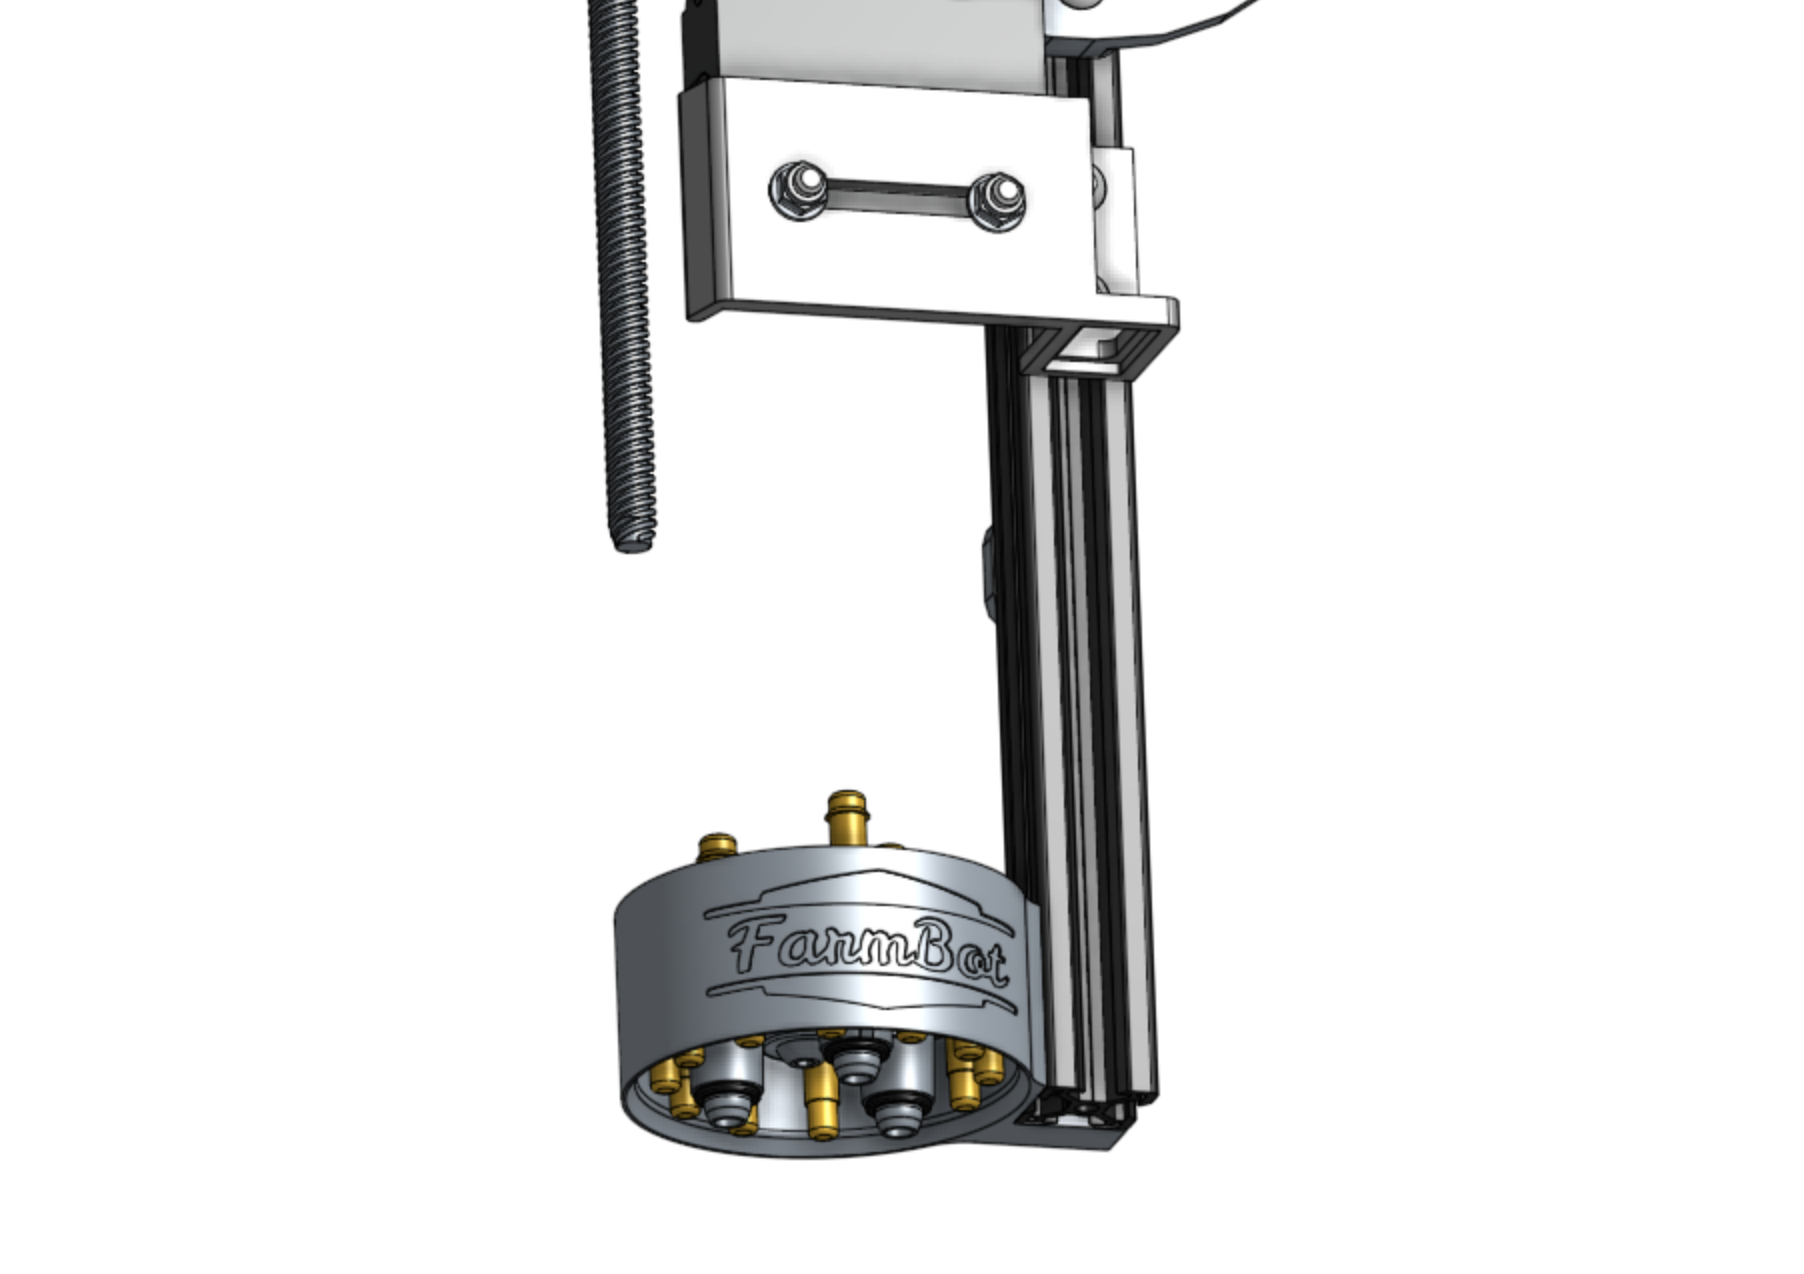
Step 1: Install the UTM onto the Z-axis
Insert two M5 x 16mm screws and tee nuts into the UTM, and then position the UTM onto the z-axis extrusion.
The mounting flanges should be positioned on the backside of the extrusion.
The bottom of the UTM should be flush with the bottom of the extrusion.
Tighten the two screws with the 3mm hex driver.
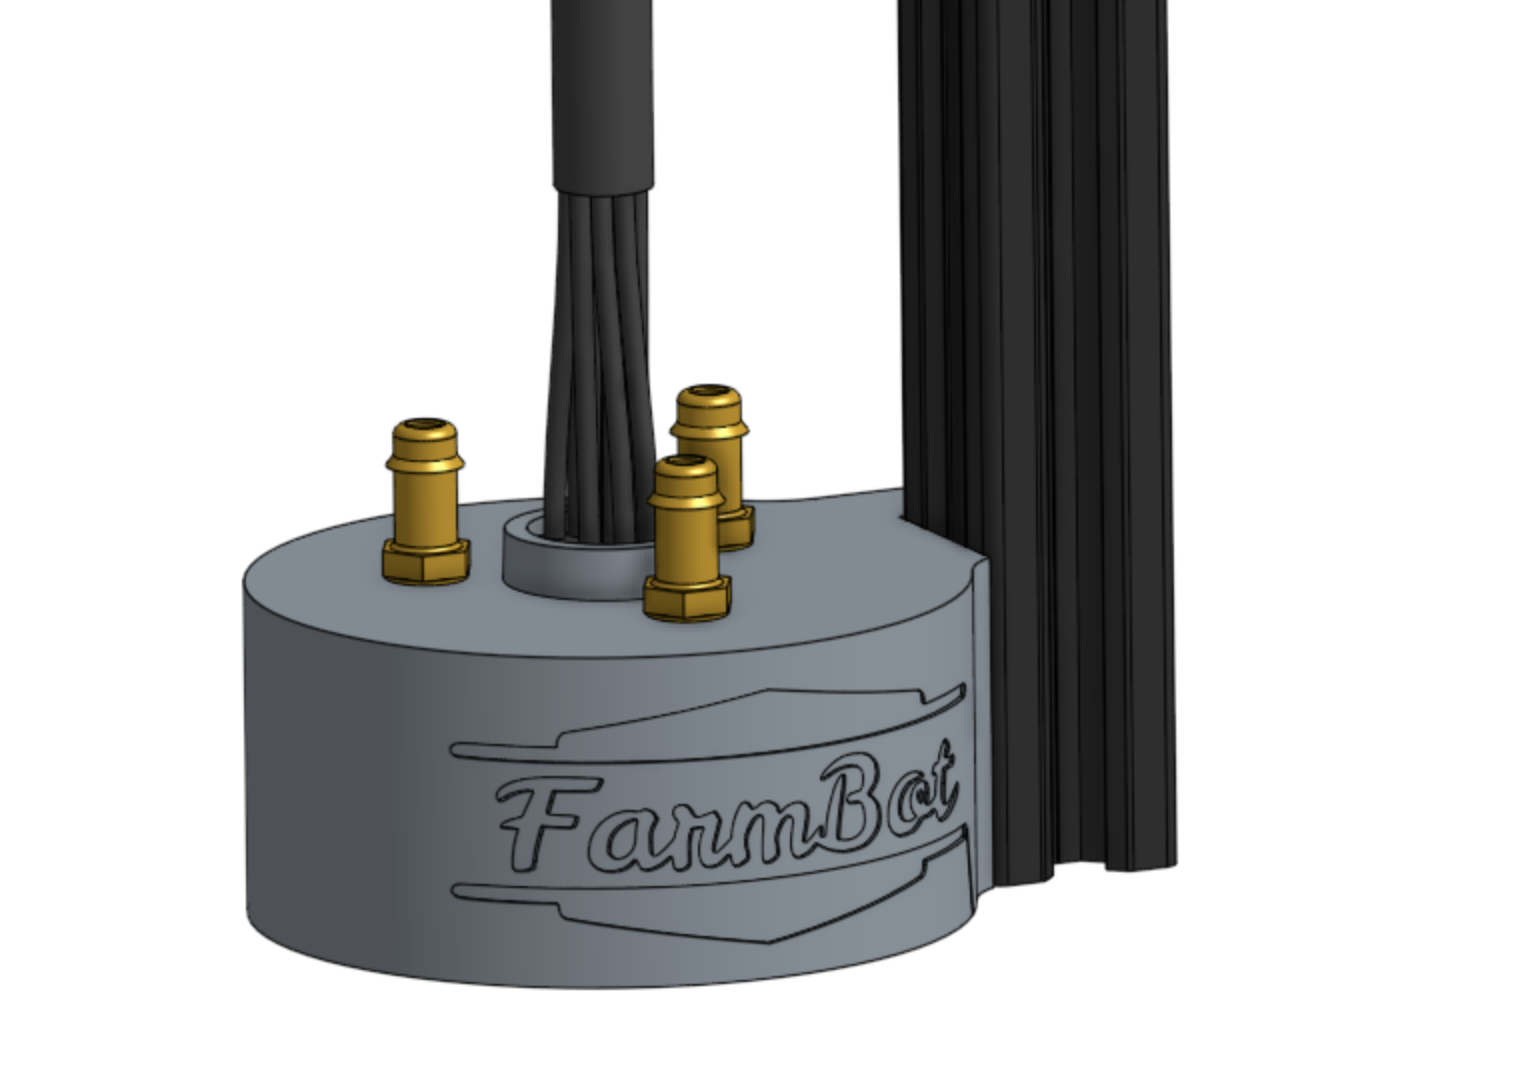
Step 2: Connect the UTM Cable
Insert the two UTM Cable Connectors into the top of the UTM.
Note: The black and yellow connectors of the cable correspond to the black and yellow pin headers inside the UTM.
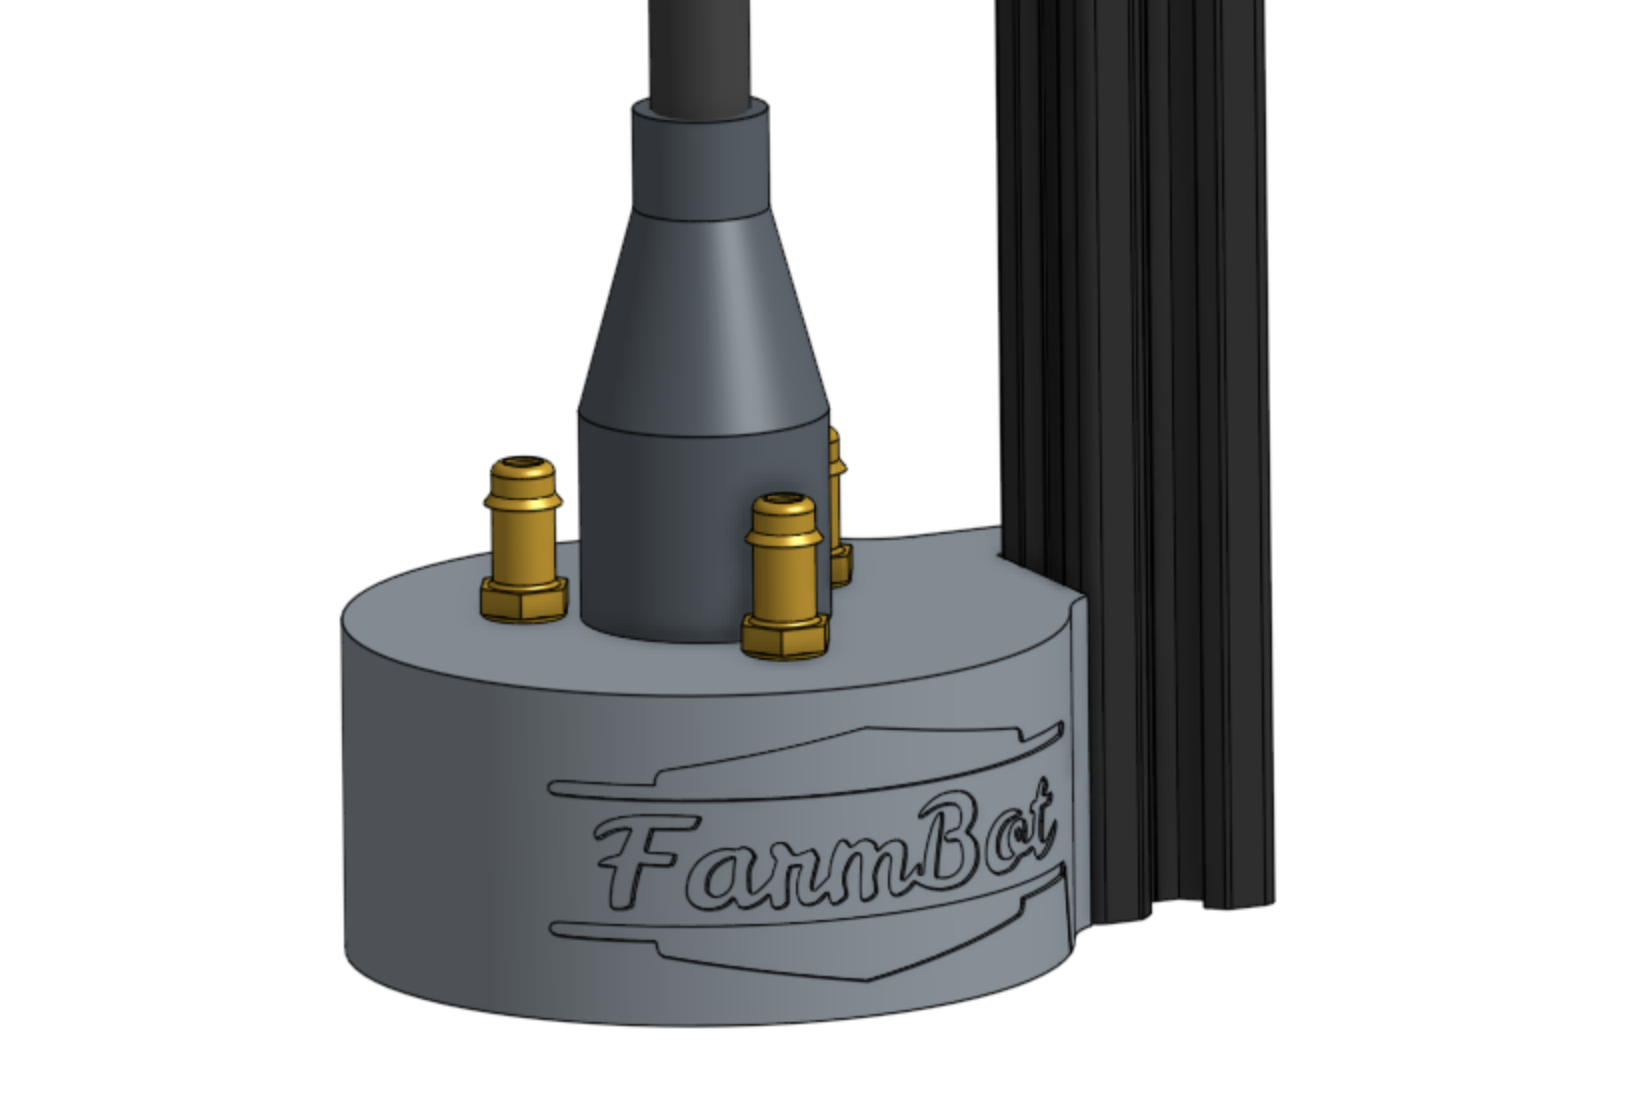
Then slide the UTM cable’s shroud down such that it fully covers the opening in the top of the UTM.
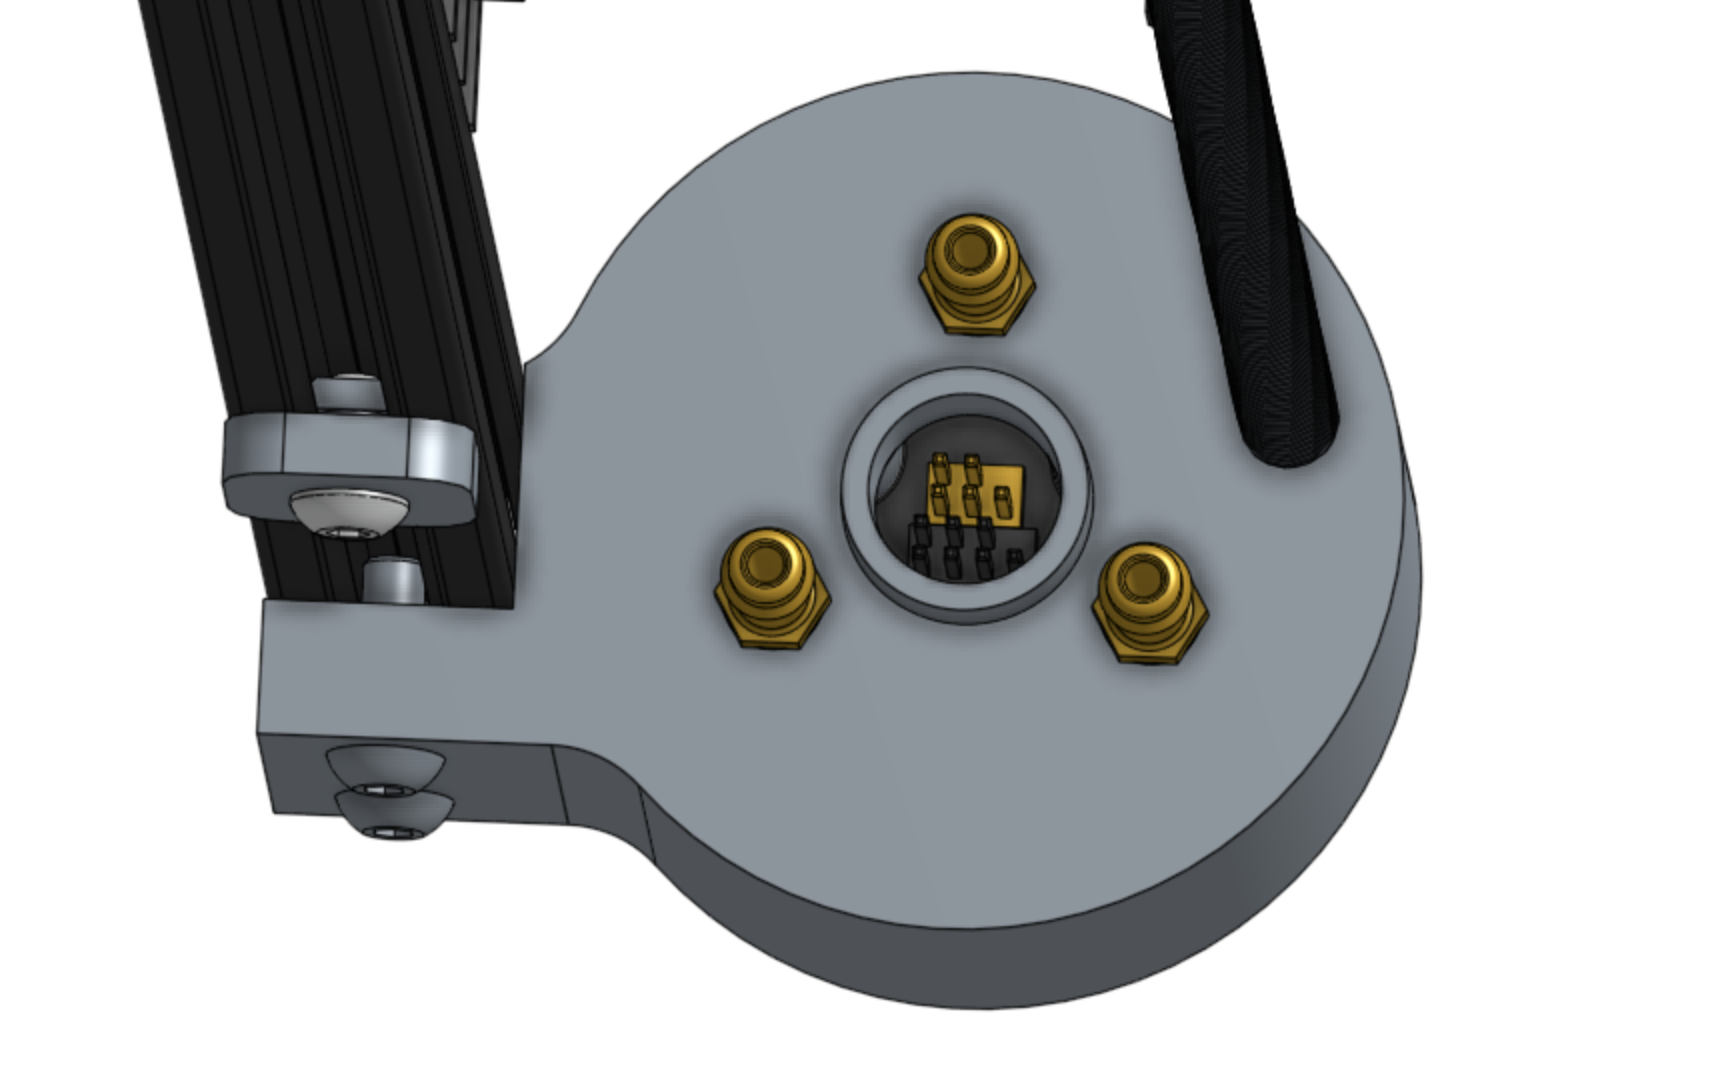
Step 3: Connect the Water Tube
Push the water tube onto the M5 barb on top of the UTM that is closest to the z-axis extrusion.

Camera
The camera is not a typical AgriBot tool in the sense that it does not mount onto the universal tool mount and it is not stored in a toolbay.
Instead, it remains fixed in place on the z-axis next to the UTM and can be used at any time, even when other tools are mounted.
The camera itself is a borescope style camera that is fully waterproof.
It can be used to take photos for weed detection, phenotyping research, or time lapse photography of your plants growing.
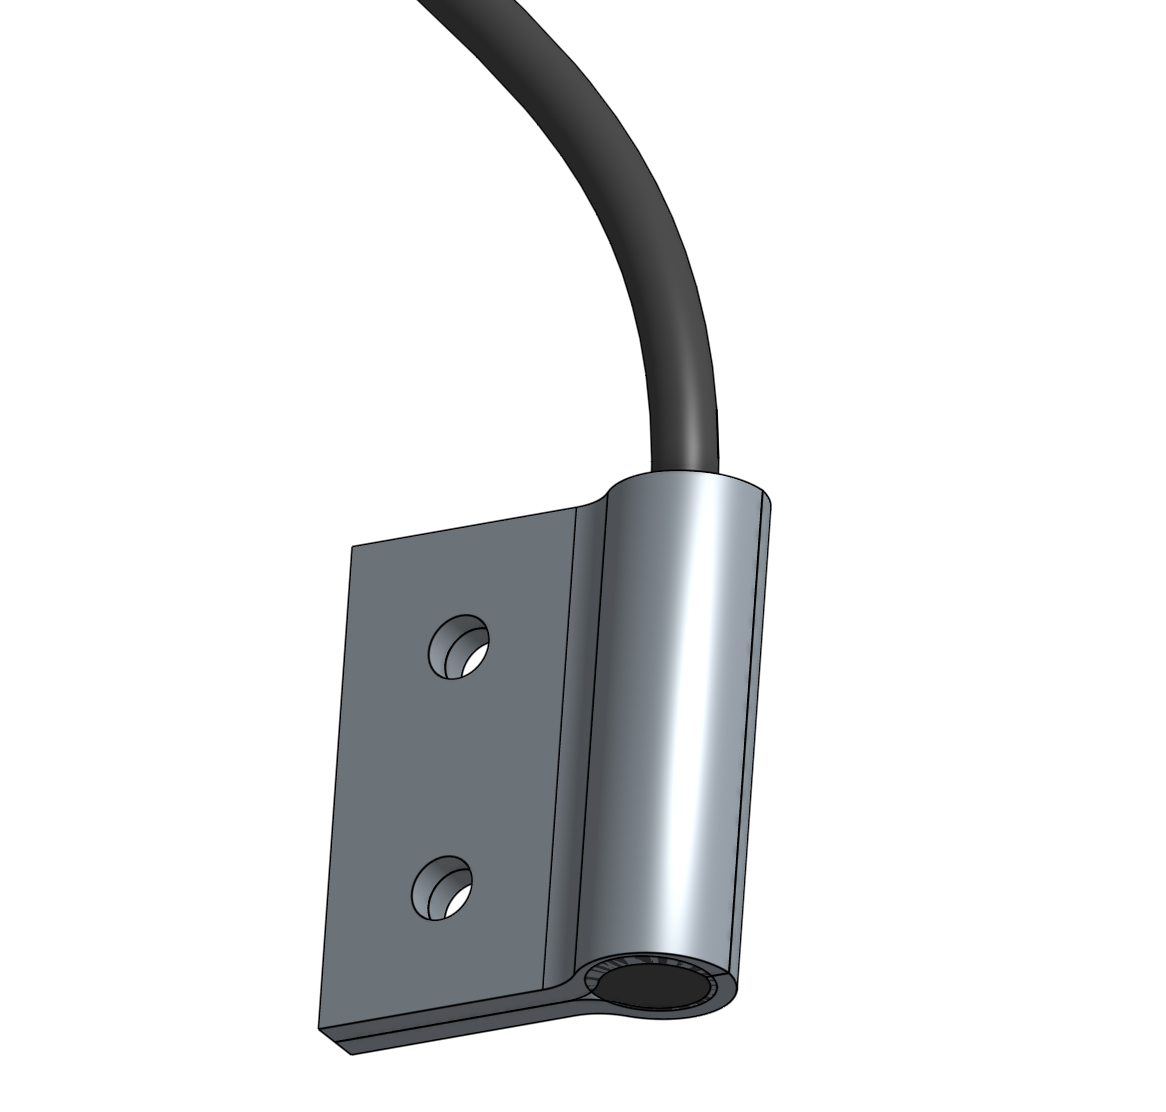
Step 1: Attach the camera to the z-axis
Sandwich the camera between the two camera mount halfs.
Then attach the camera and mounts to the z-axis using the two M5 x 10mm screws and a 40mm nut bar.

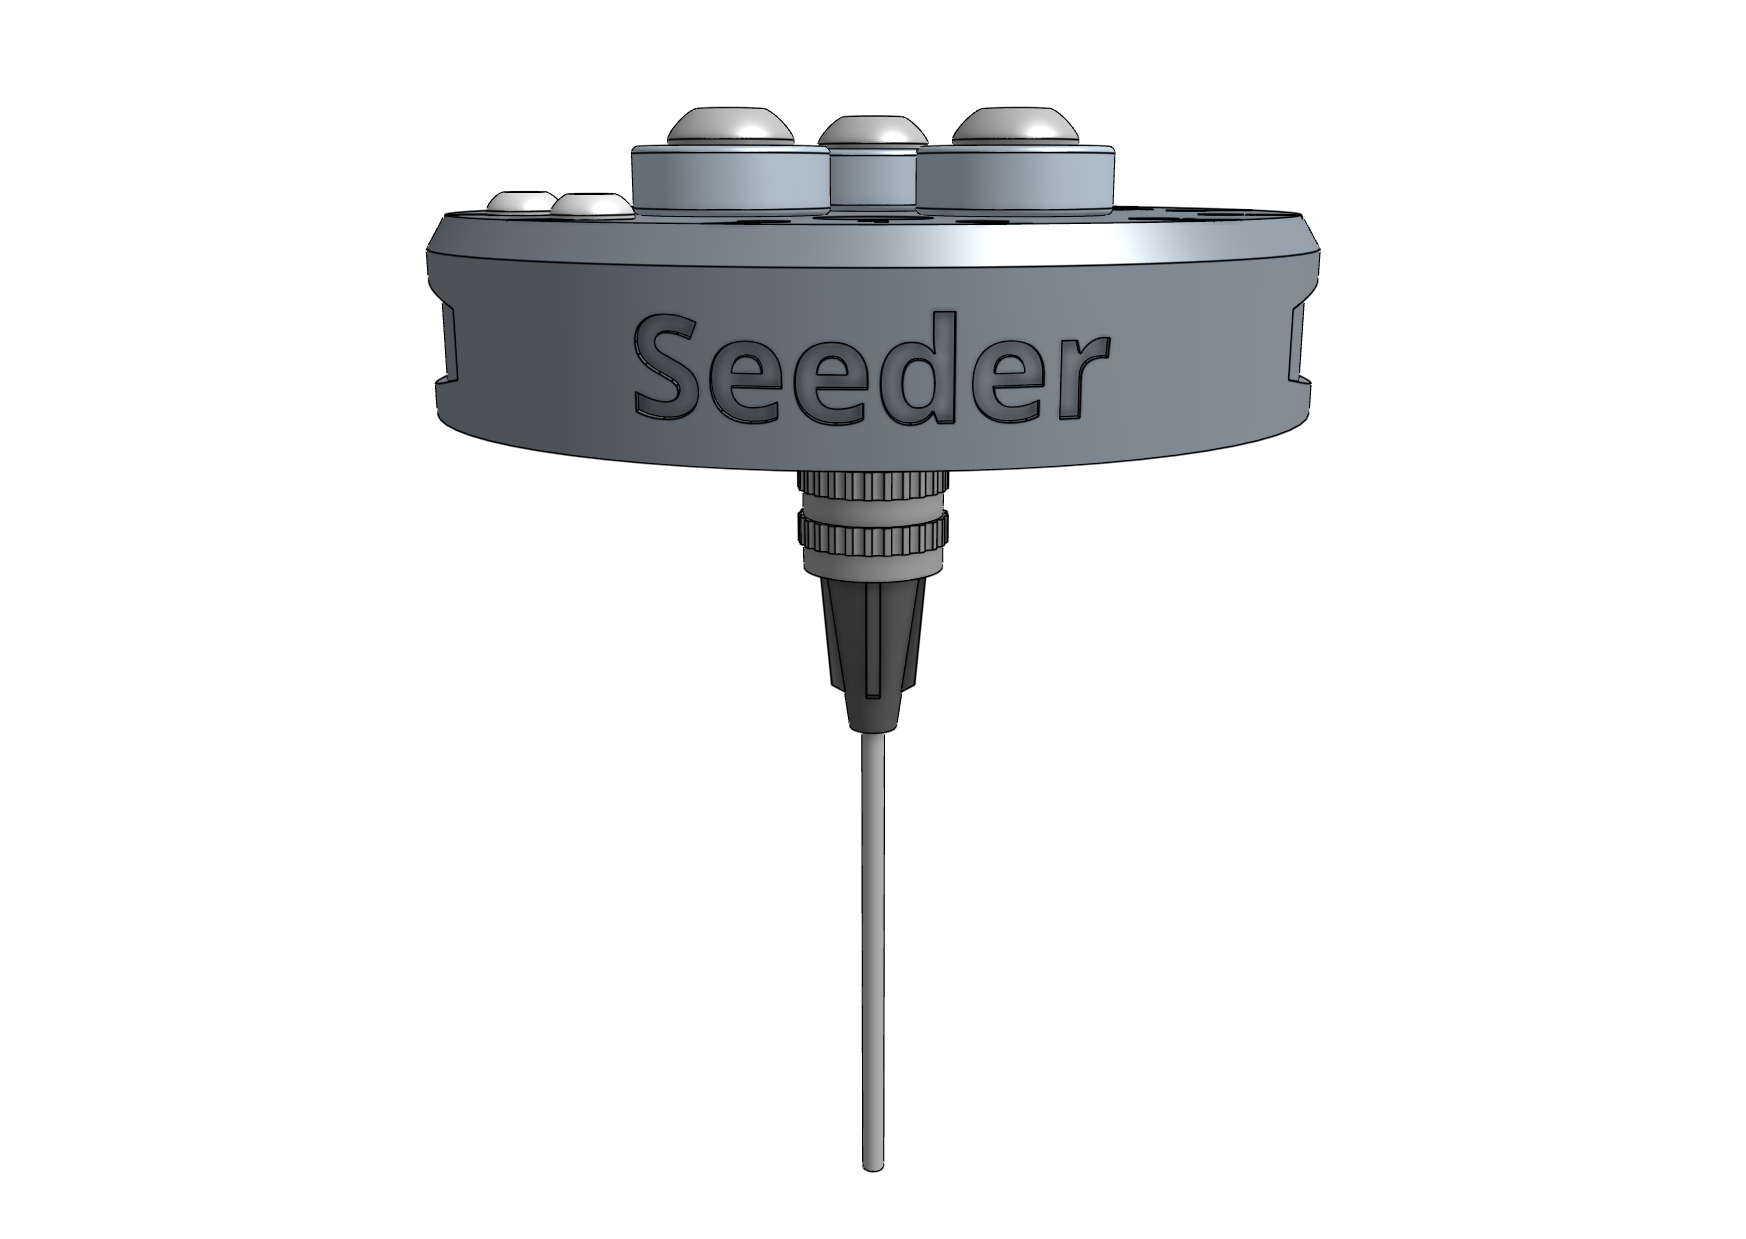
Seeder
The seeder tool works by using a vacuum pump to suction-hold a single seed at the end of a needle.
Step 1: Selecting a luer lock needle
AgriBot comes with different luer lock needle sizes so that you can experiment and find the best needle for your needs.
Size |
Gauge |
Inner Diameter |
Good for |
||
|---|---|---|---|---|---|
Large |
16 |
1.35mm (0.053”) |
Large seeds (e.g., pumpkin) |
||
Medium |
19 |
0.83mm (0.032”) |
Most seeds |
||
Small |
22 |
0.48mm (0.019”) |
Small seeds (e.g., lettuce) |
||
Once you’ve selected a needle, attach it to the luer lock adapter with a quarter turn.
At any time you can quickly swap the needle out for another size or replace a damaged one.
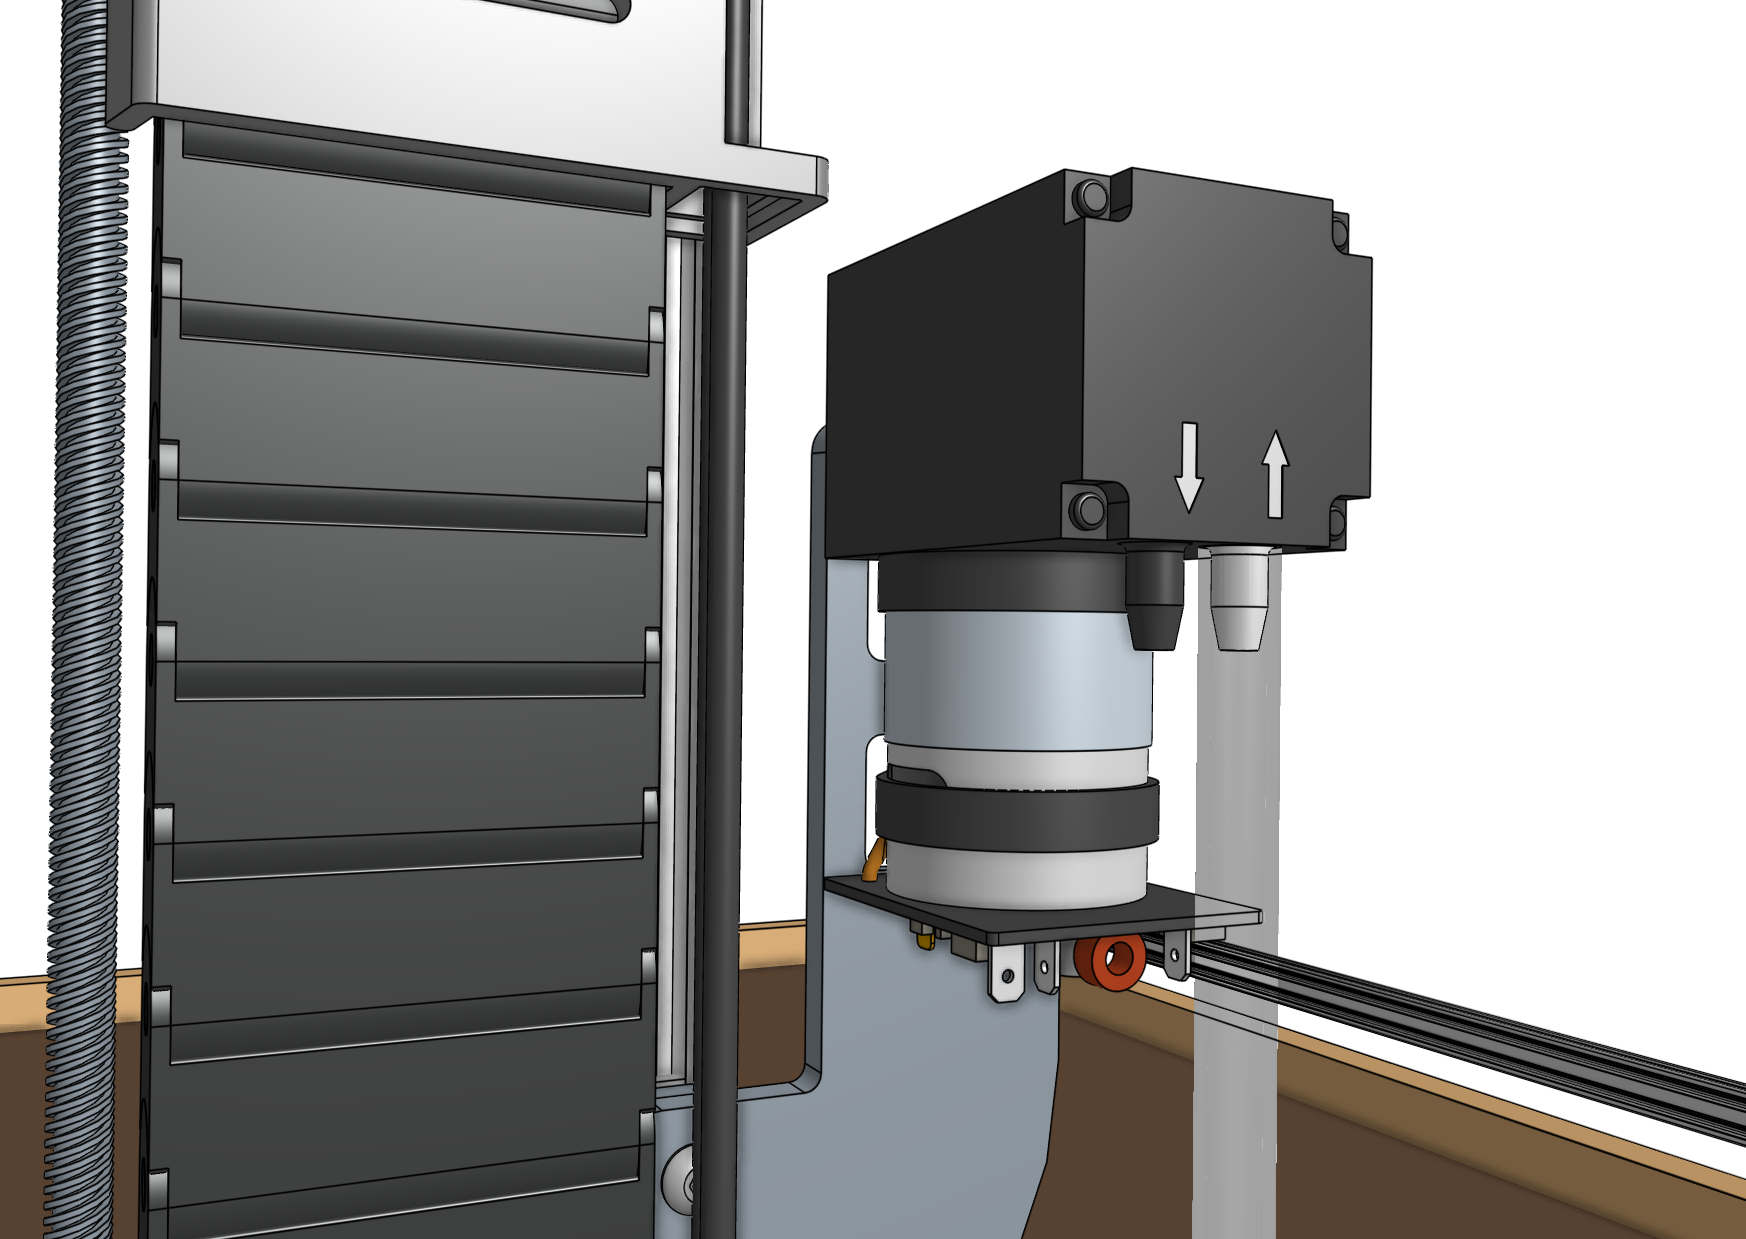
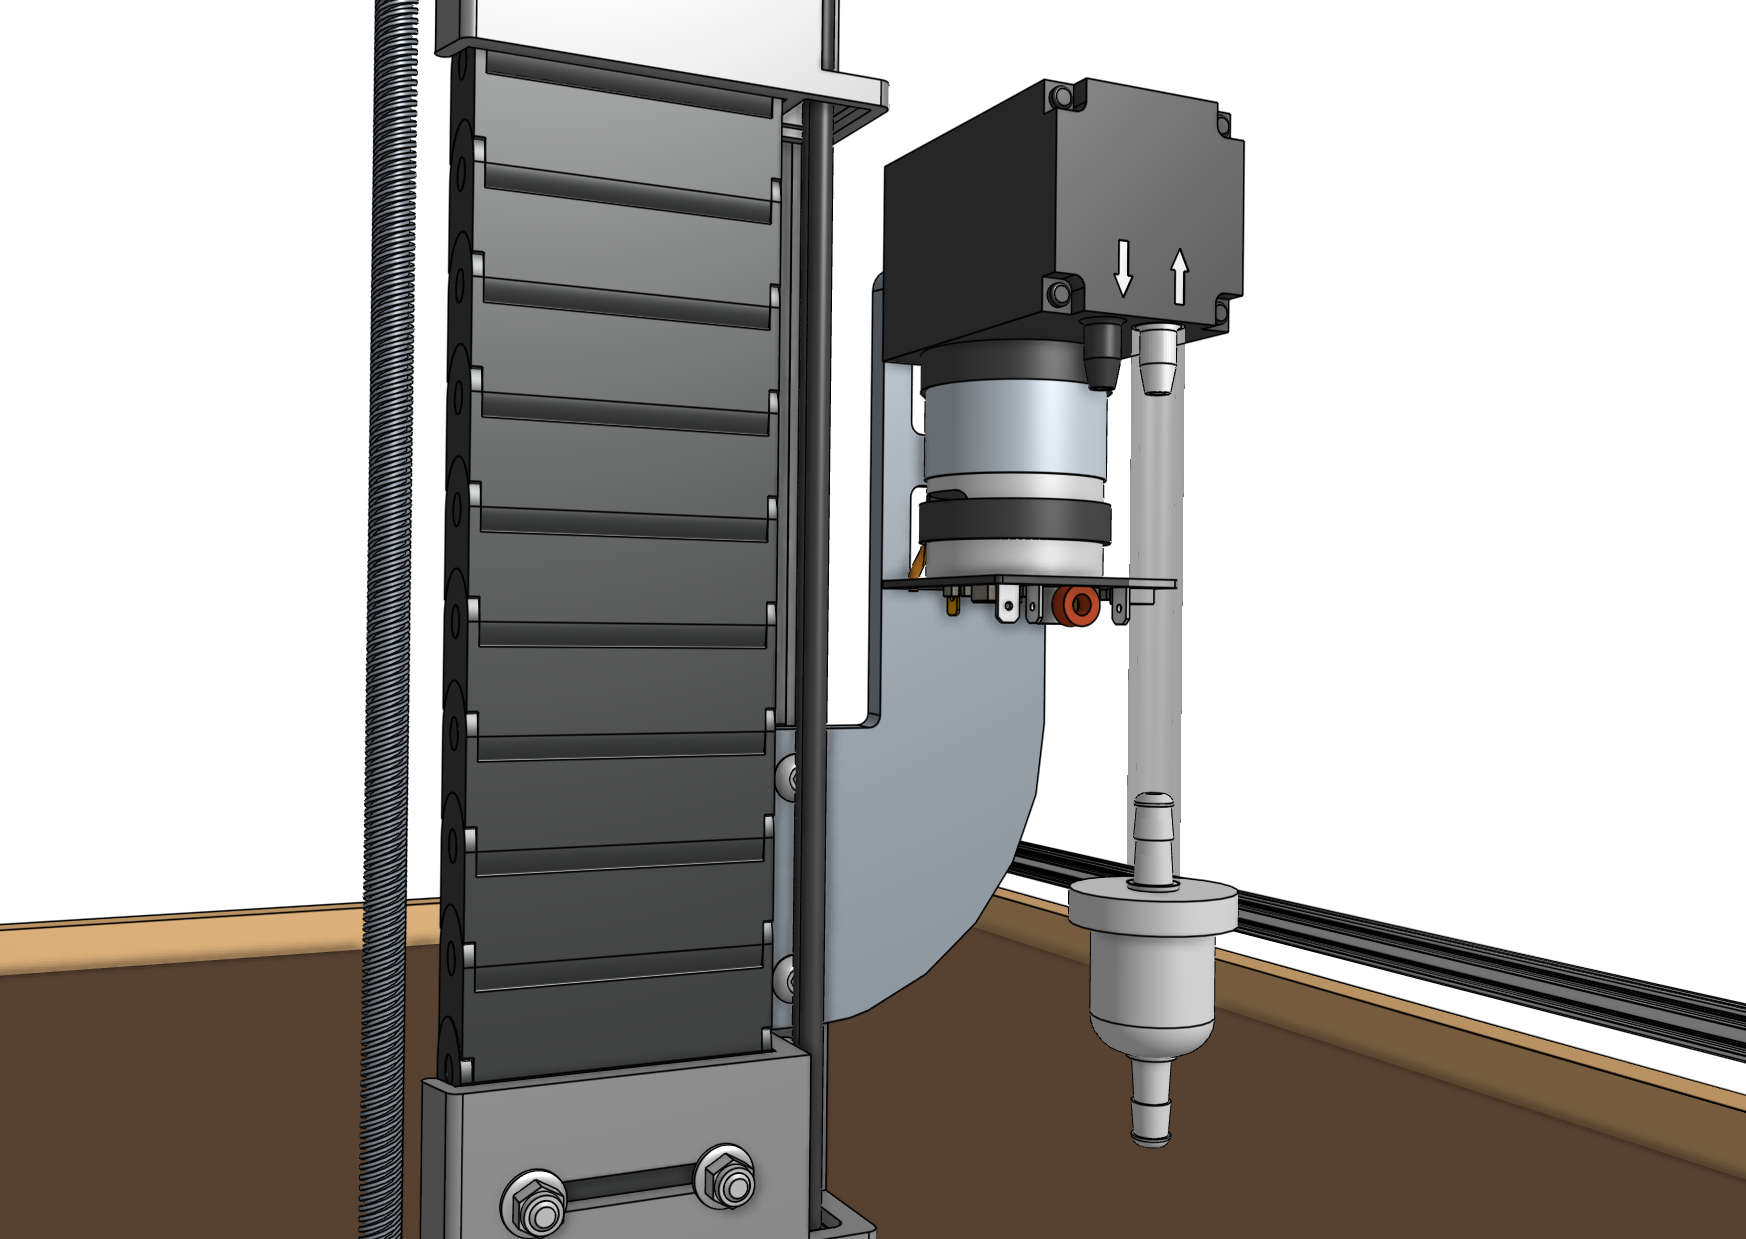
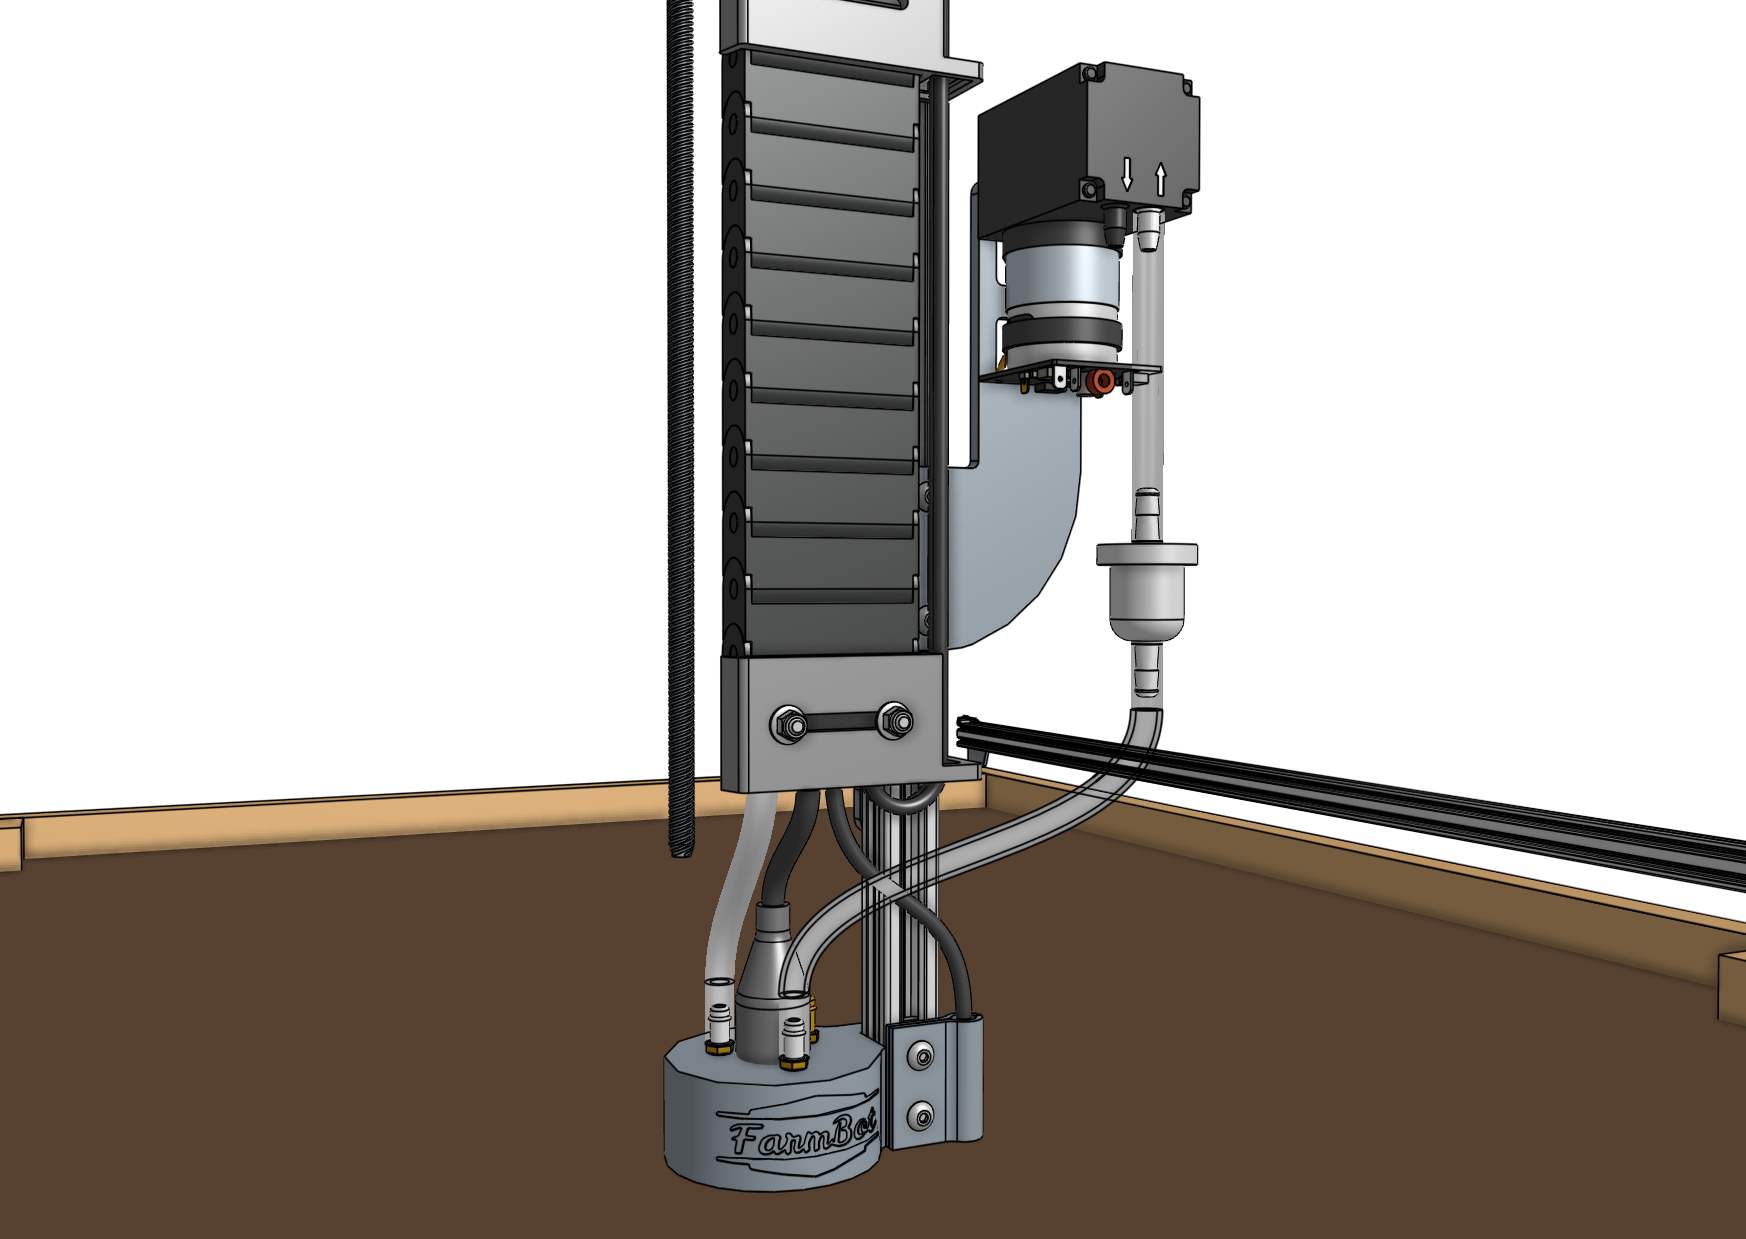
Step 2: Connect the vacuum tubes and filter
Slide one of the vacuum tubes onto the inlet barb of the vacuum pump.
The inlet will be marked with an arrow pointing into the pump.
The inlet may be on the left or the right side of the pump depending on when your kit was purchased.
Please refer to the arrows on your pump to ensure the tube is connected correctly.
Then slide the inline air filter onto the end of the first tube and connect the second vacuum tube between the air filter and the M5 barb on top of the UTM closest to the AgriBot logo.
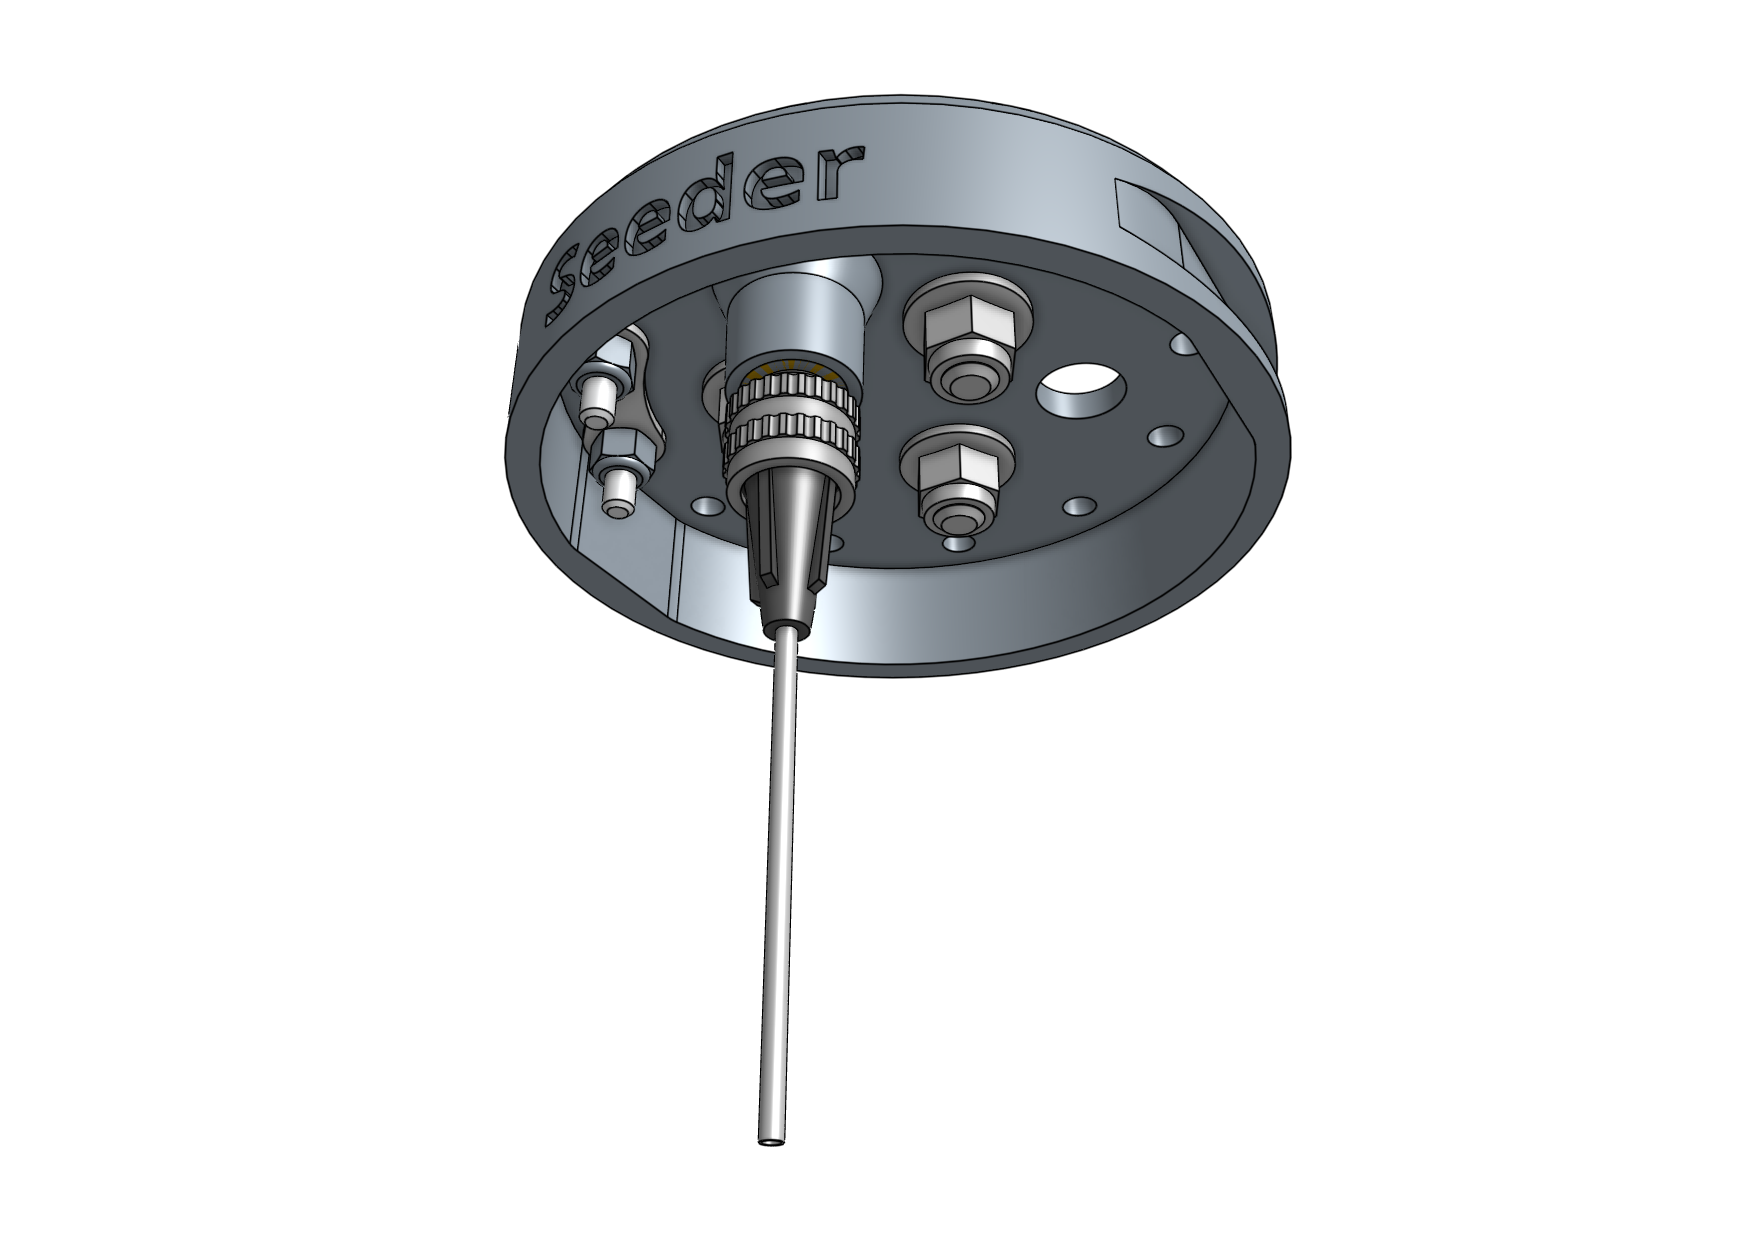
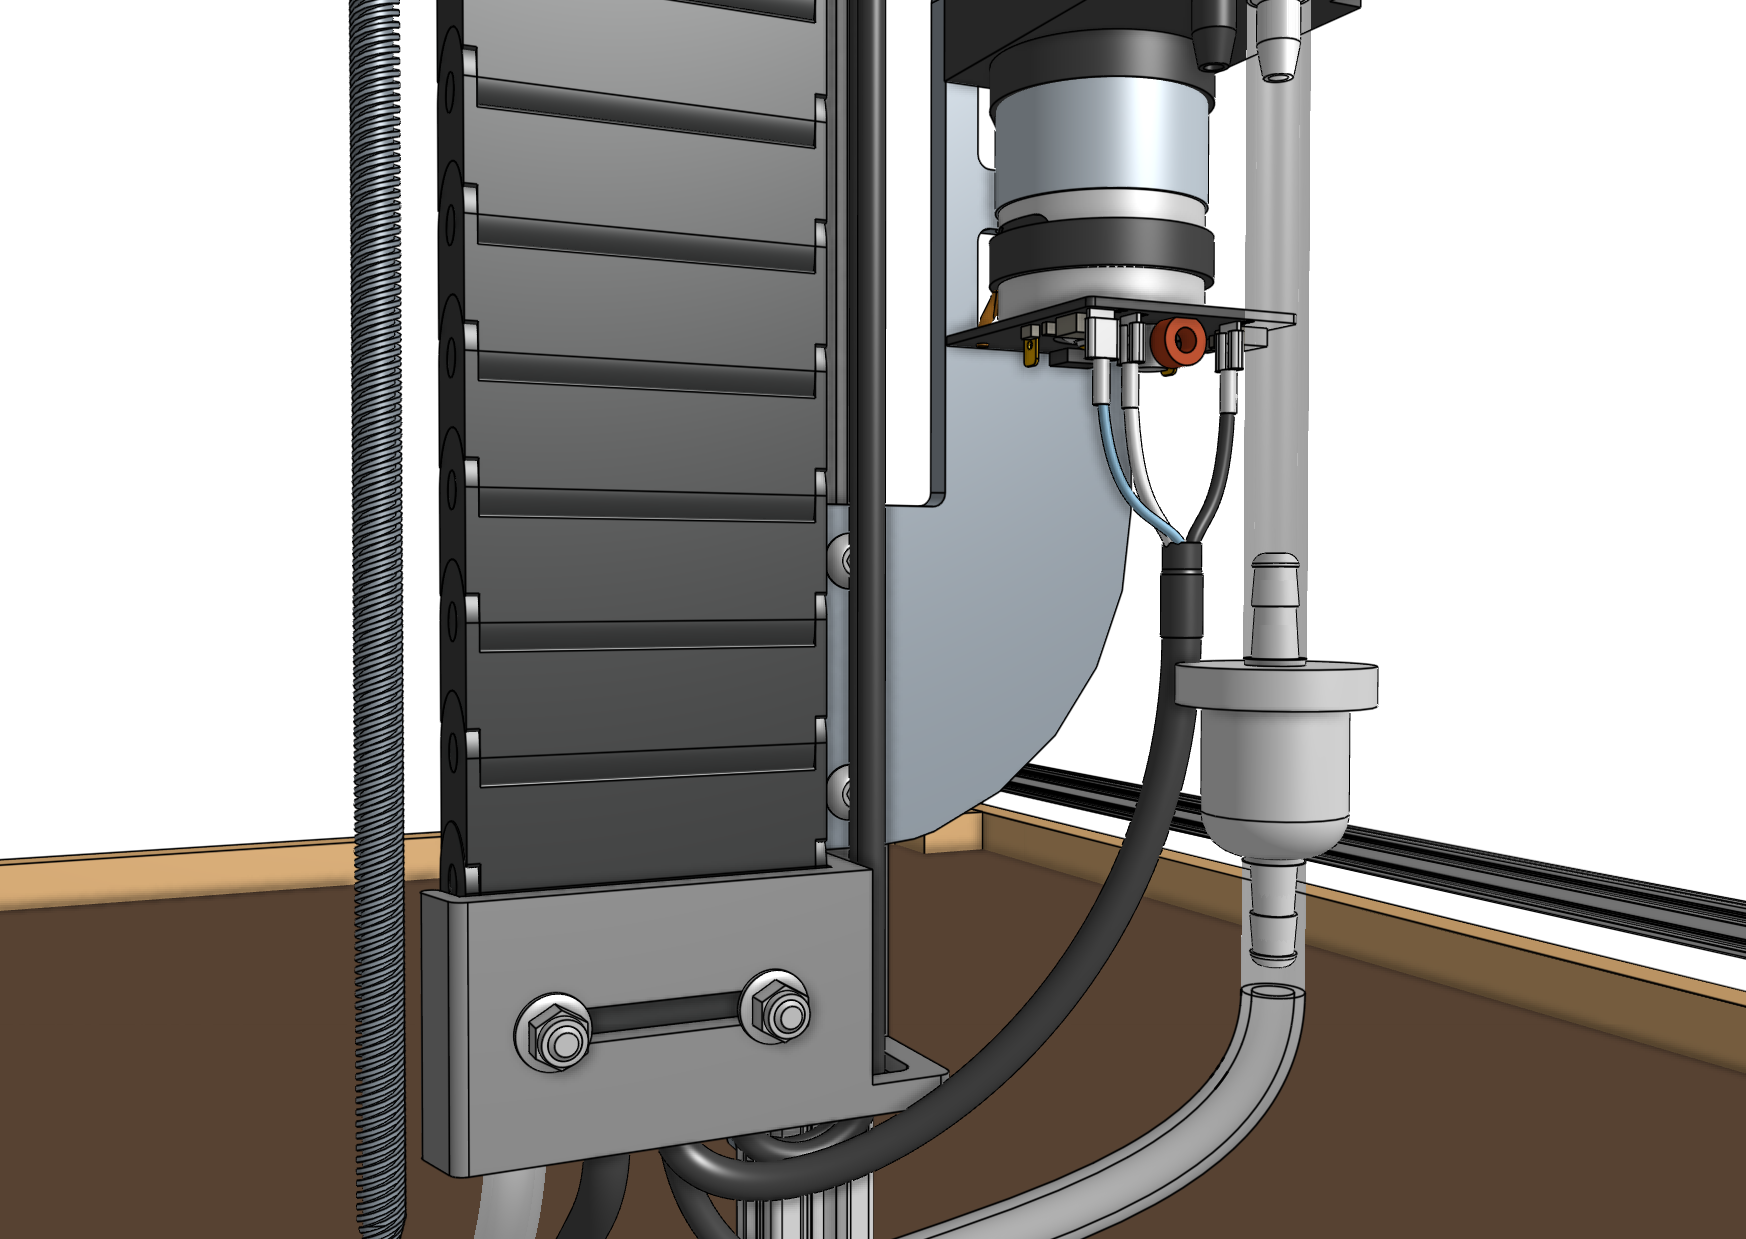
Step 3: Wire up the vacuum pump
Connect the vacuum pump cable to the vacuum pump terminals according to the images below.
Connect the clear/silver wire to the terminal on the left labelled PE.
Connect the white wire to the middle terminal labelled 24V.
Connect the black wire to the terminal on the right labelled GND.
If you cannot see the colors of the wires, carefully peel back the black heatshrink covering the whole cable so that you can correctly identify the individual wire colors.

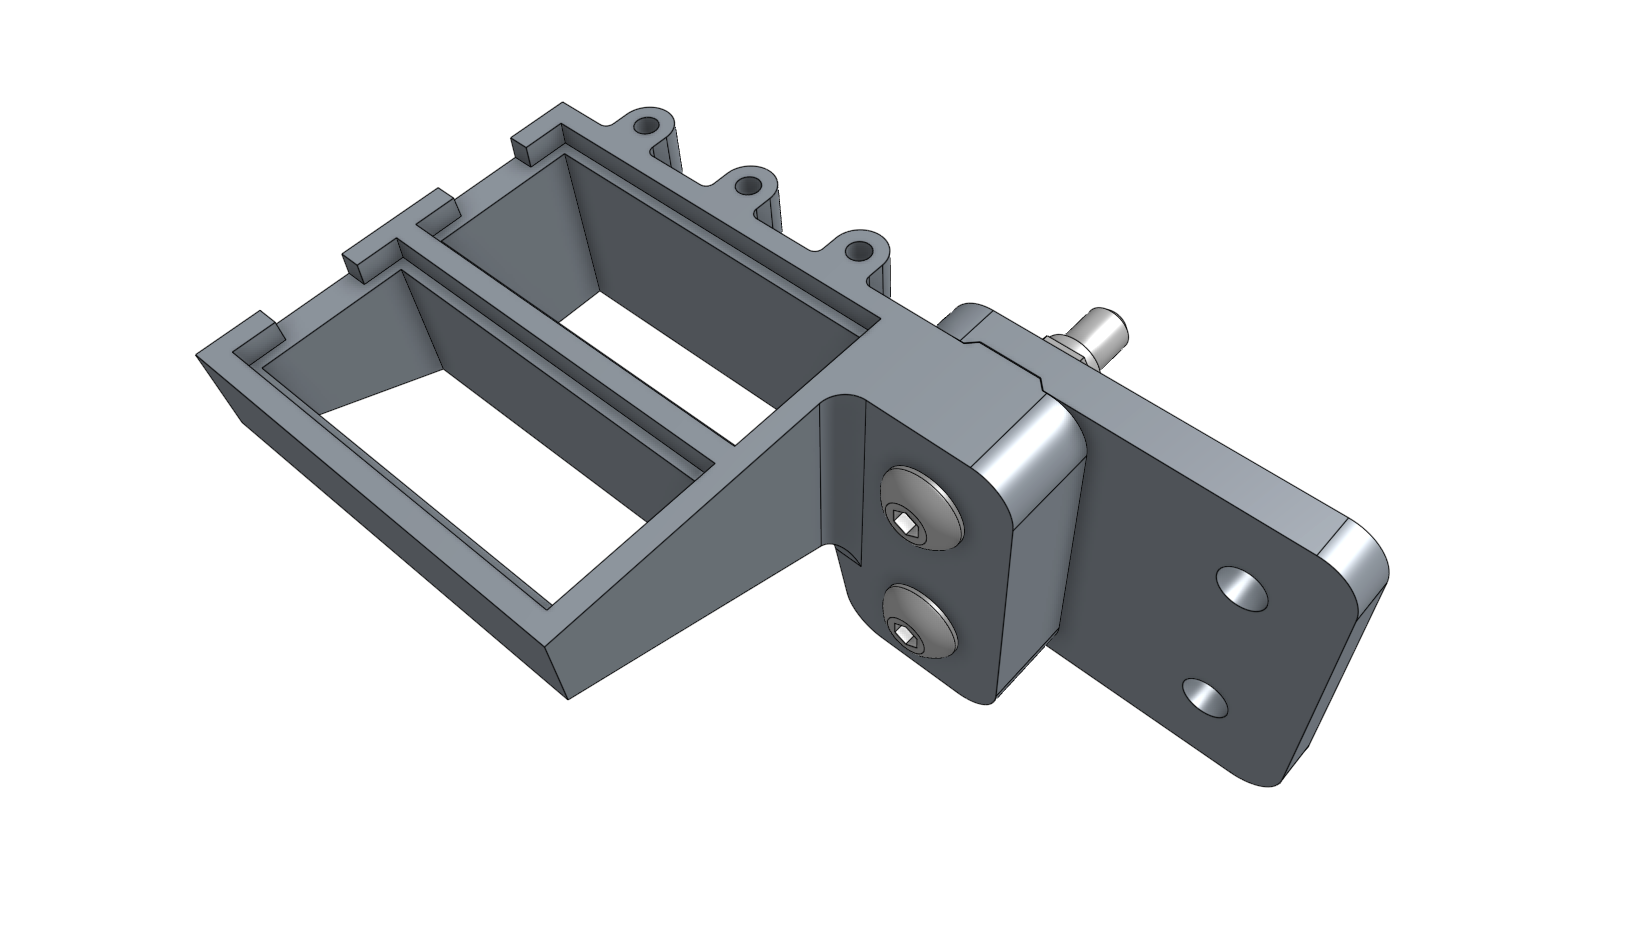
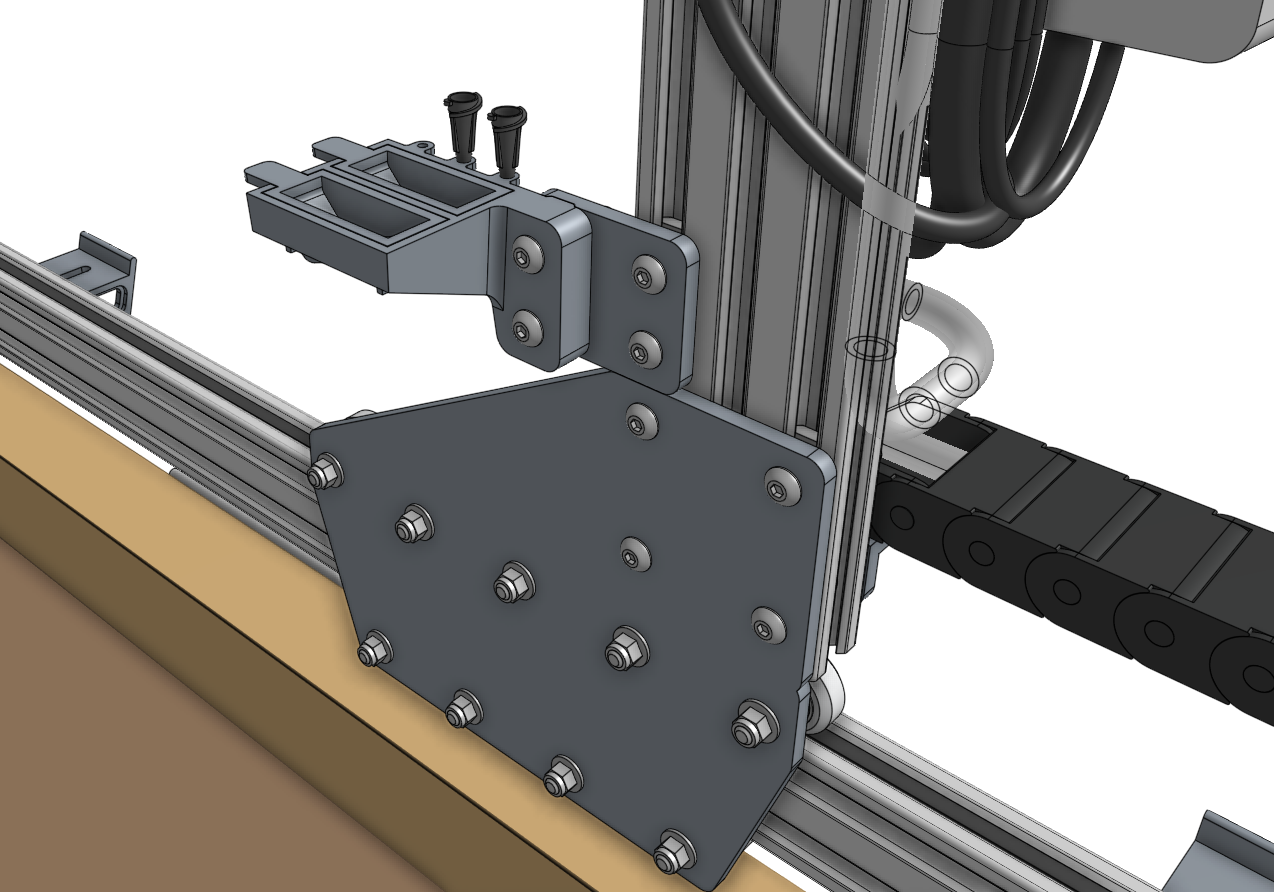
Step 4: Attach the seed trough holder
Attach the seed trough holder to the seed trough holder mount plate using two M5 x 30mm screws and M5 flange locknuts.
Then mount the assembly to the left gantry column using a 40mm nut bar and two M5 x 10mm screws.
Place the two seed troughs into the holder. Optionally, you may store up to three luer lock needles in the holder as well.
Step 5: Understanding the seed containers
We offer the following types of seed containers, each optimized for different purposes.
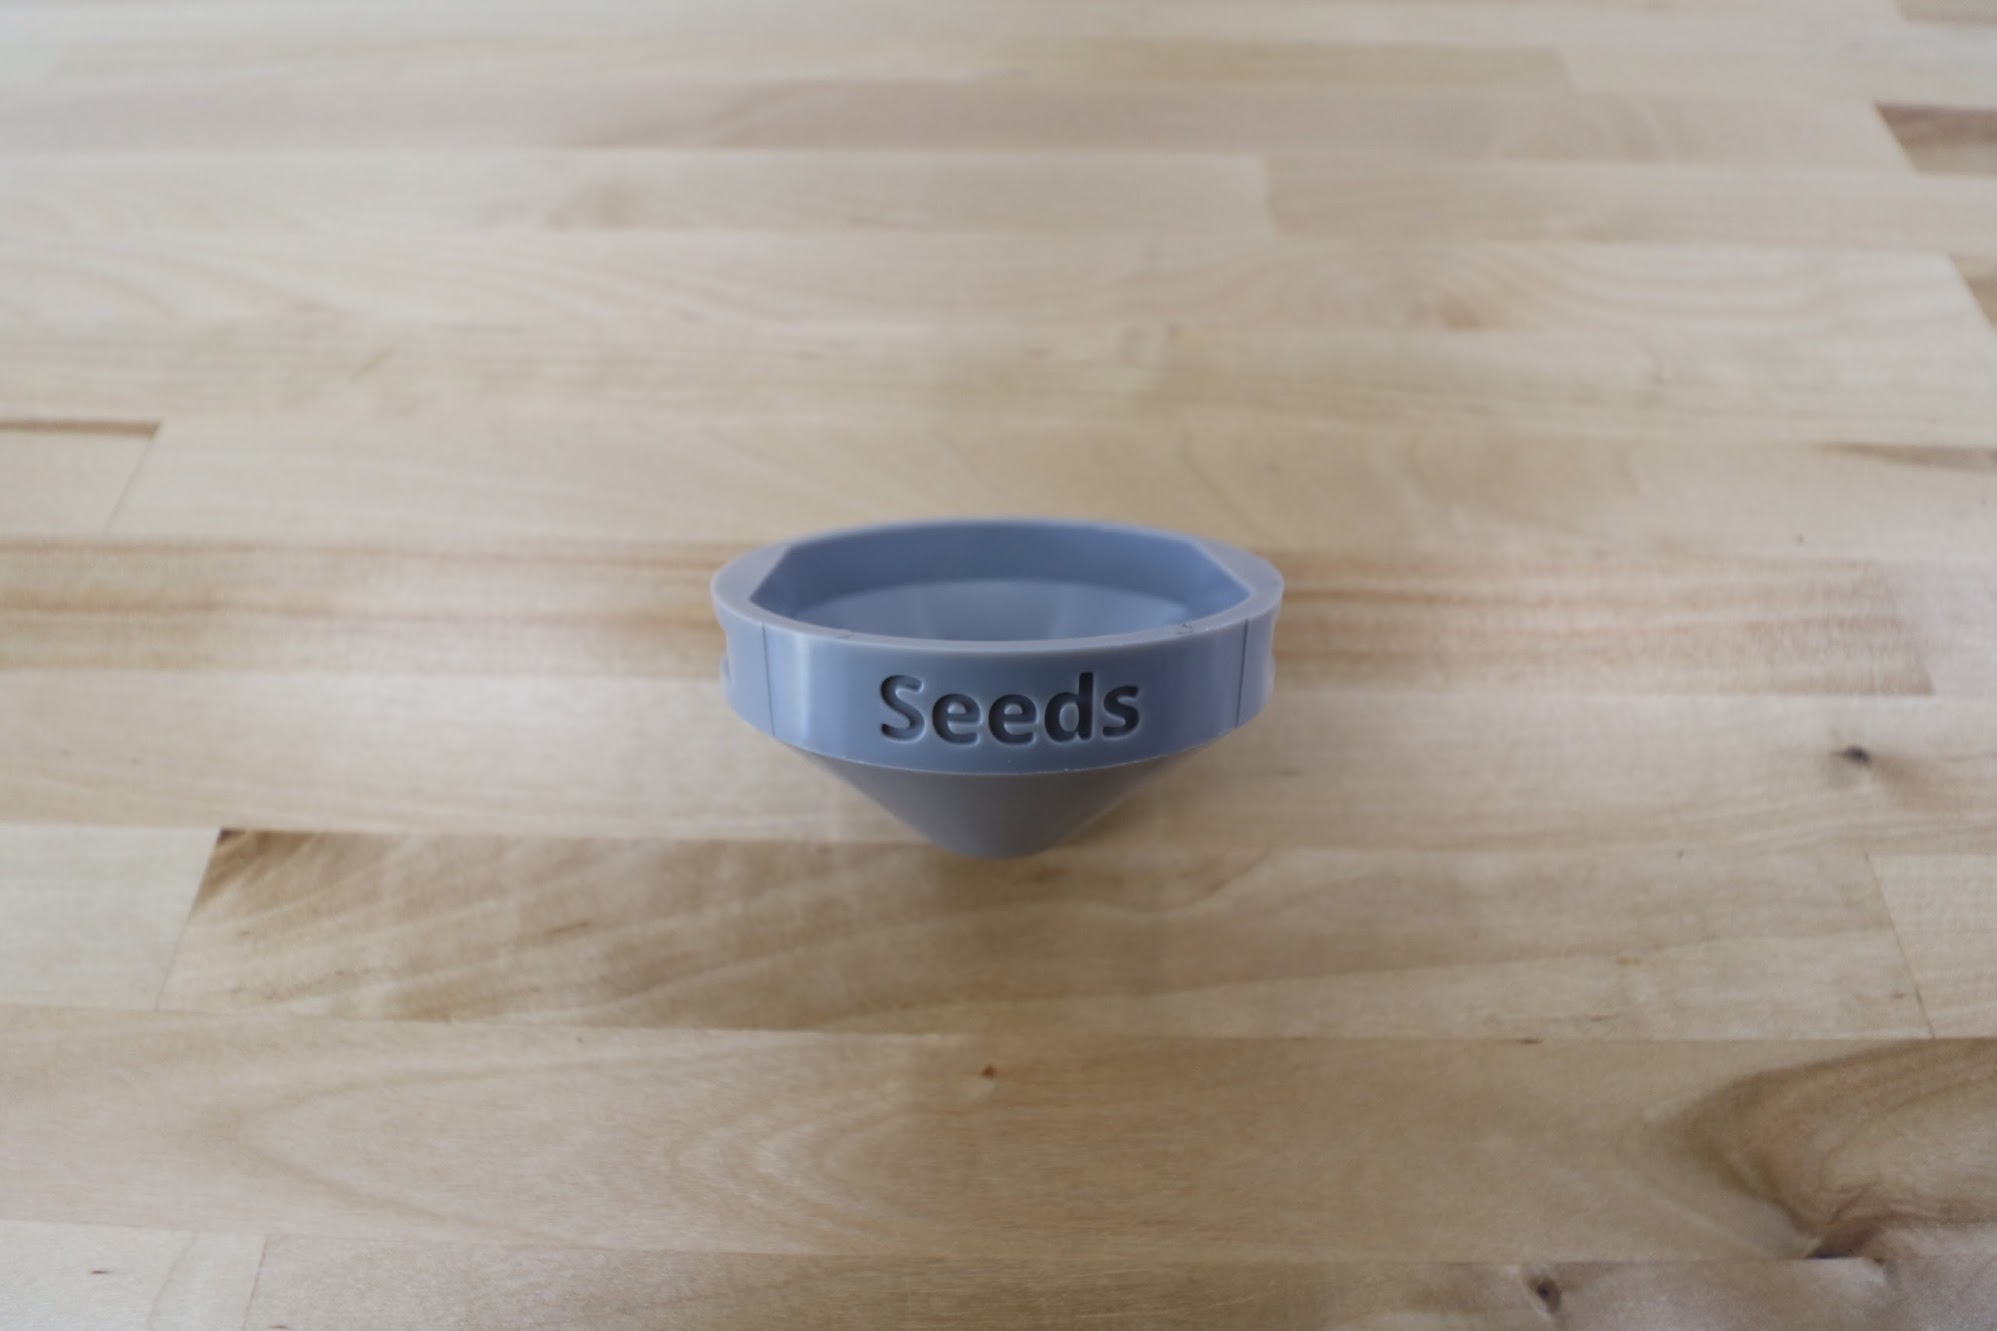
Seed bins
The seed bins are for holding large amounts of one type of seed.
This is best used when planting many plants of the same crop, for example: when growing microgreens.
To use a seed bin, simply slide it into the toolbay and fill it with seeds.
Then run a planting sequence from the web app with the corresponding seed bin sequence and location.
If desired, you can mix a variety of seed types into one seed bin and have AgriBot plant whatever it happens to grab.
Keep in mind though that AgriBot will have no way of knowing which seeds it grabs, so only use this technique when you will be taking care of all those plants identically.
An example for this again might be when growing microgreens - you can grow three different types in the same area at the same time, all in the same way, without having to do three planting sequences or otherwise treat them differently.
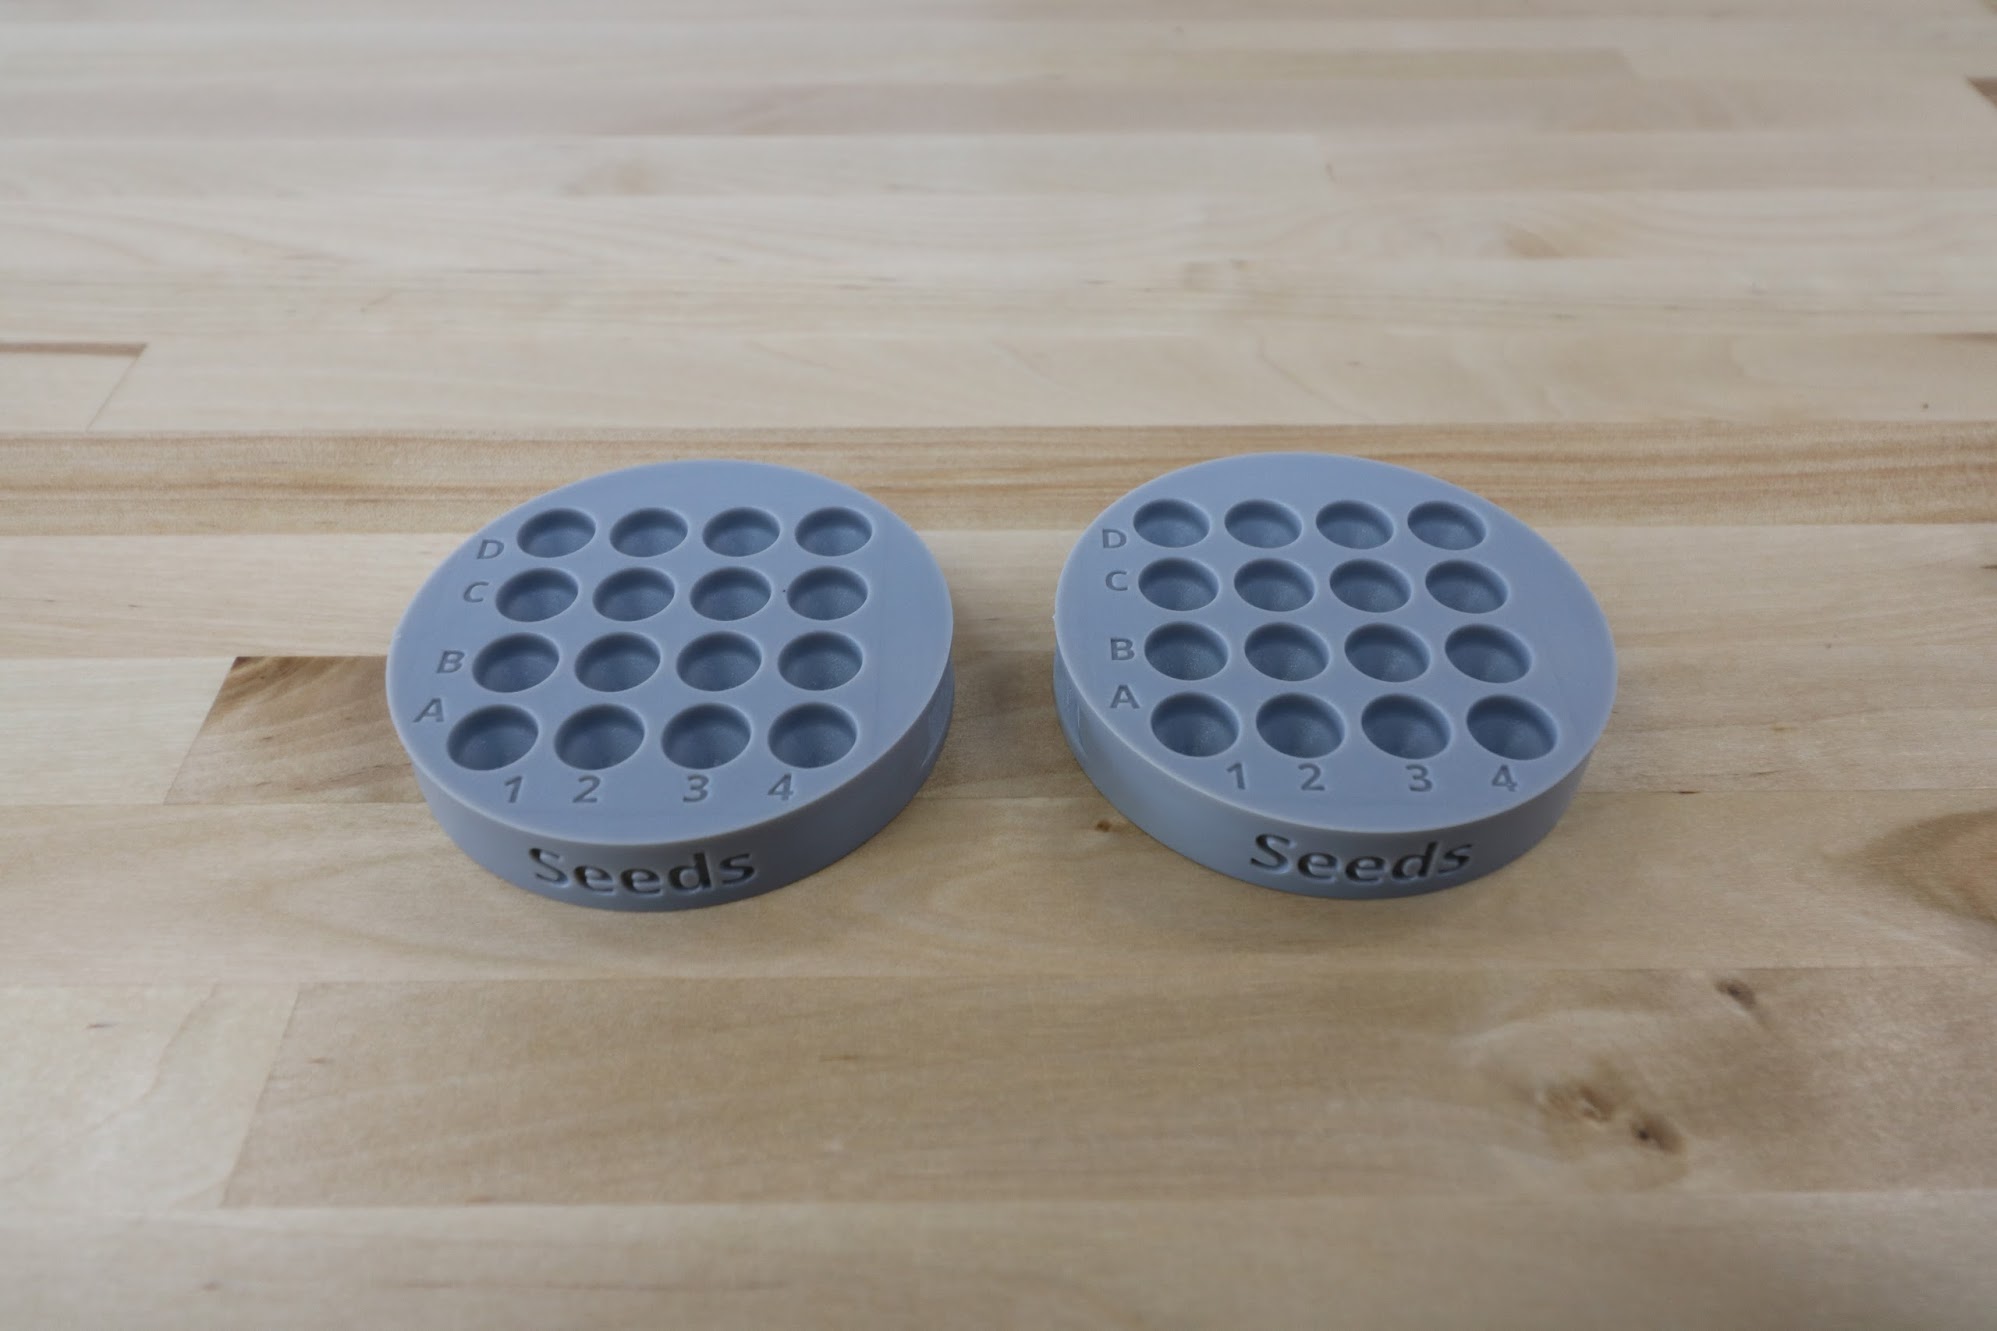
Seed trays
The seed trays have 16 small area for holding seeds.
They are best used when planting many different crops, and when the number of seeds per hole needs to be strictly controlled.
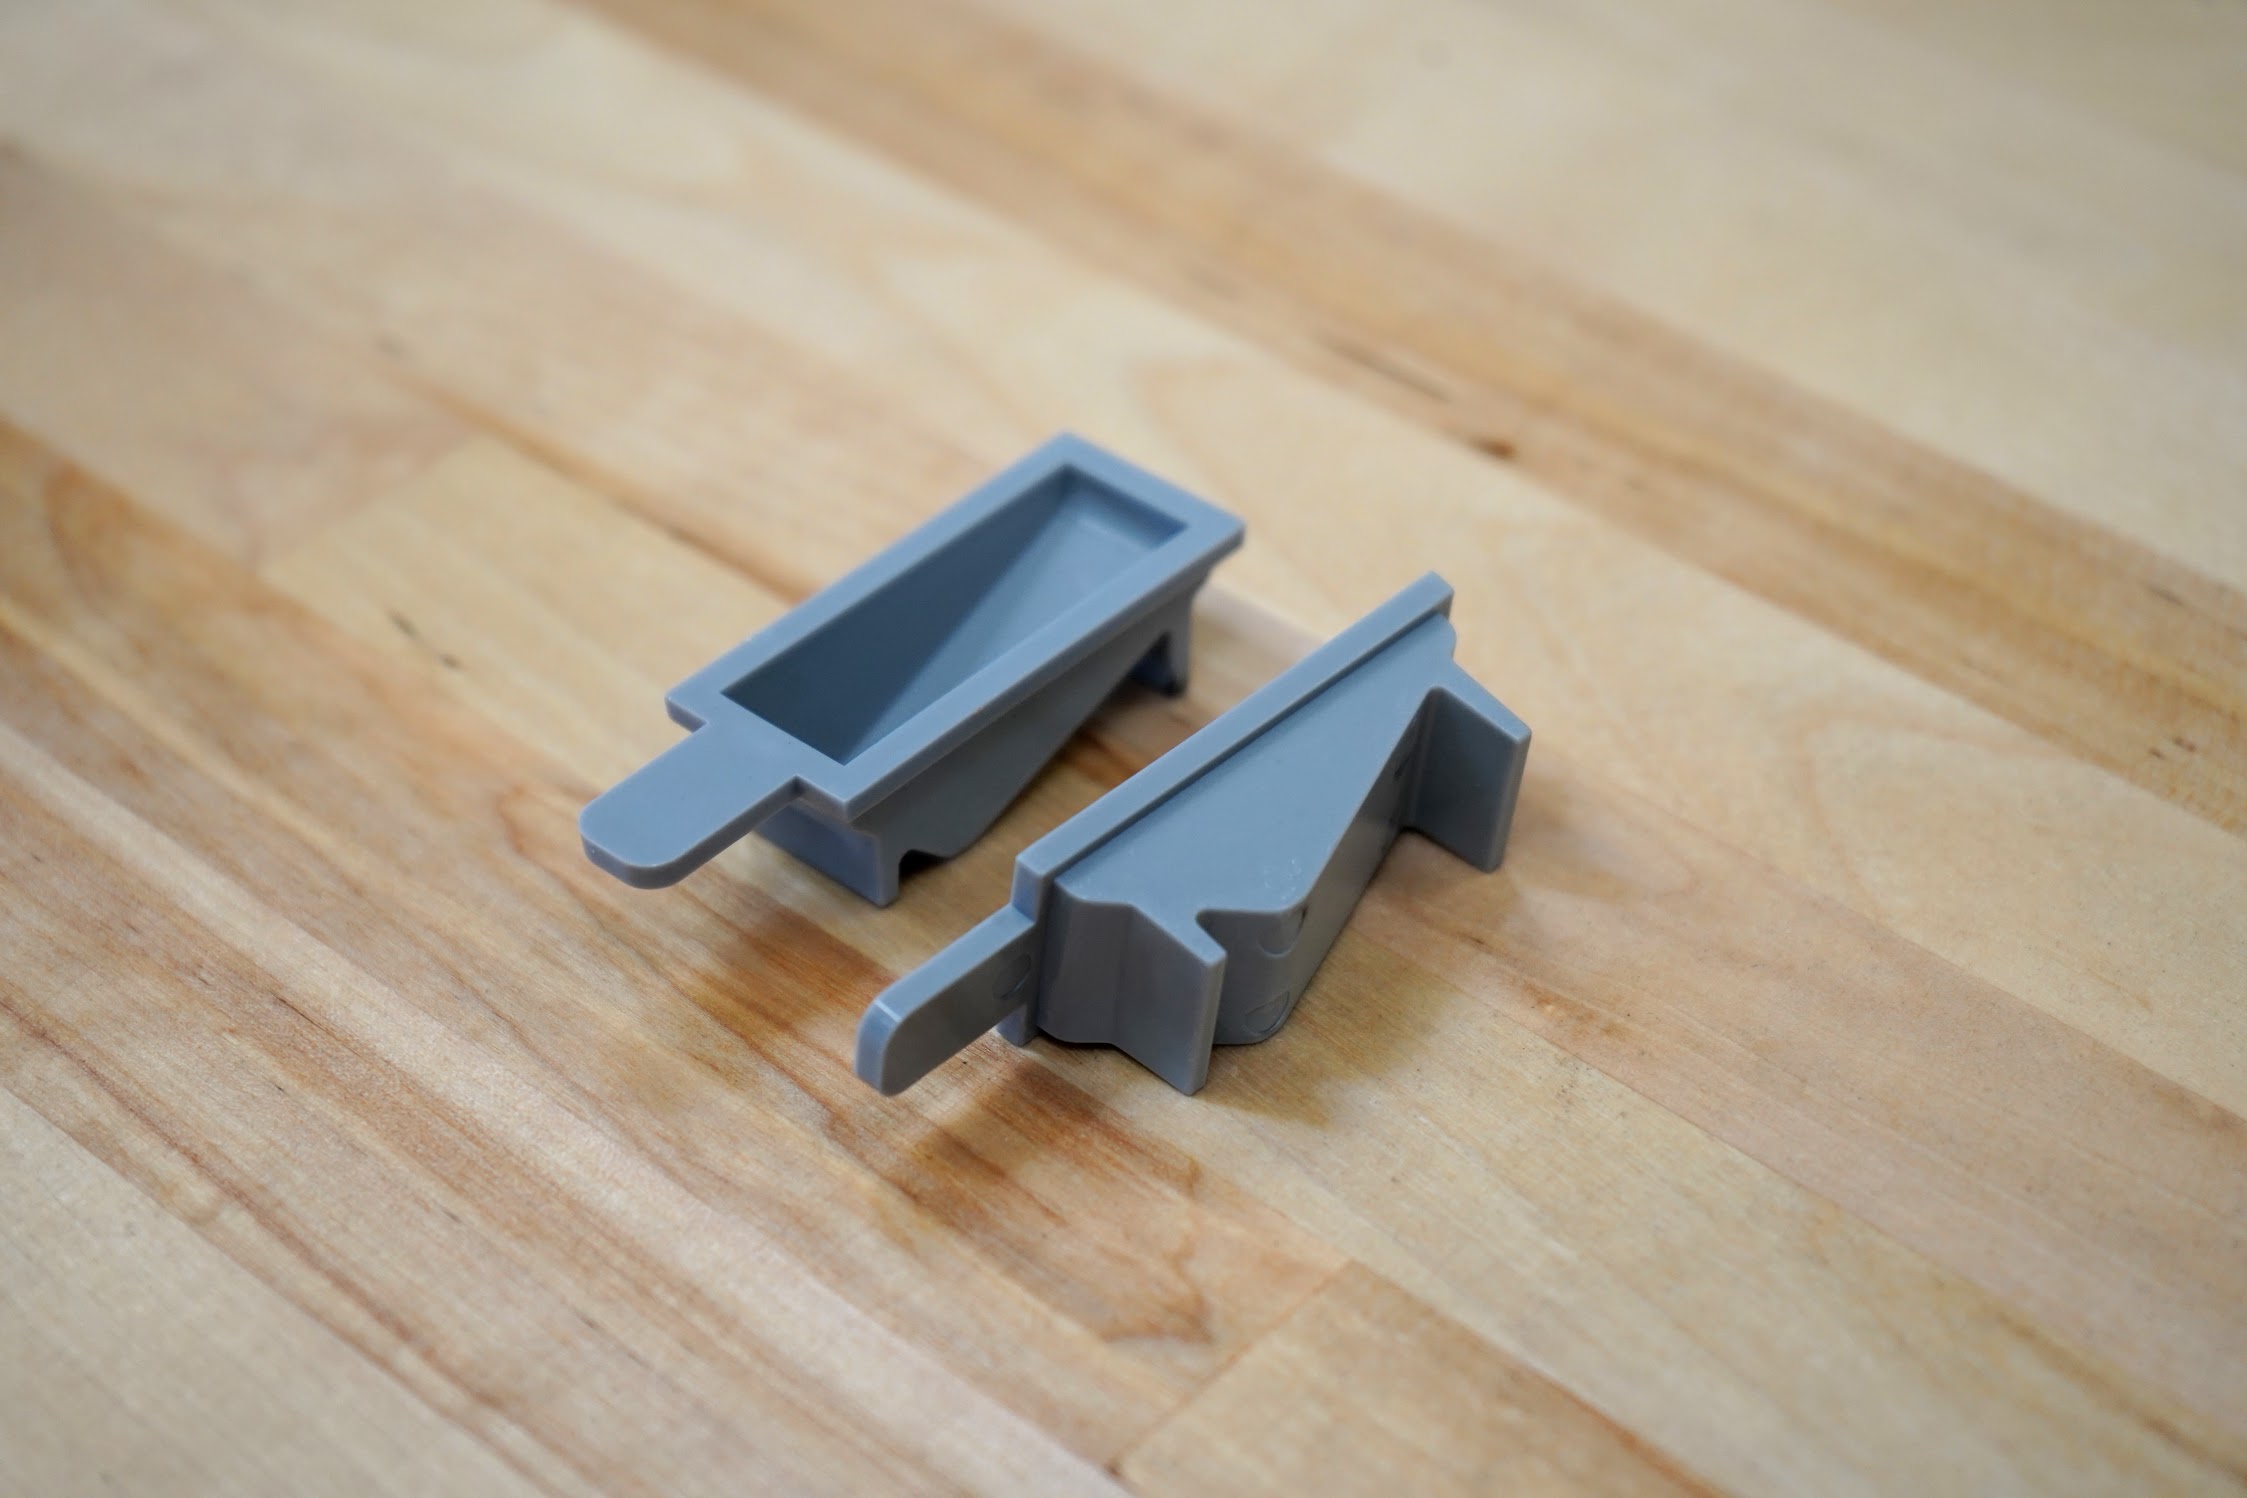
Seed troughs
The seed troughs are small seed containers that are stored in the seed trough holder, which is mounted on the gantry.
This allows AgriBot to bring seeds with it along the x-axis, reducing the time to sow an entire bed.
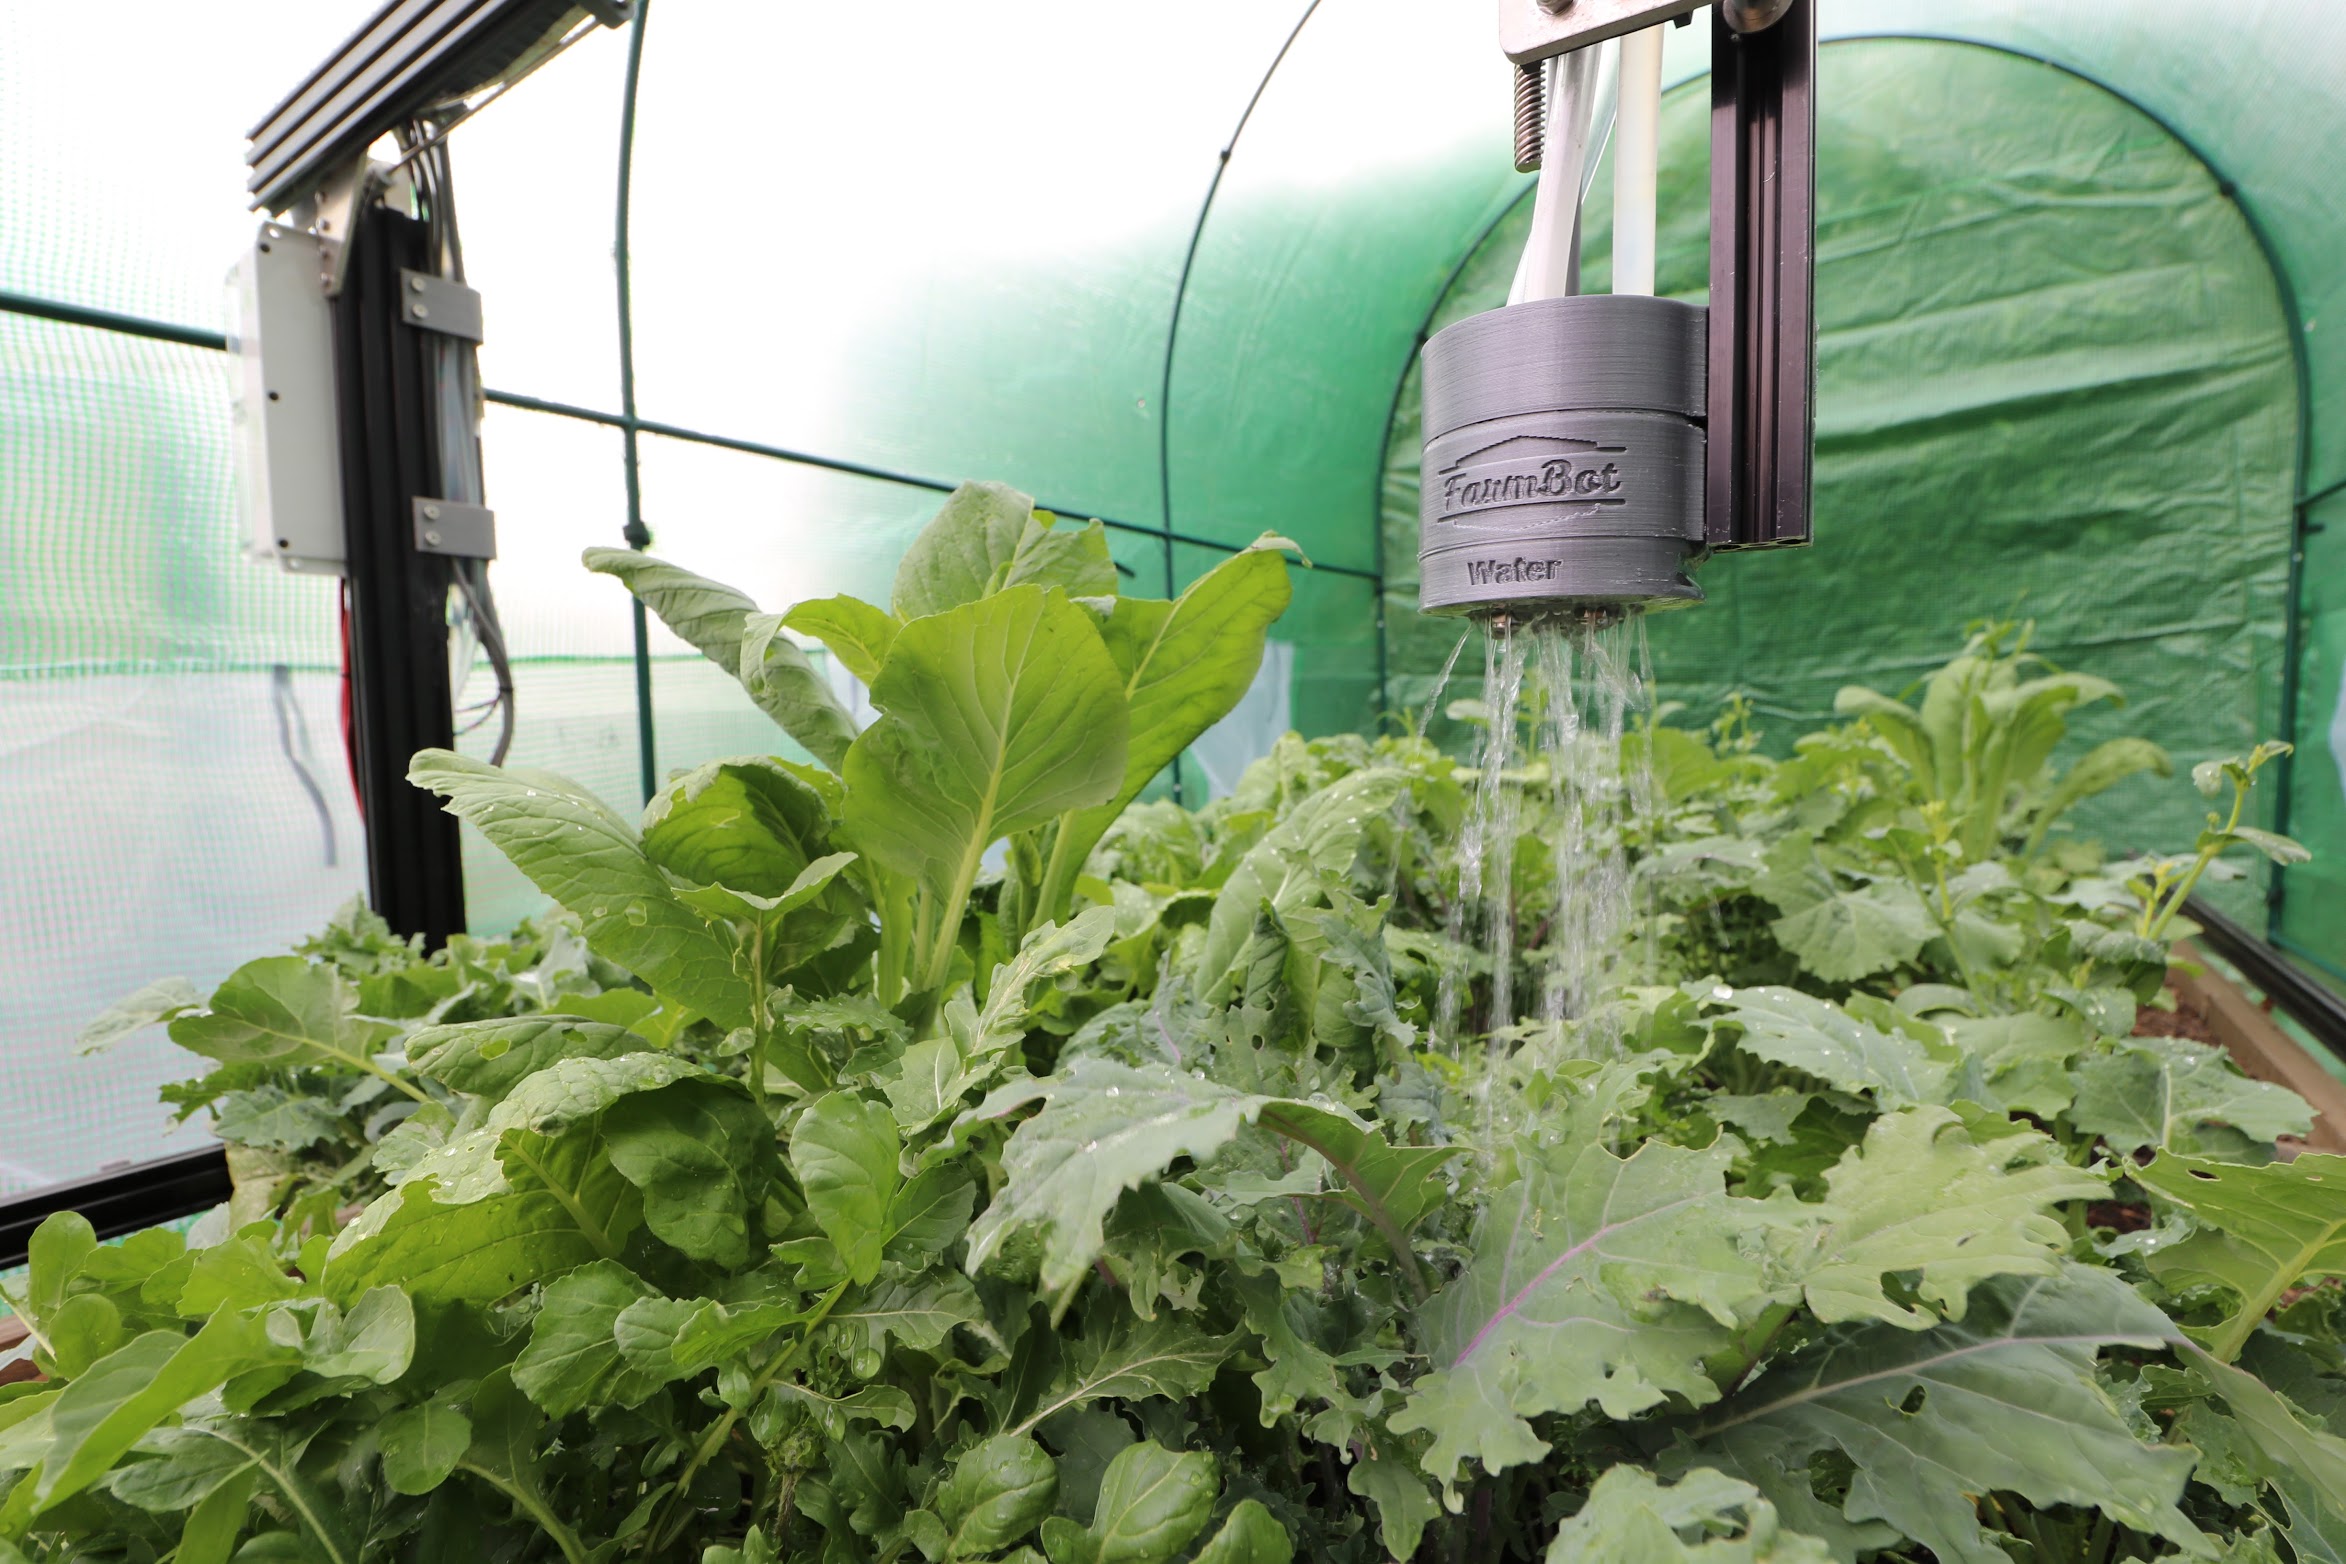
Watering Nozzle
The watering nozzle accepts a concentrated stream of water coming from the UTM and turns it into a gentle shower for your plants.
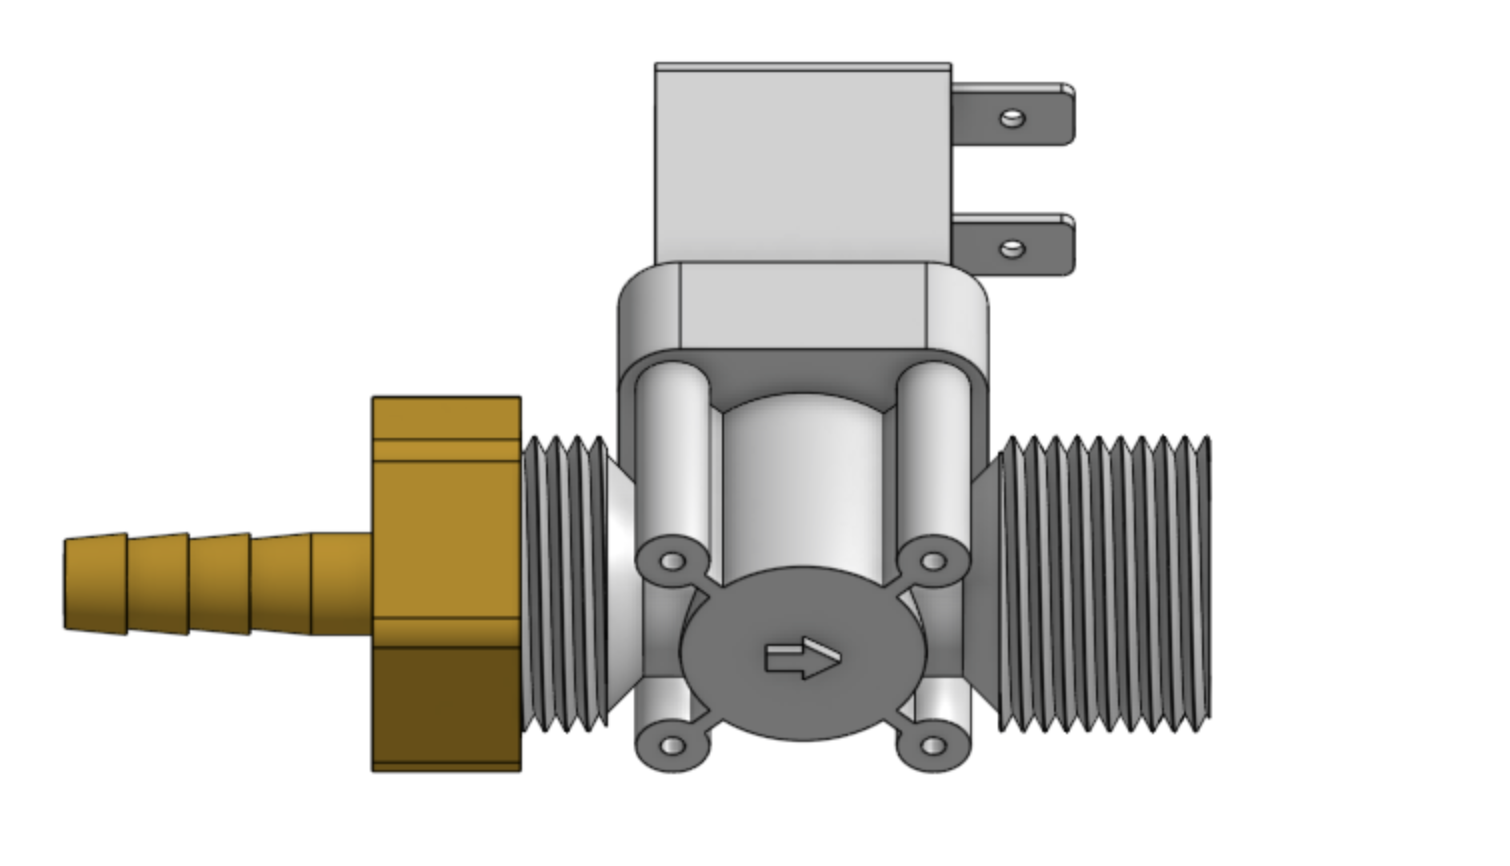
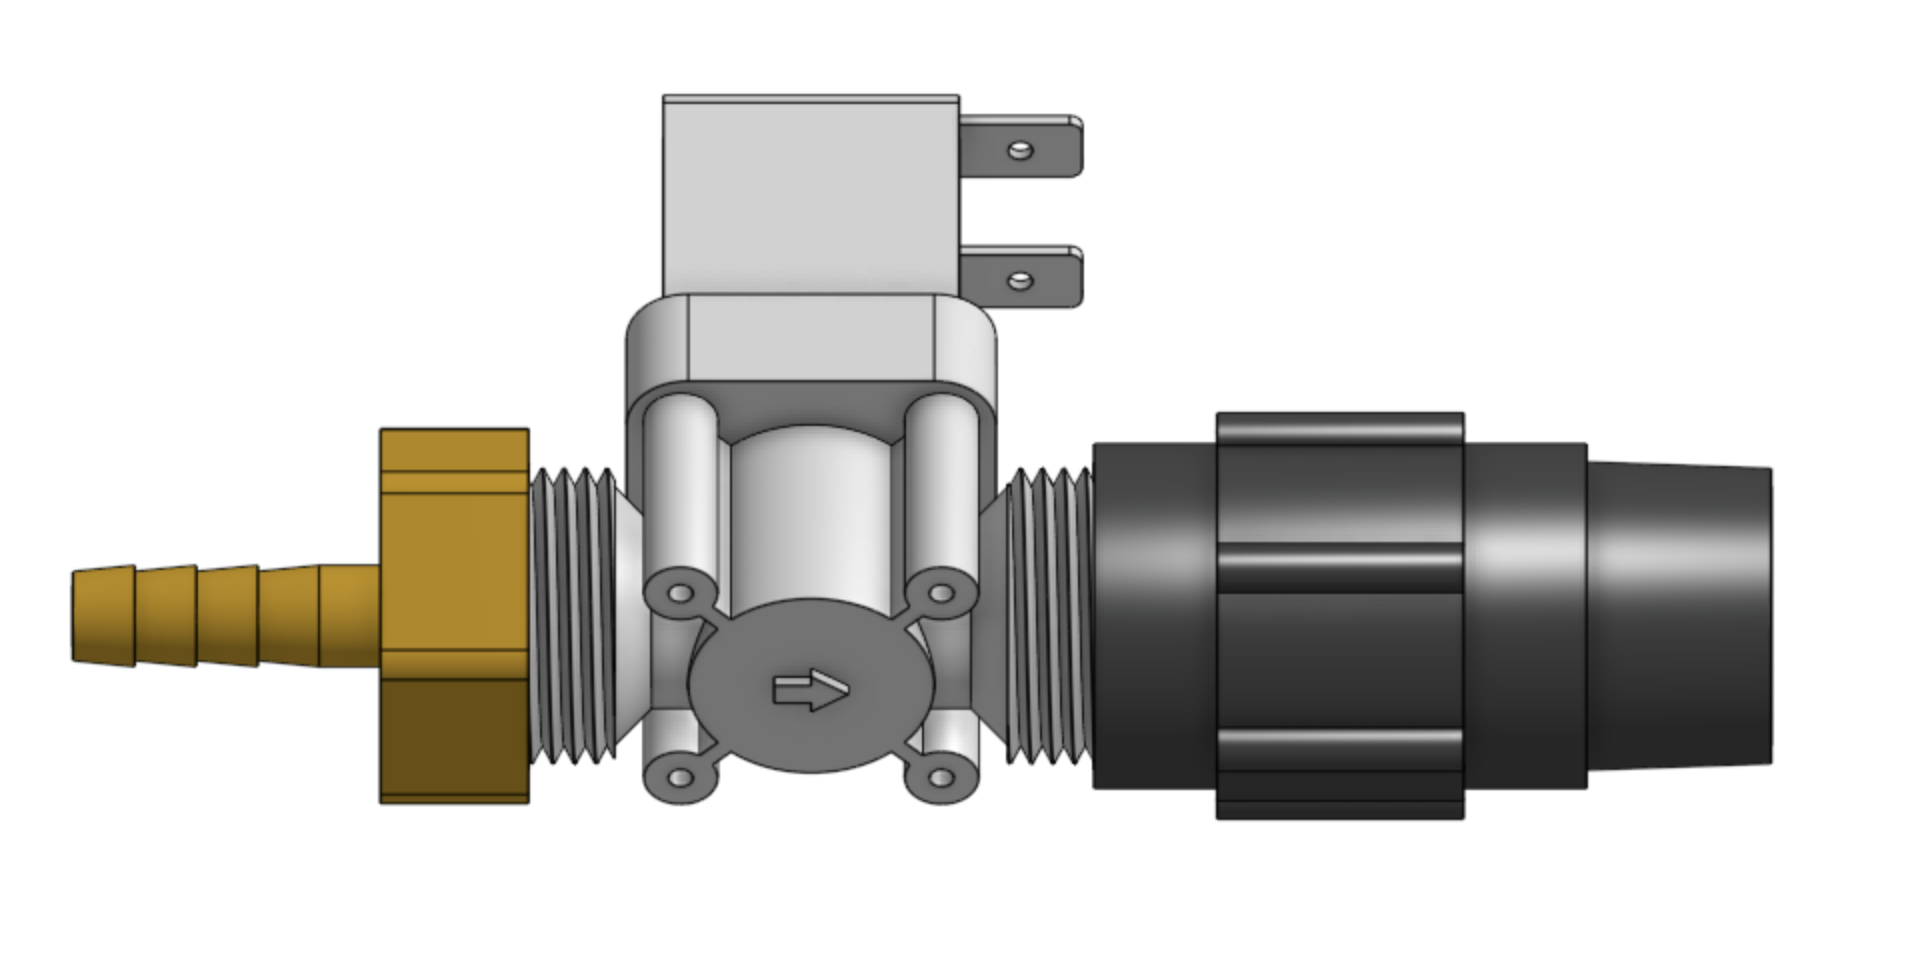
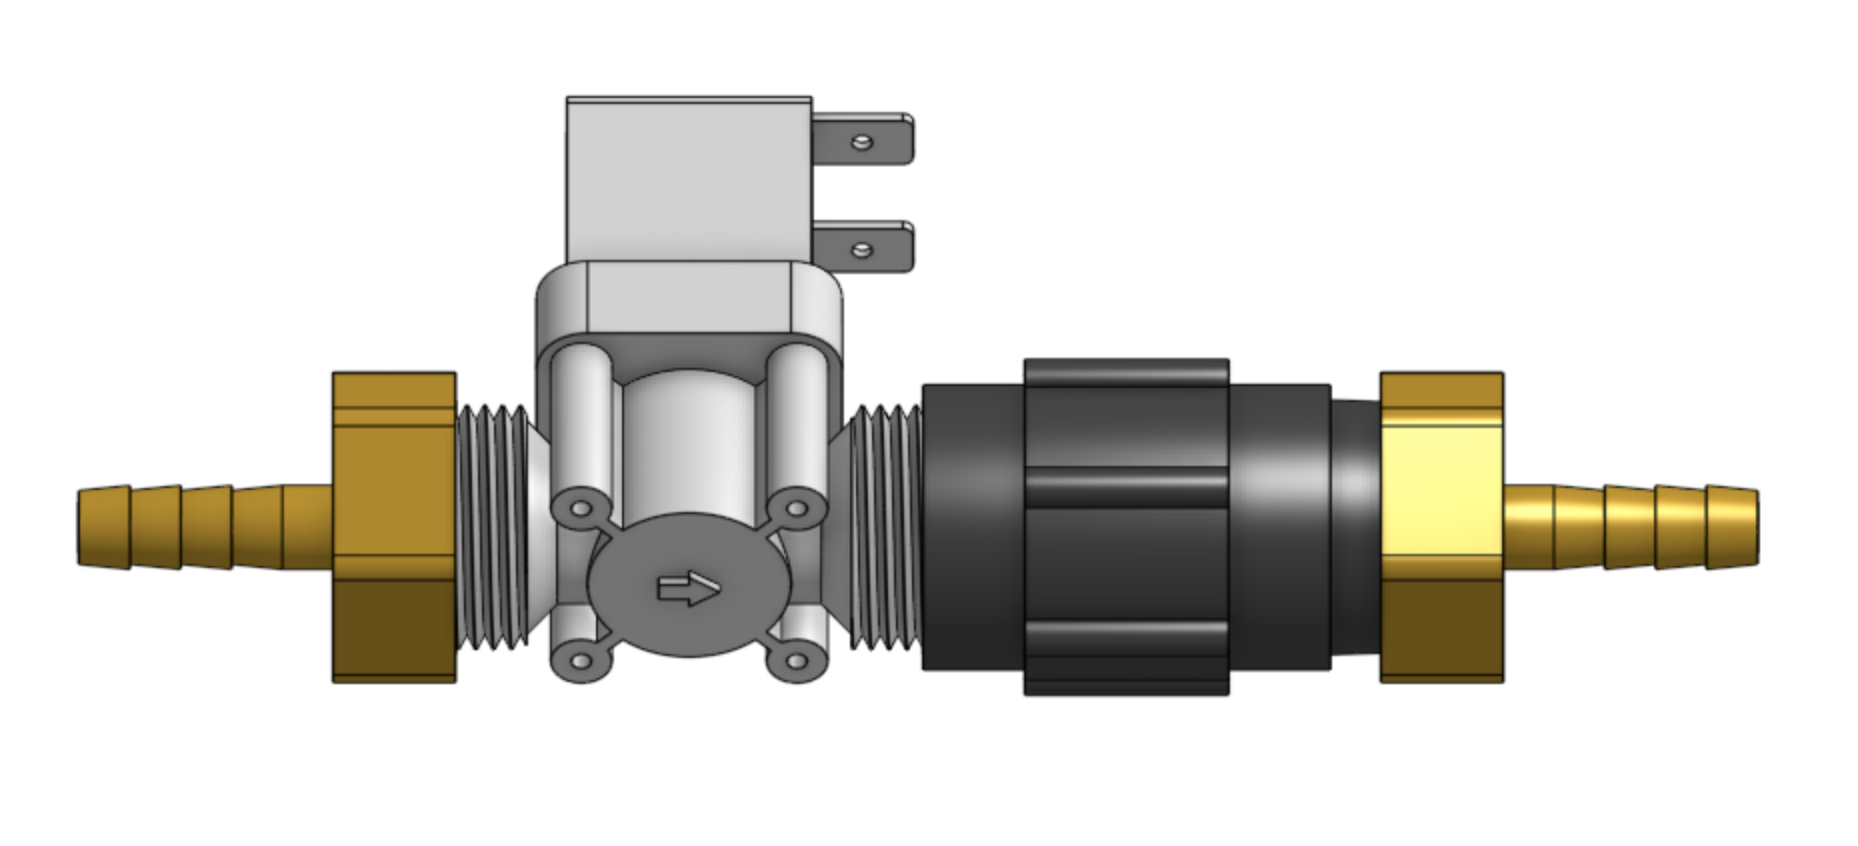
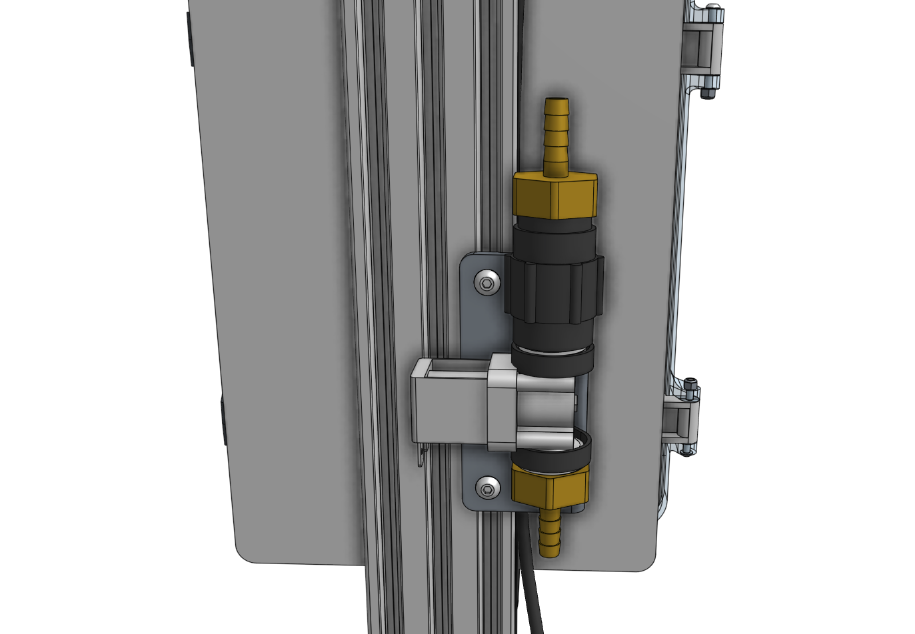
Step 1: Assemble the solenoid valve and pressure regulator
Insert rubber gaskets into the female ends of the pressure regulator, the garden hose to barb adapter, and both NPT to barb adapters.
Then screw one of the NPT to barb adapters onto the solenoid valve inlet, the pressure regulator onto the solenoid valve outlet, and the second NPT to barb adapter onto the pressure regulator.
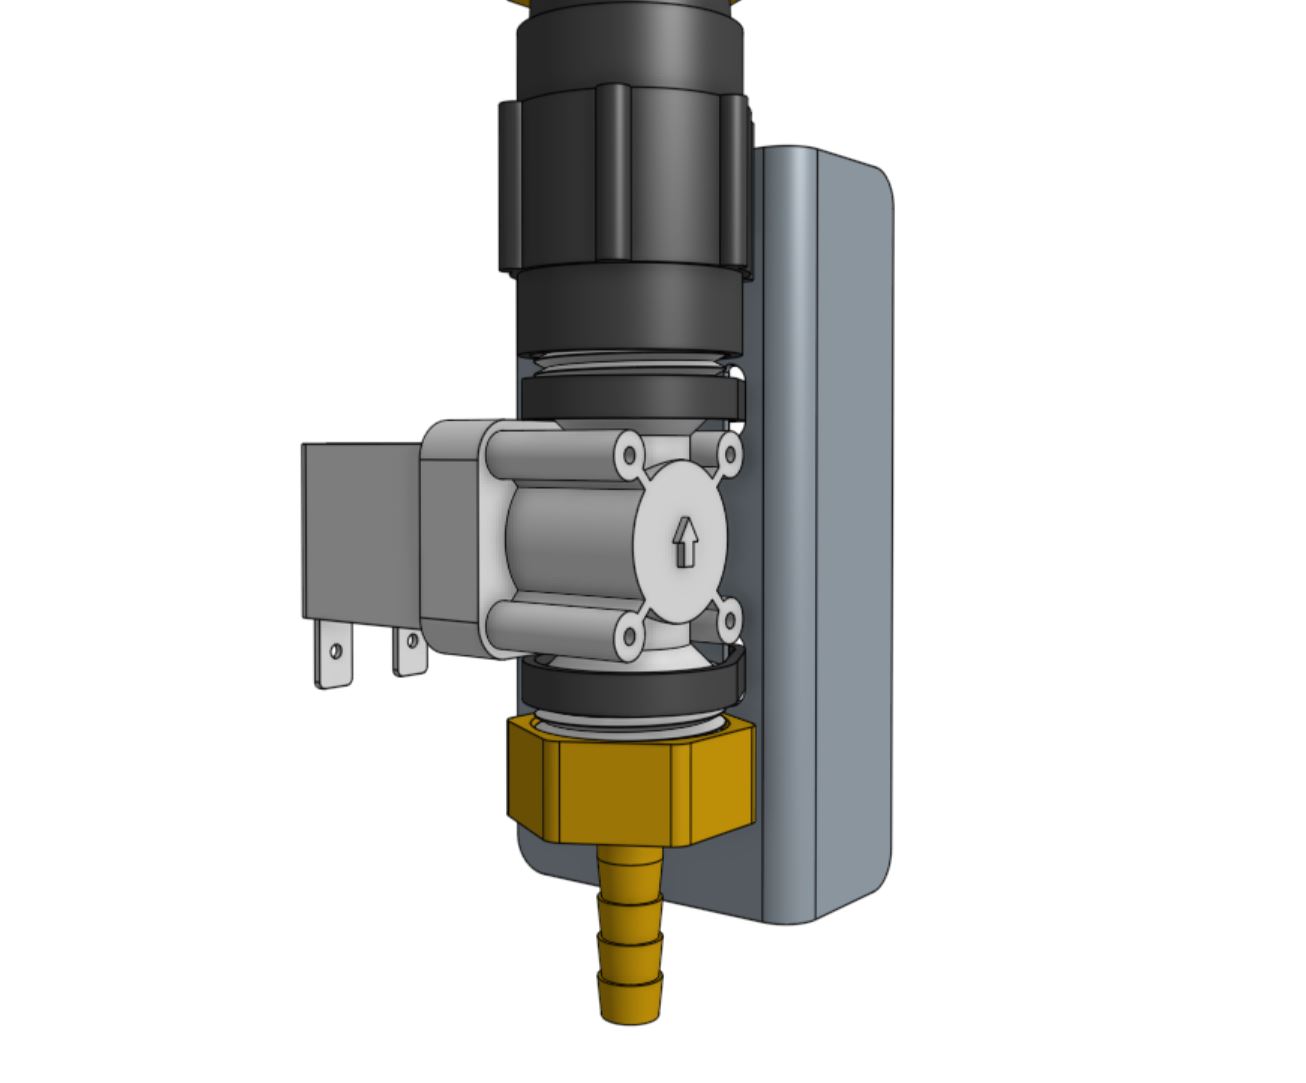
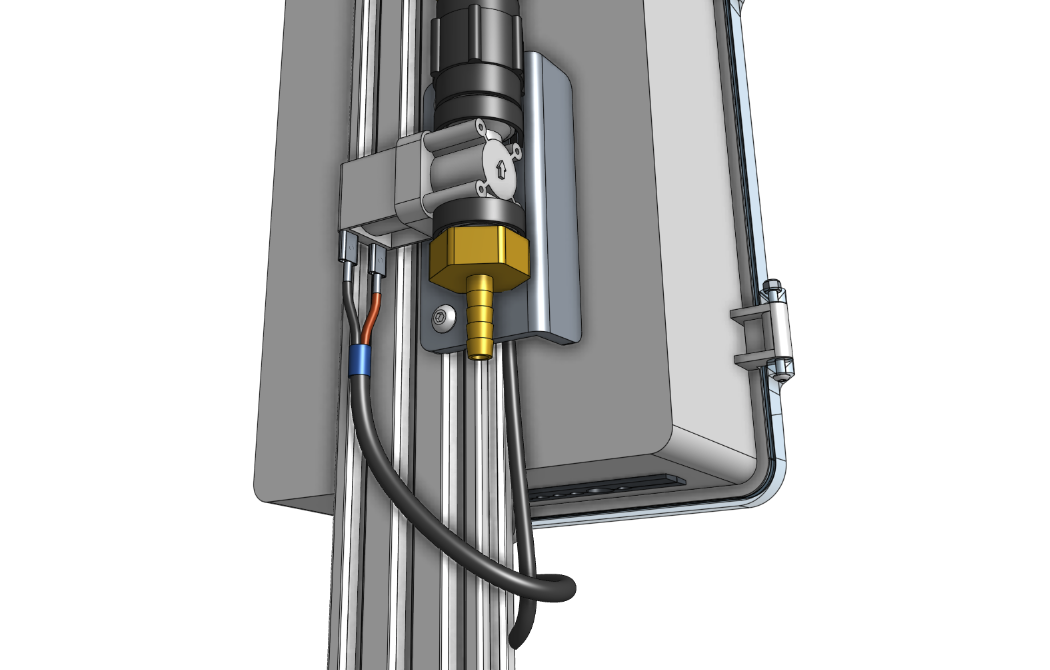
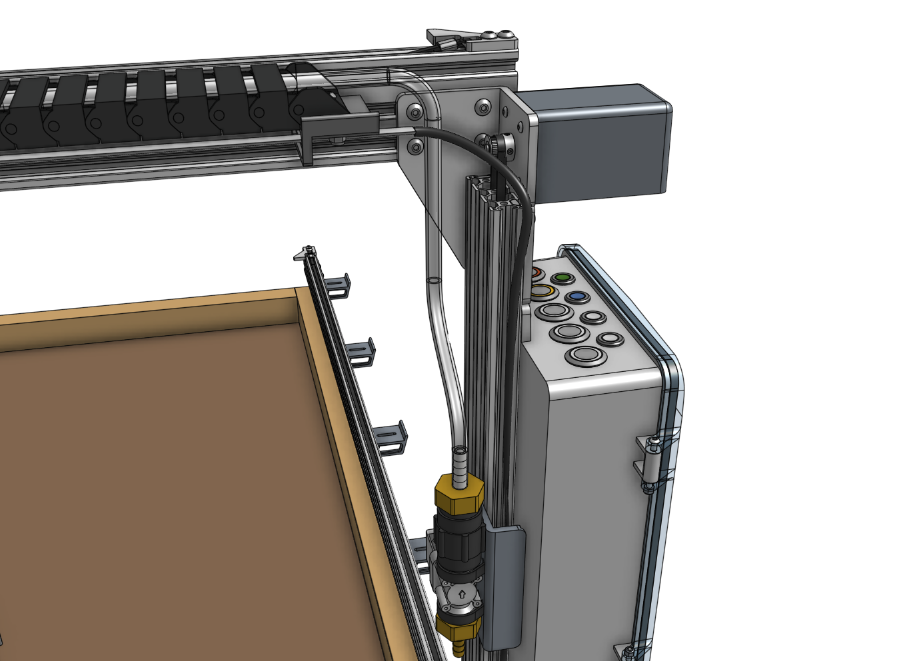
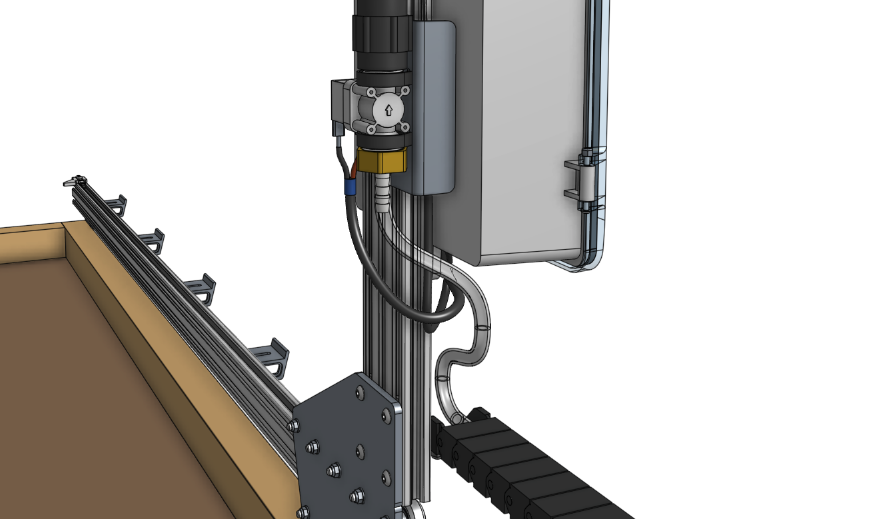
Step 2: Attach the solenoid valve
Attach the solenoid valve to the solenoid valve mount using two 200mm zip ties.
Then attach the solenoid valve mount to the left gantry column using two M5 x 10mm screws and tee nuts.
Cables should be routed between the mount and the box.
Step 3: Wire up the solenoid valve
Connect the solenoid valve cable to the solenoid valve terminals.
Note: in a few steps from now, you will connect the other end of the cable to the Agriduino.
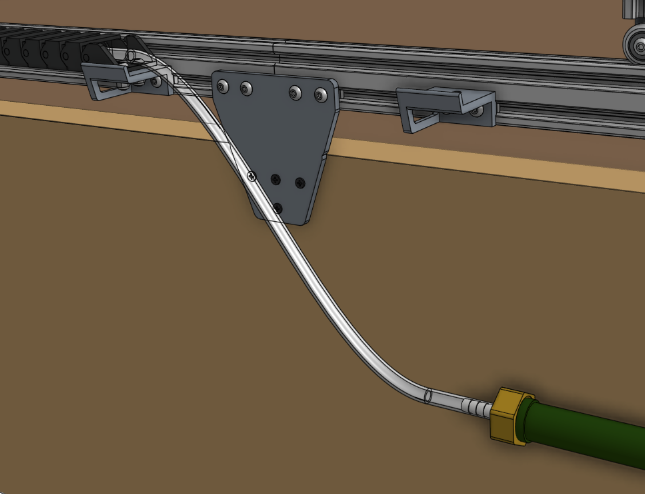
Step 4: Connect the tubing
Push the water tube coming from the y-axis cable carrier onto the upper NPT to barb adapter.
Then push the water tube coming from the x-axis cable carrier (where it is mounted to the gantry) onto the lower NPT to barb adapter.
Step 5: Connect AgriBot to the water source
Screw the garden hose to barb adapter onto the garden hose.
Note that you will need to provide a garden hose of the appropriate length to connect AgriBot to your municipal water source - one is not provided with the AgriBot kits.
Then push the water tube coming from the bottom of the x-axis cable carrier onto the barb.
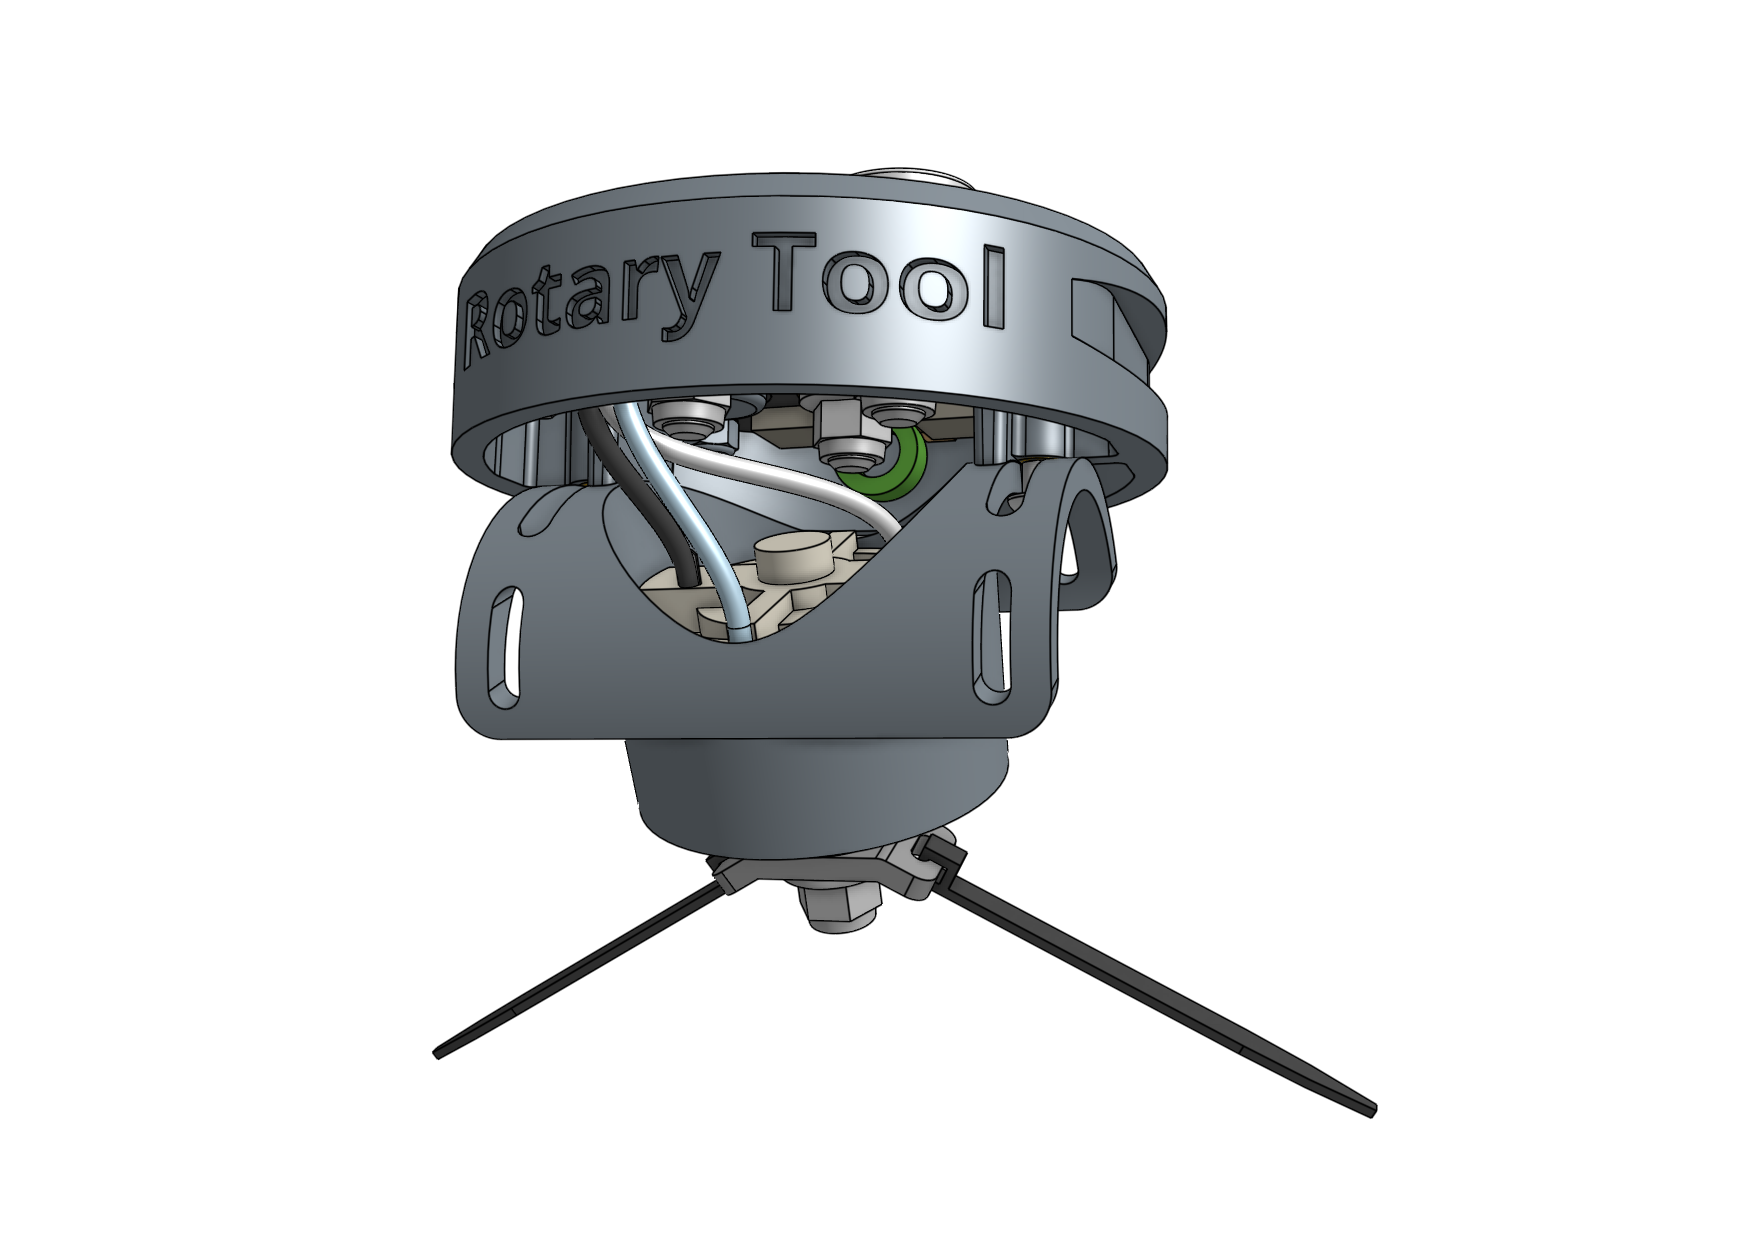
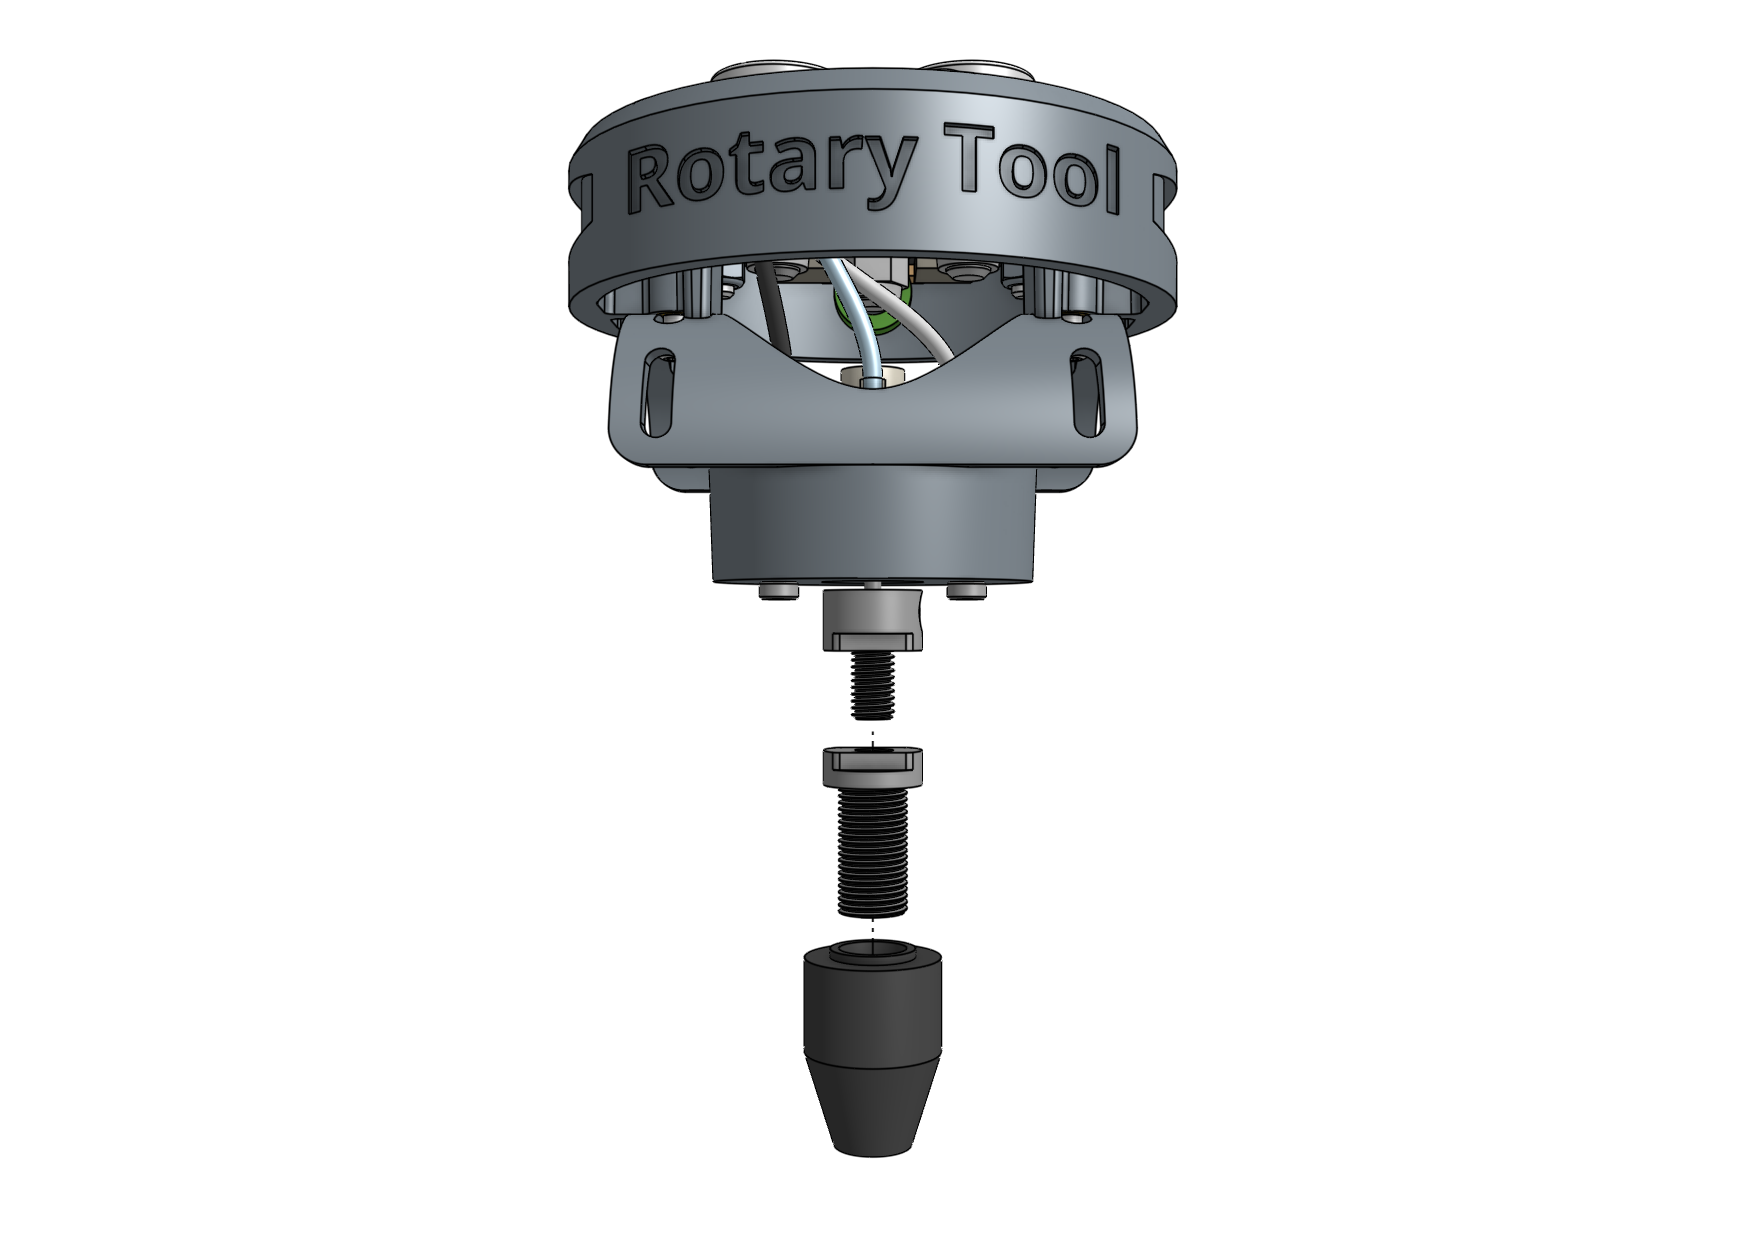
Rotary Tool
The rotary tool features a 24 volt DC motor, interchangeable implements, and an adjustable motor angle allowing AgriBot to perform light duty weed whacking, soil surface milling, and drilling operations.
This tool, and AgriBot in general, is designed for removing weeds early and often such that the weeds are always small, young, and fragile, and therefore easily removed.
What makes this possible is AgriBot’s diligence.
AgriBot has 24 hours a day to maintain your garden meticulously.
It can be configured to remove weeds every single day that a human would never waste their time with.
This prevents weeds from even having a chance at becoming a real problem.
If you configure AgriBot well, you will never even notice weeds in your garden because they will never have a chance to survive beyond germination.
Over time, the number of weed seeds in your growing area will approach zero.
Safety considerations
The Rotary Tool’s motor is fairly low powered relative to other common household tools and garden equipment:
Equipment |
Power (watts) |
|---|---|
AgriBot Rotary Tool |
Less than 10 |
Hand-held Dremel tool |
100+ |
Electric weed trimmer |
150 to 300 |
However, even though the tool is fairly low powered, some commonsense precautions should be taken when using the tool:
Do not connect or disconnect the tool from the UTM by hand when the AgriBot is powered on.
Do not change the tool’s implement (drill bit, for example) while it is mounted to the UTM.
Keep hands, feet, hair, and other body parts away from the tool when mounted to the UTM, especially when the tool is powered.
When the tool is powered, maintain a safe distance and be mindful of debris (rocks, sticks, dirt) that may be kicked up.
If closer observation is absolutely necessary while the tool is being used, use appropriate protective equipment such as safety glasses, a face shield, and/or protective clothing.
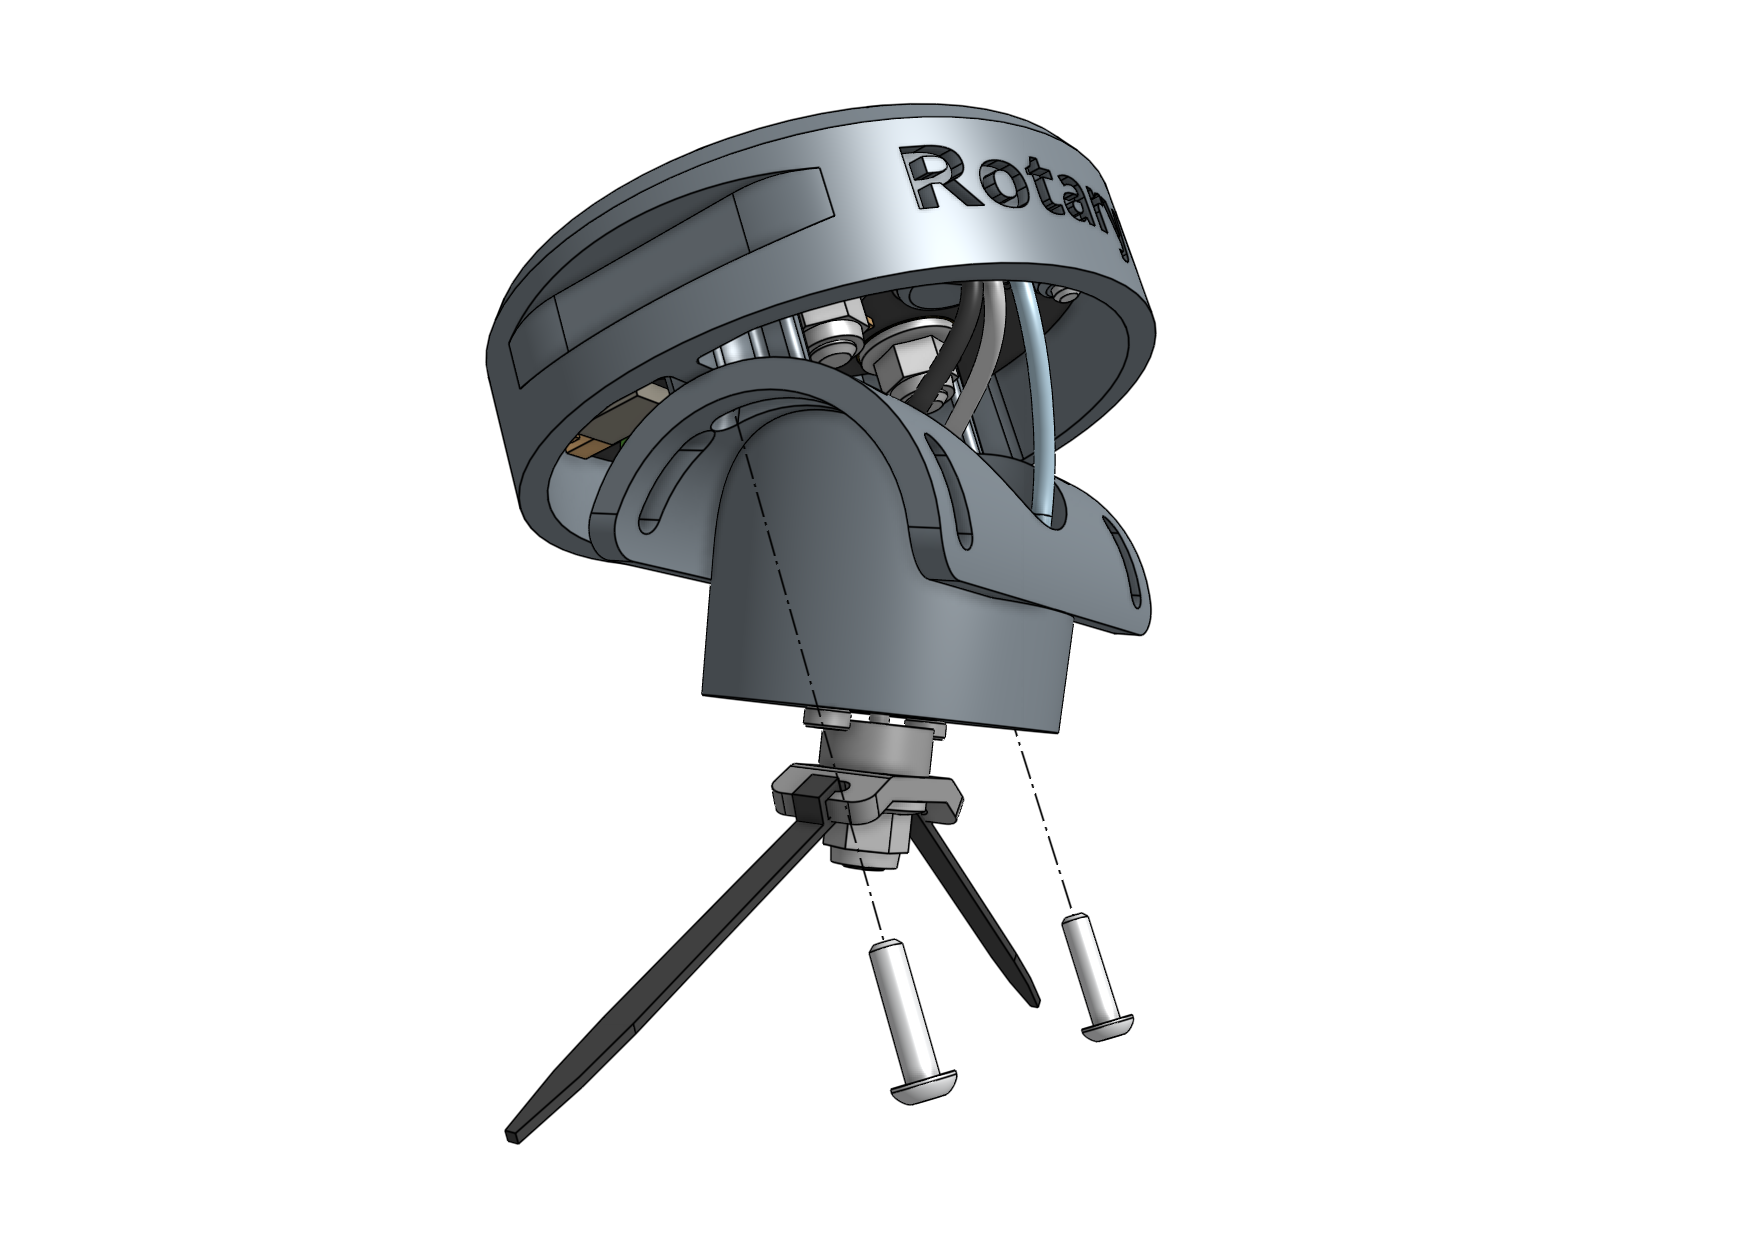
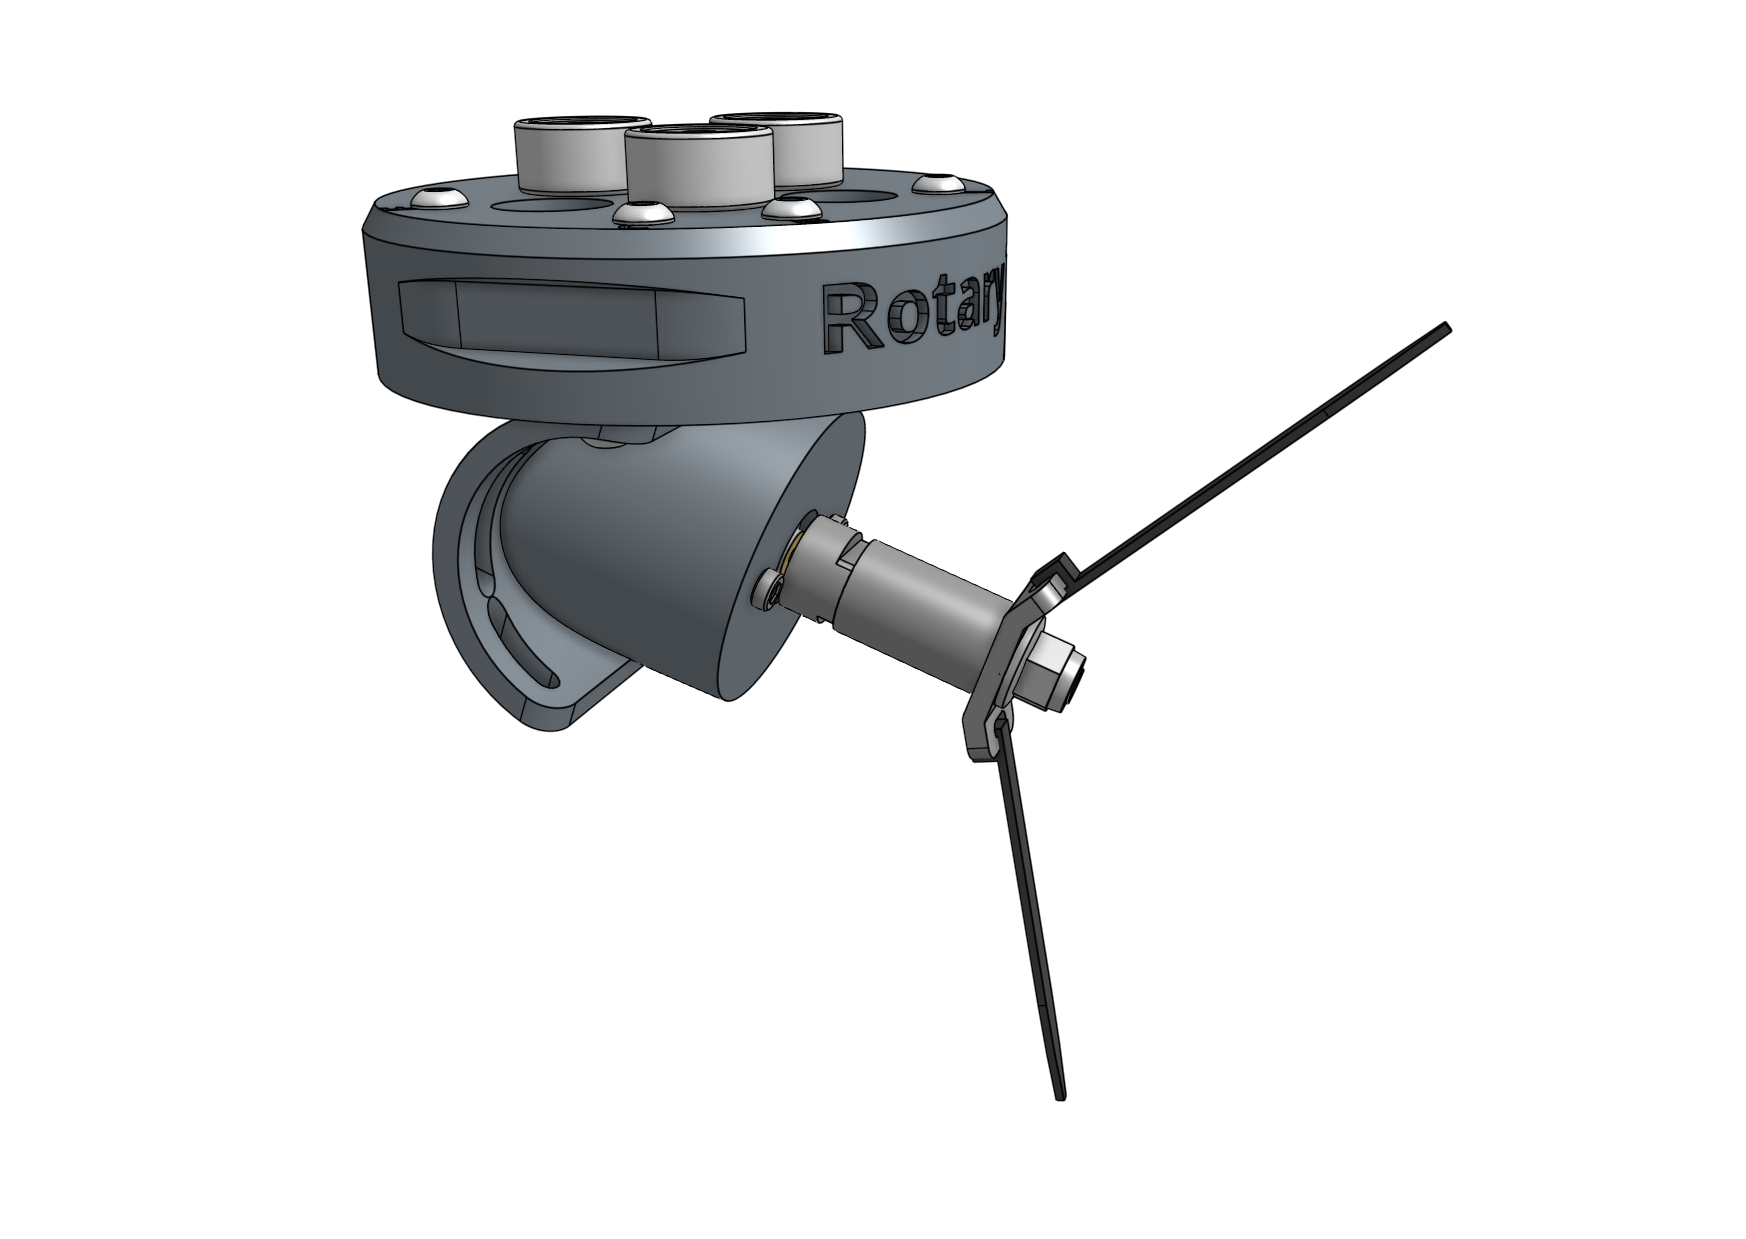
Changing the motor angle
The angle of the rotary tool’s motor can be adjusted +/- 70 degrees to allow for more aggressive weed whacking.
To adjust the angle, loosen or remove the two M3 screws holding the motor to the upper half of the tool.
Position the motor at the desired angle and retighten the screws.
Using the shaft extension
In certain configurations of the rotary tool, you may need to use the rotary tool shaft extension to provide extra distance between the tool itself and the implement being used.
To use the shaft extension, remove any implement currently being used.
Screw the shaft extension onto the motor and then re-attach the implement.
Using the drill chuck
The rotary tool can be configured with the included drill chuck to perform light duty drilling operations with most standard drill bits smaller than 5mm.
To use the drill chuck, set the motor angle to vertical and remove any implement currently being used.
Then screw the drill chuck adapter onto the motor, followed by the drill chuck.
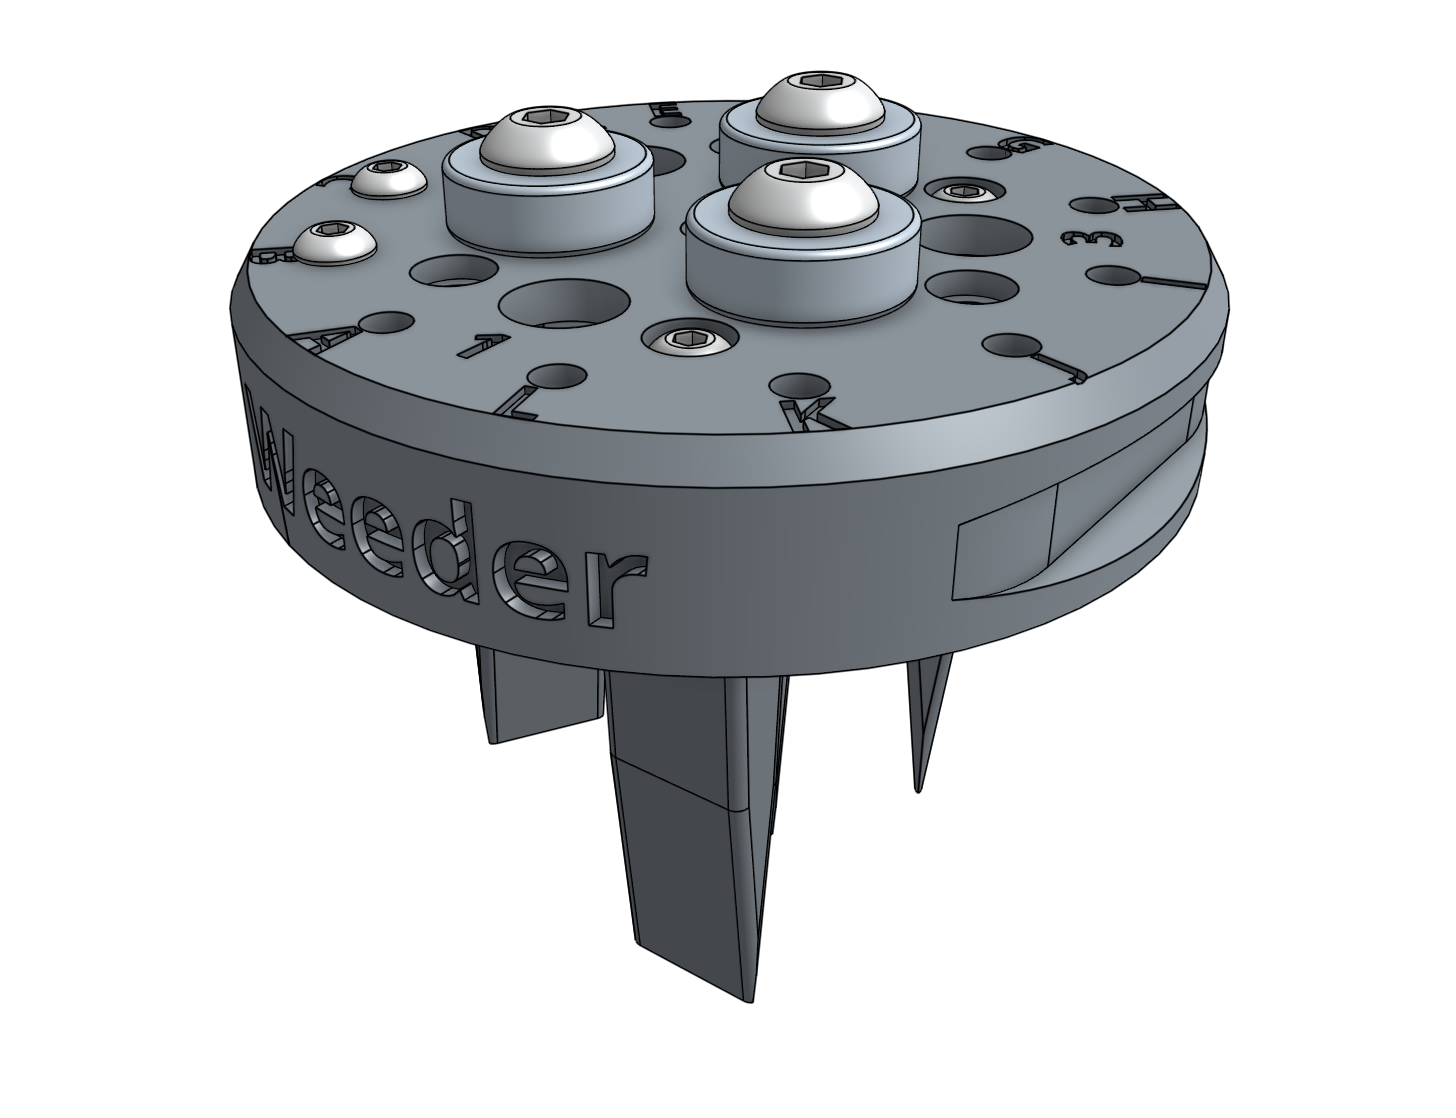
Weeder
The weeder tool works by pushing small weeds under the soil surface and disrupting their fragile root systems.
This tool, and AgriBot in general, is designed for removing weeds early and often such that the weeds are always small, young, and fragile, and therefore easily removed.
What makes this possible is AgriBot’s diligence.
AgriBot has 24 hours a day to maintain your garden meticulously.
It can be configured to remove weeds every single day that a human would never waste their time with.
This prevents weeds from even having a chance at becoming a real problem.
If you configure AgriBot well, you will never even notice weeds in your garden because they will never have a chance to survive beyond germination.
Over time, the number of weed seeds in your growing area will approach zero.
Customizing the weeder
he weeding tool is customizable so you can optimize it for your soil conditions, the types of weeds you are up against, and also how you configure your weeding sequences.
Feel free to add, remove, and reconfigure the blades as needed.
You can also create new implements of your own design with a 3D printer or out of household materials.
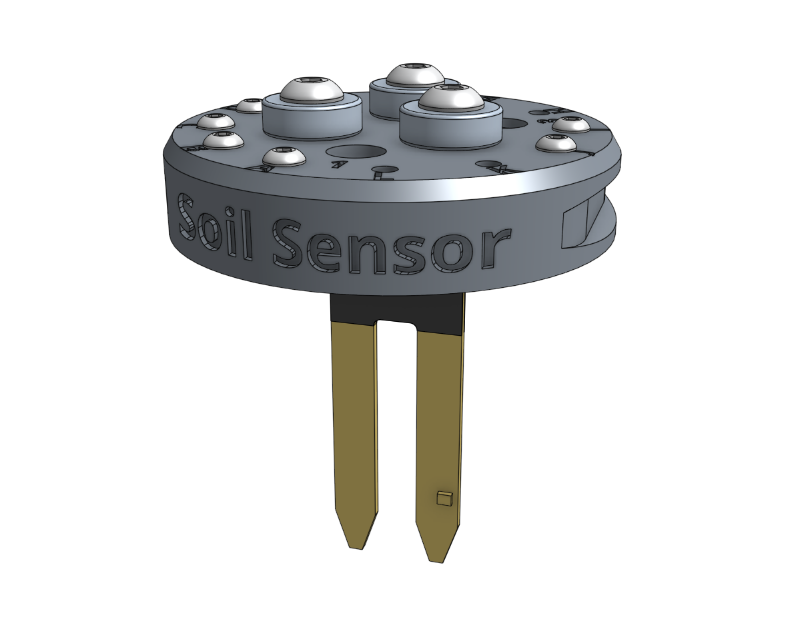
Soil Sensor
The soil sensor works by driving the tool vertically into the soil so that the soil properties can be read by the soil sensor PCB.
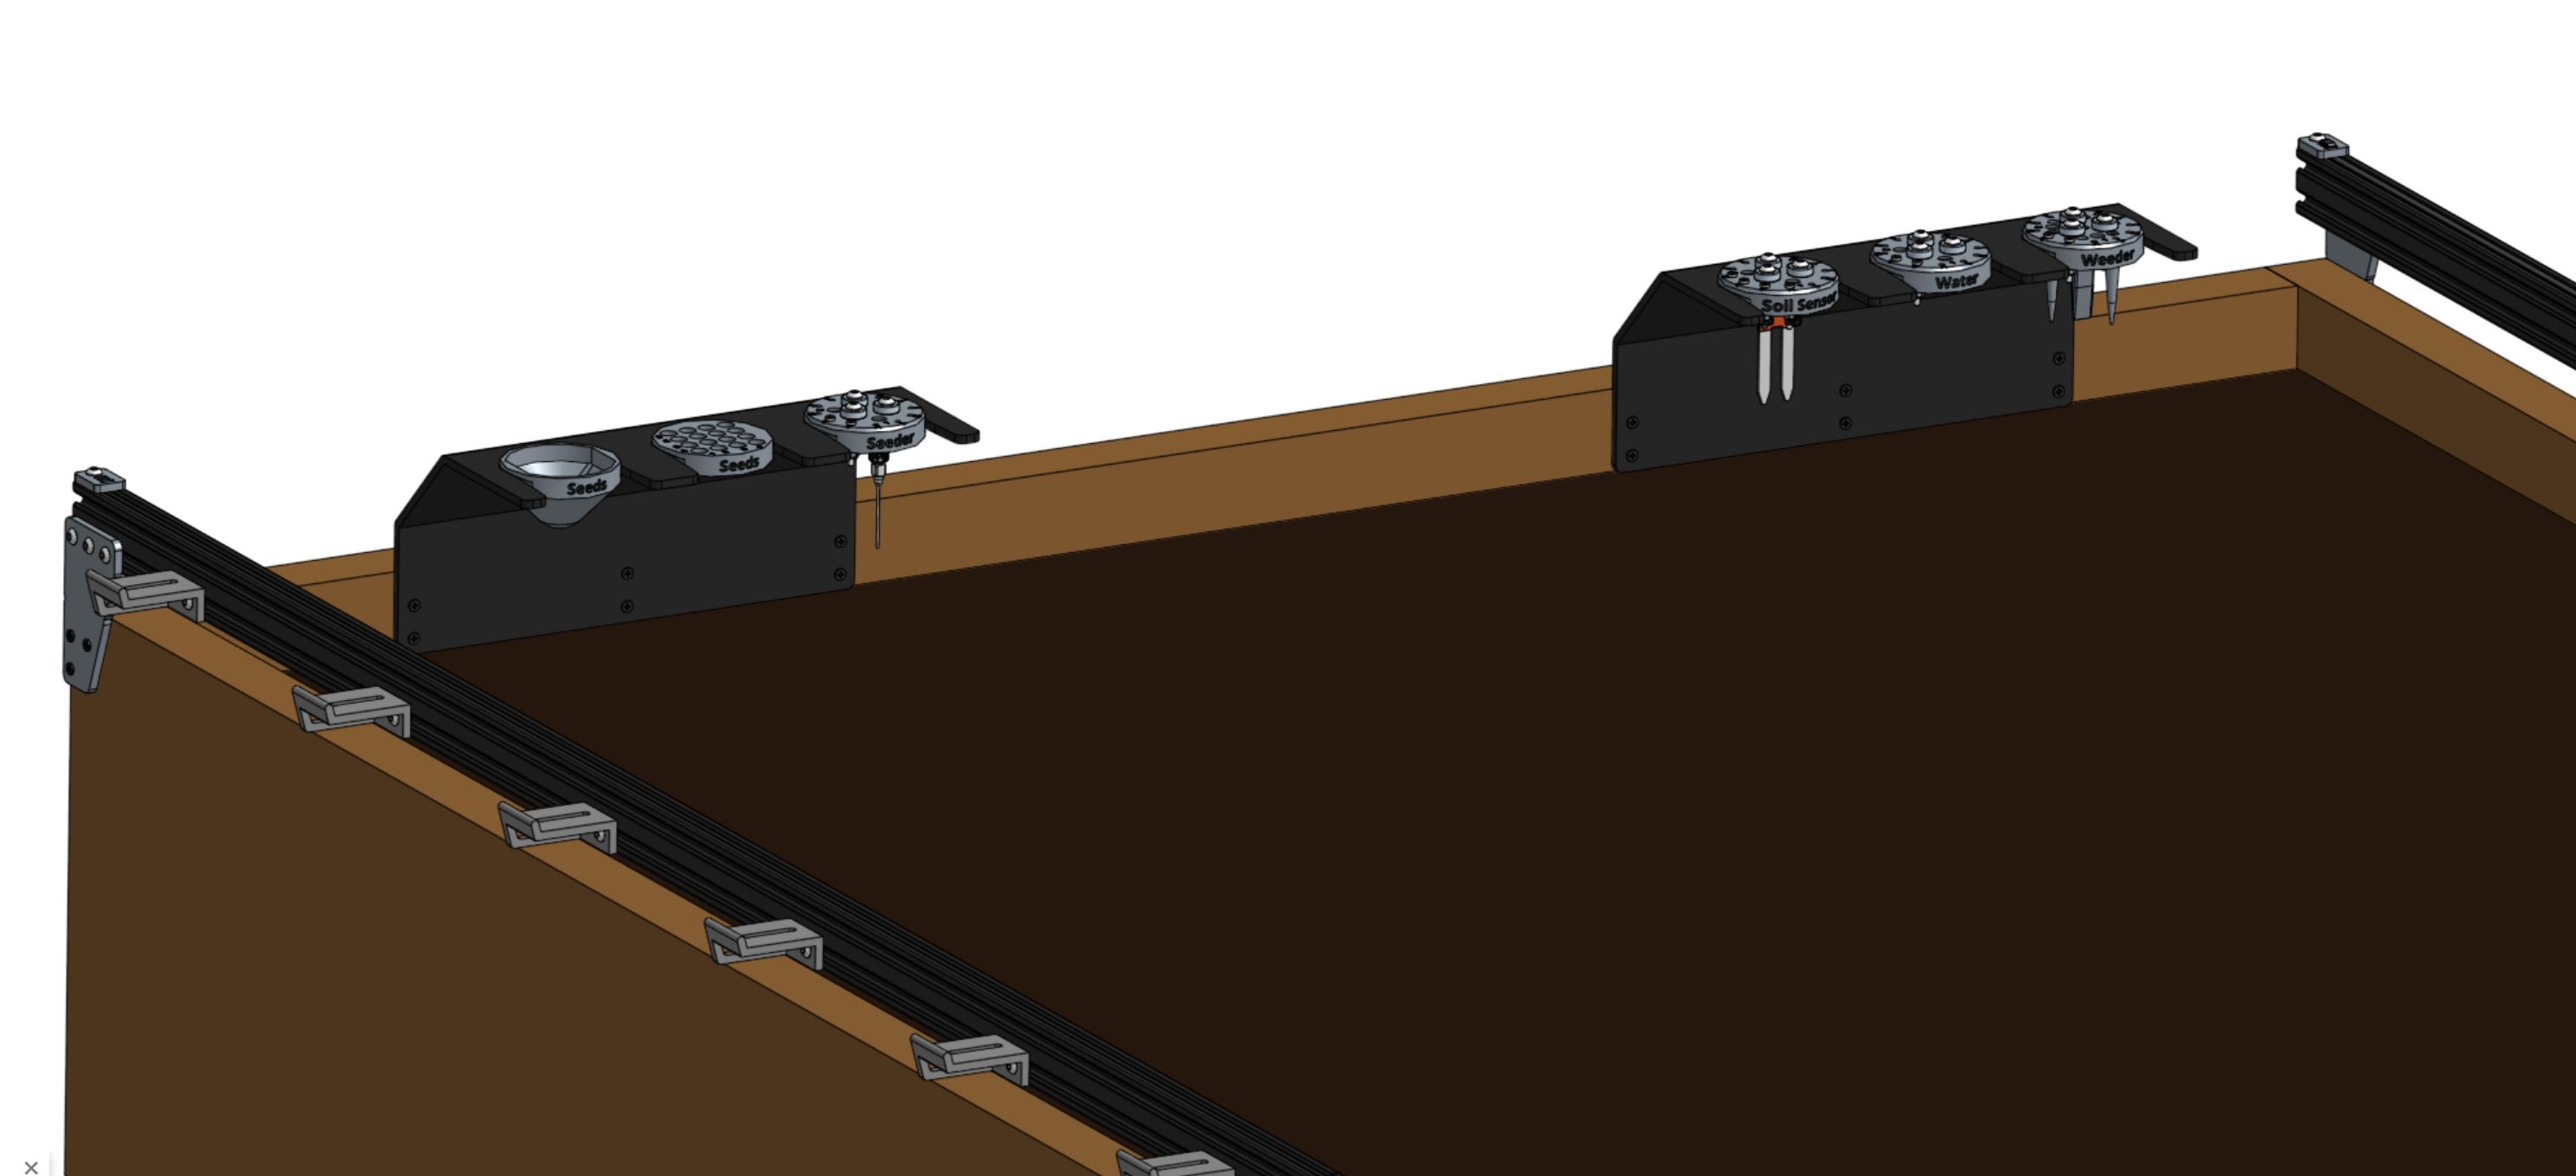
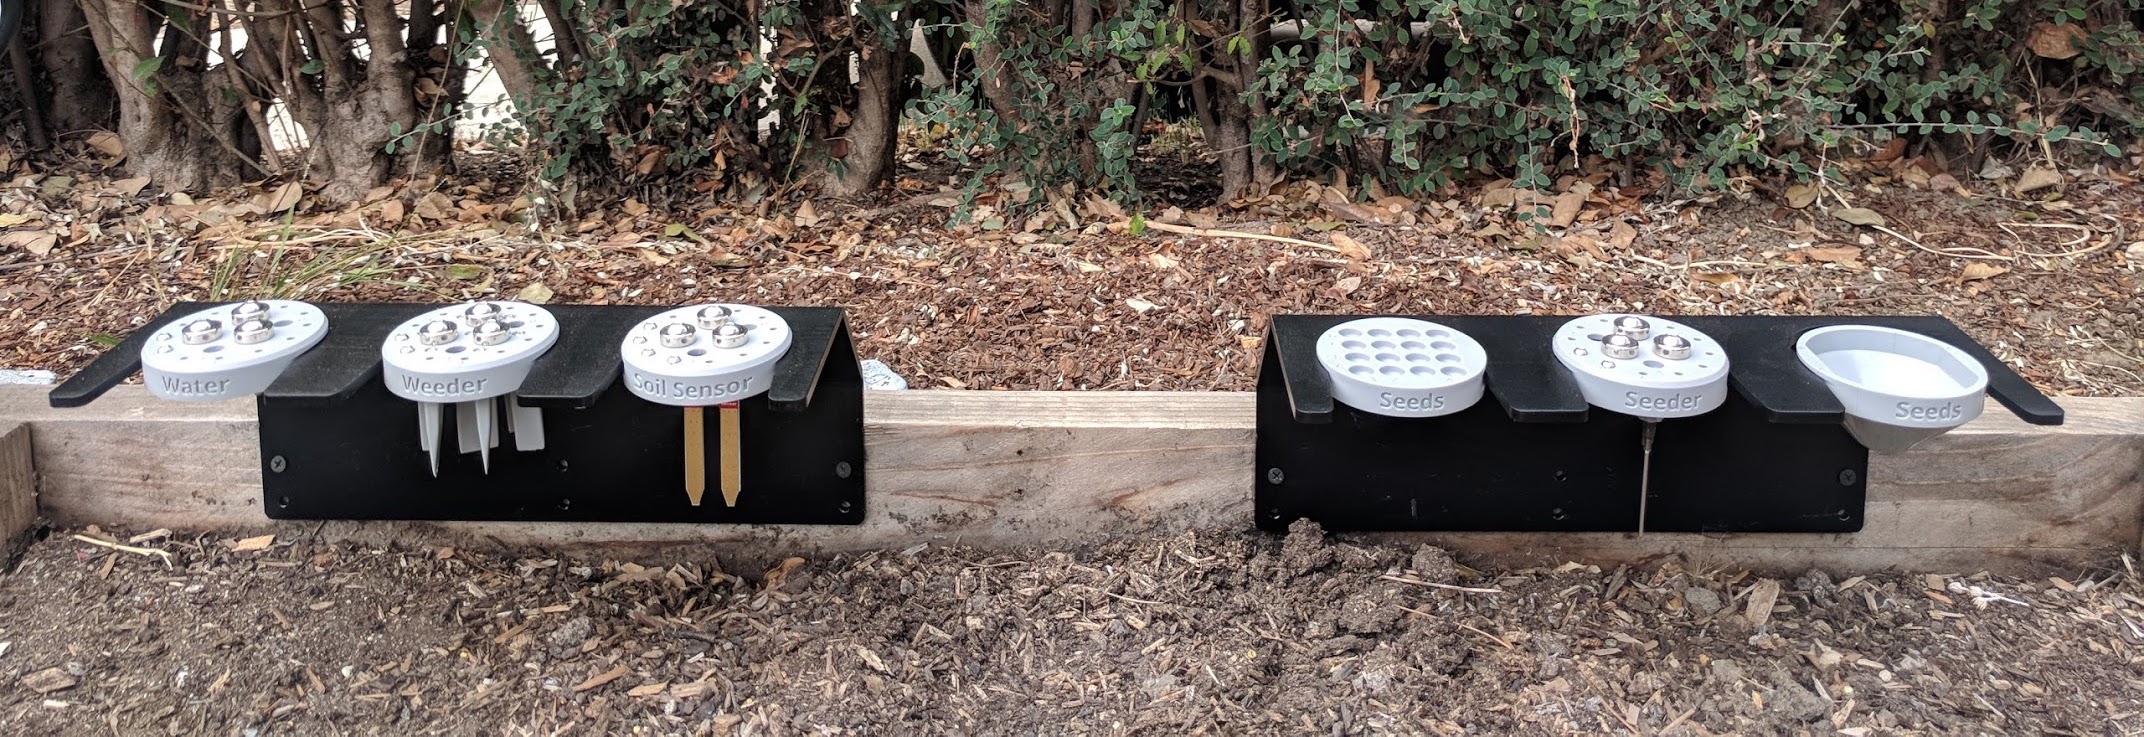
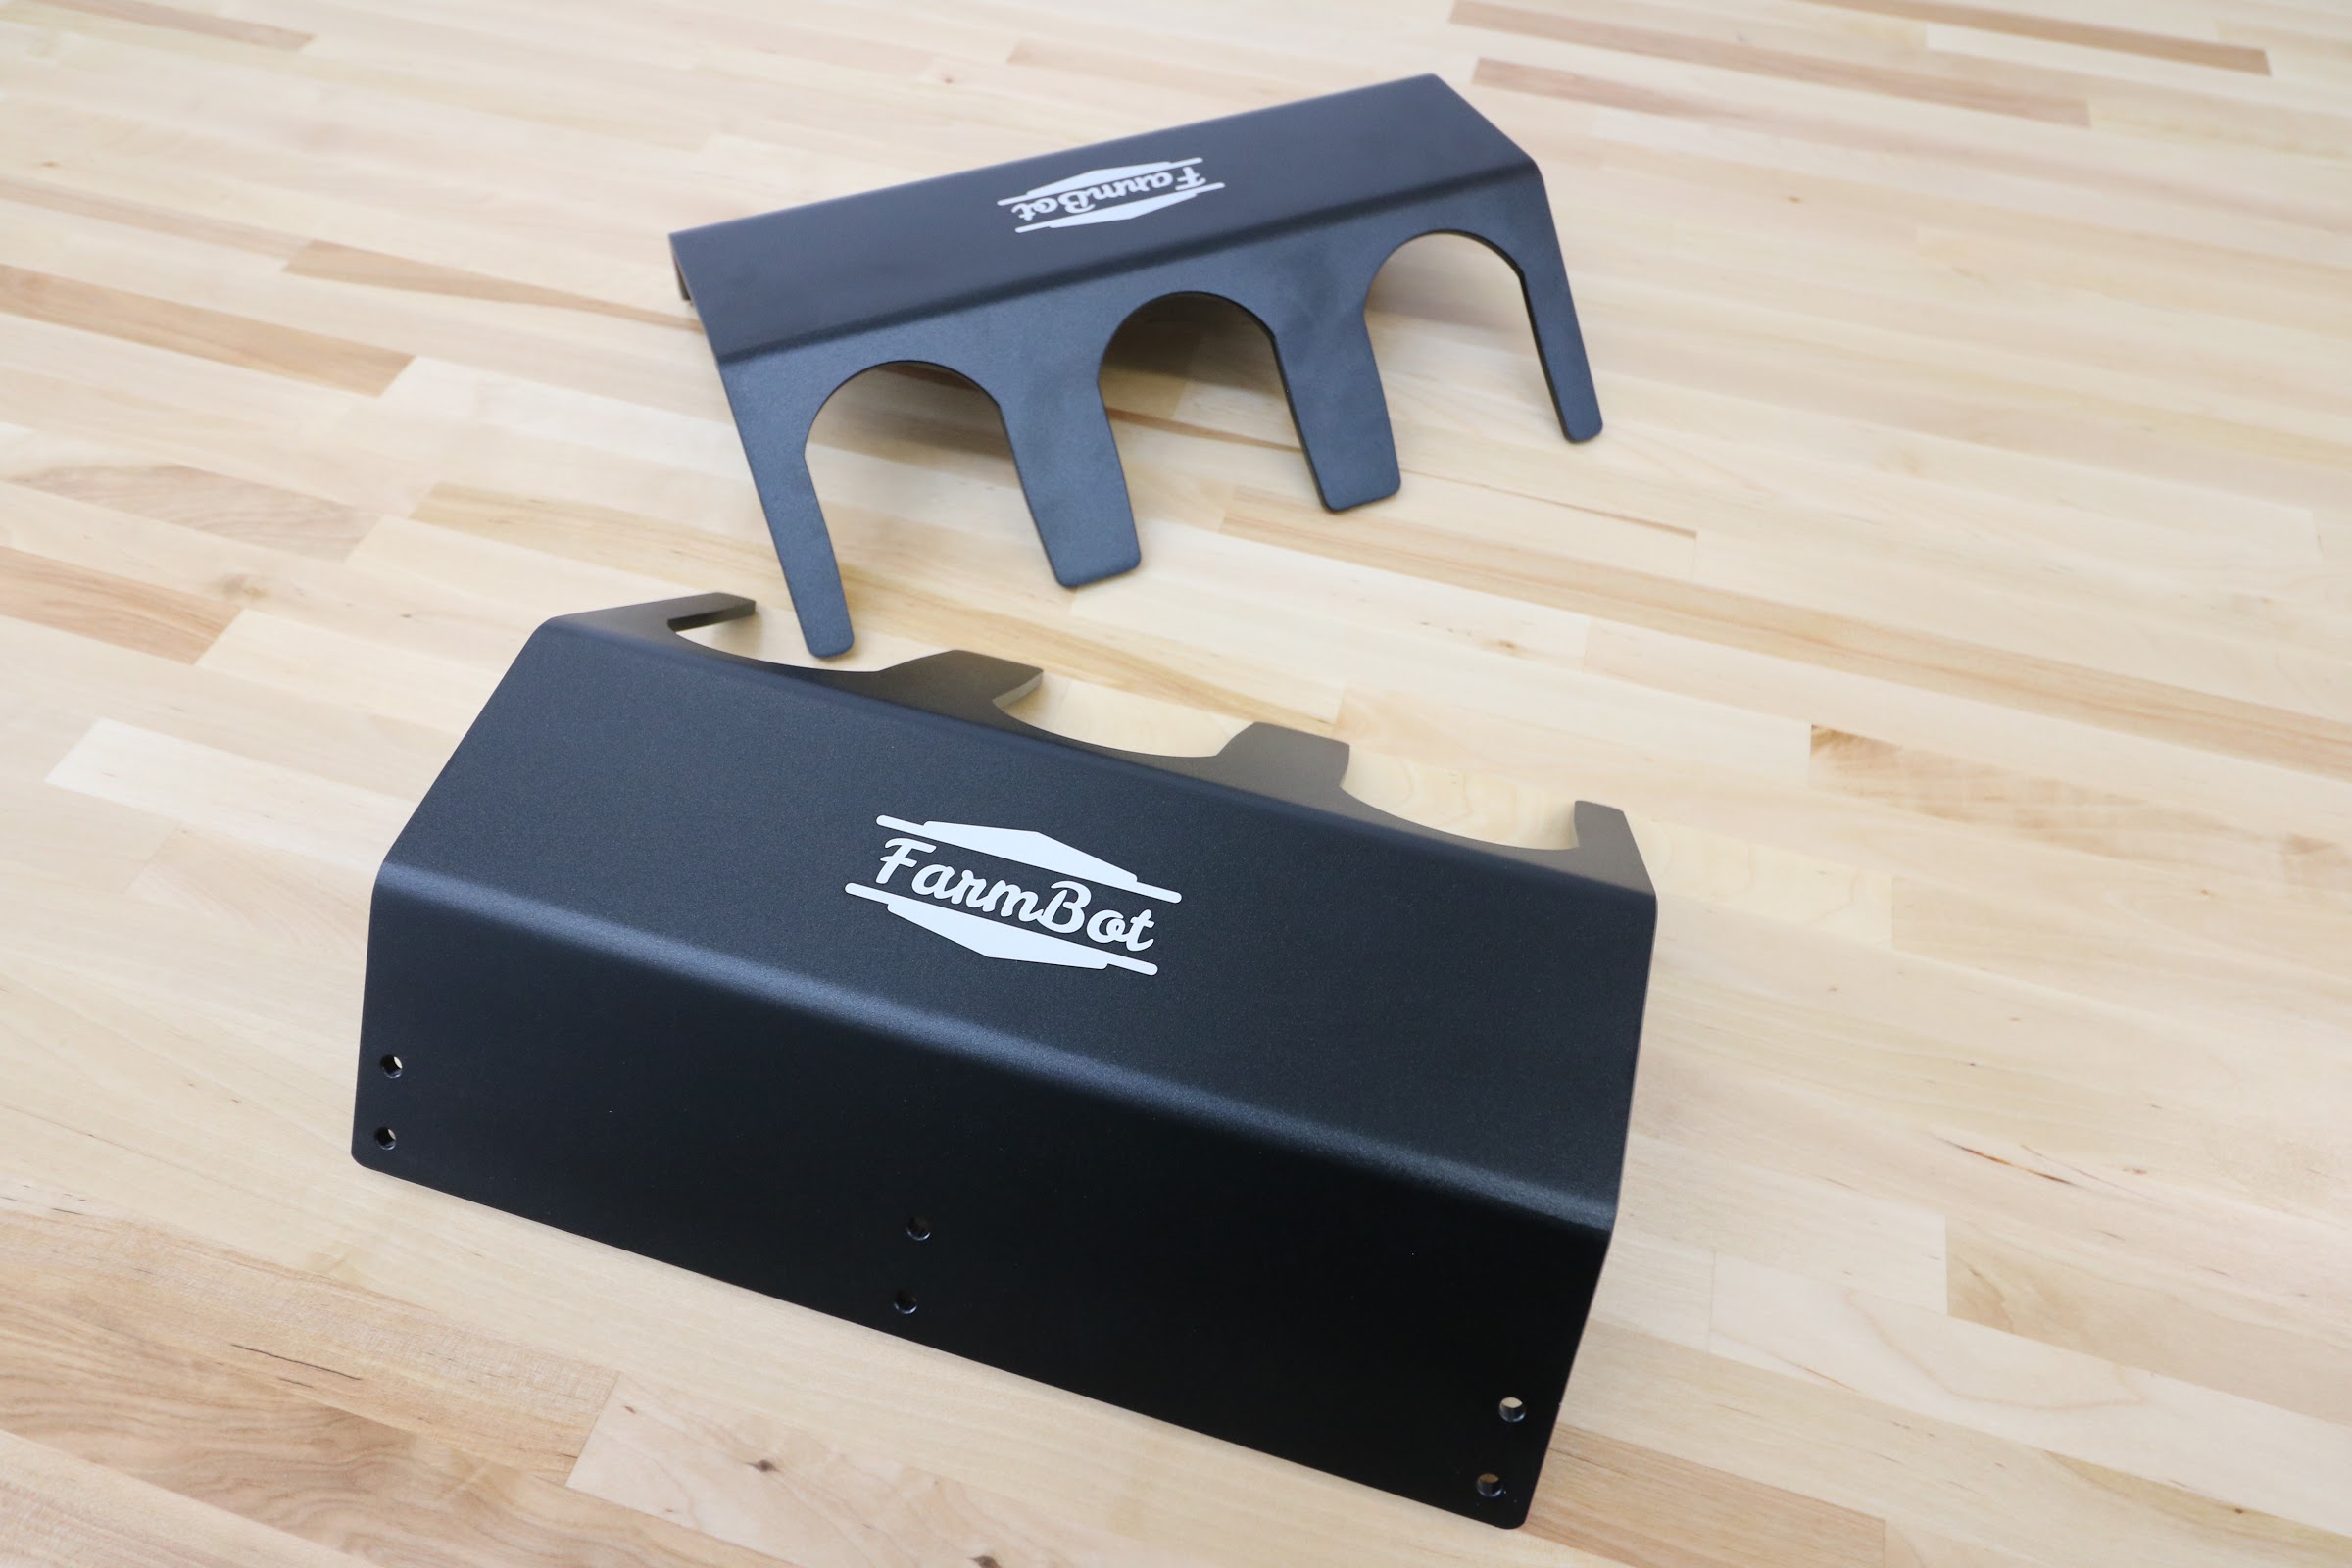
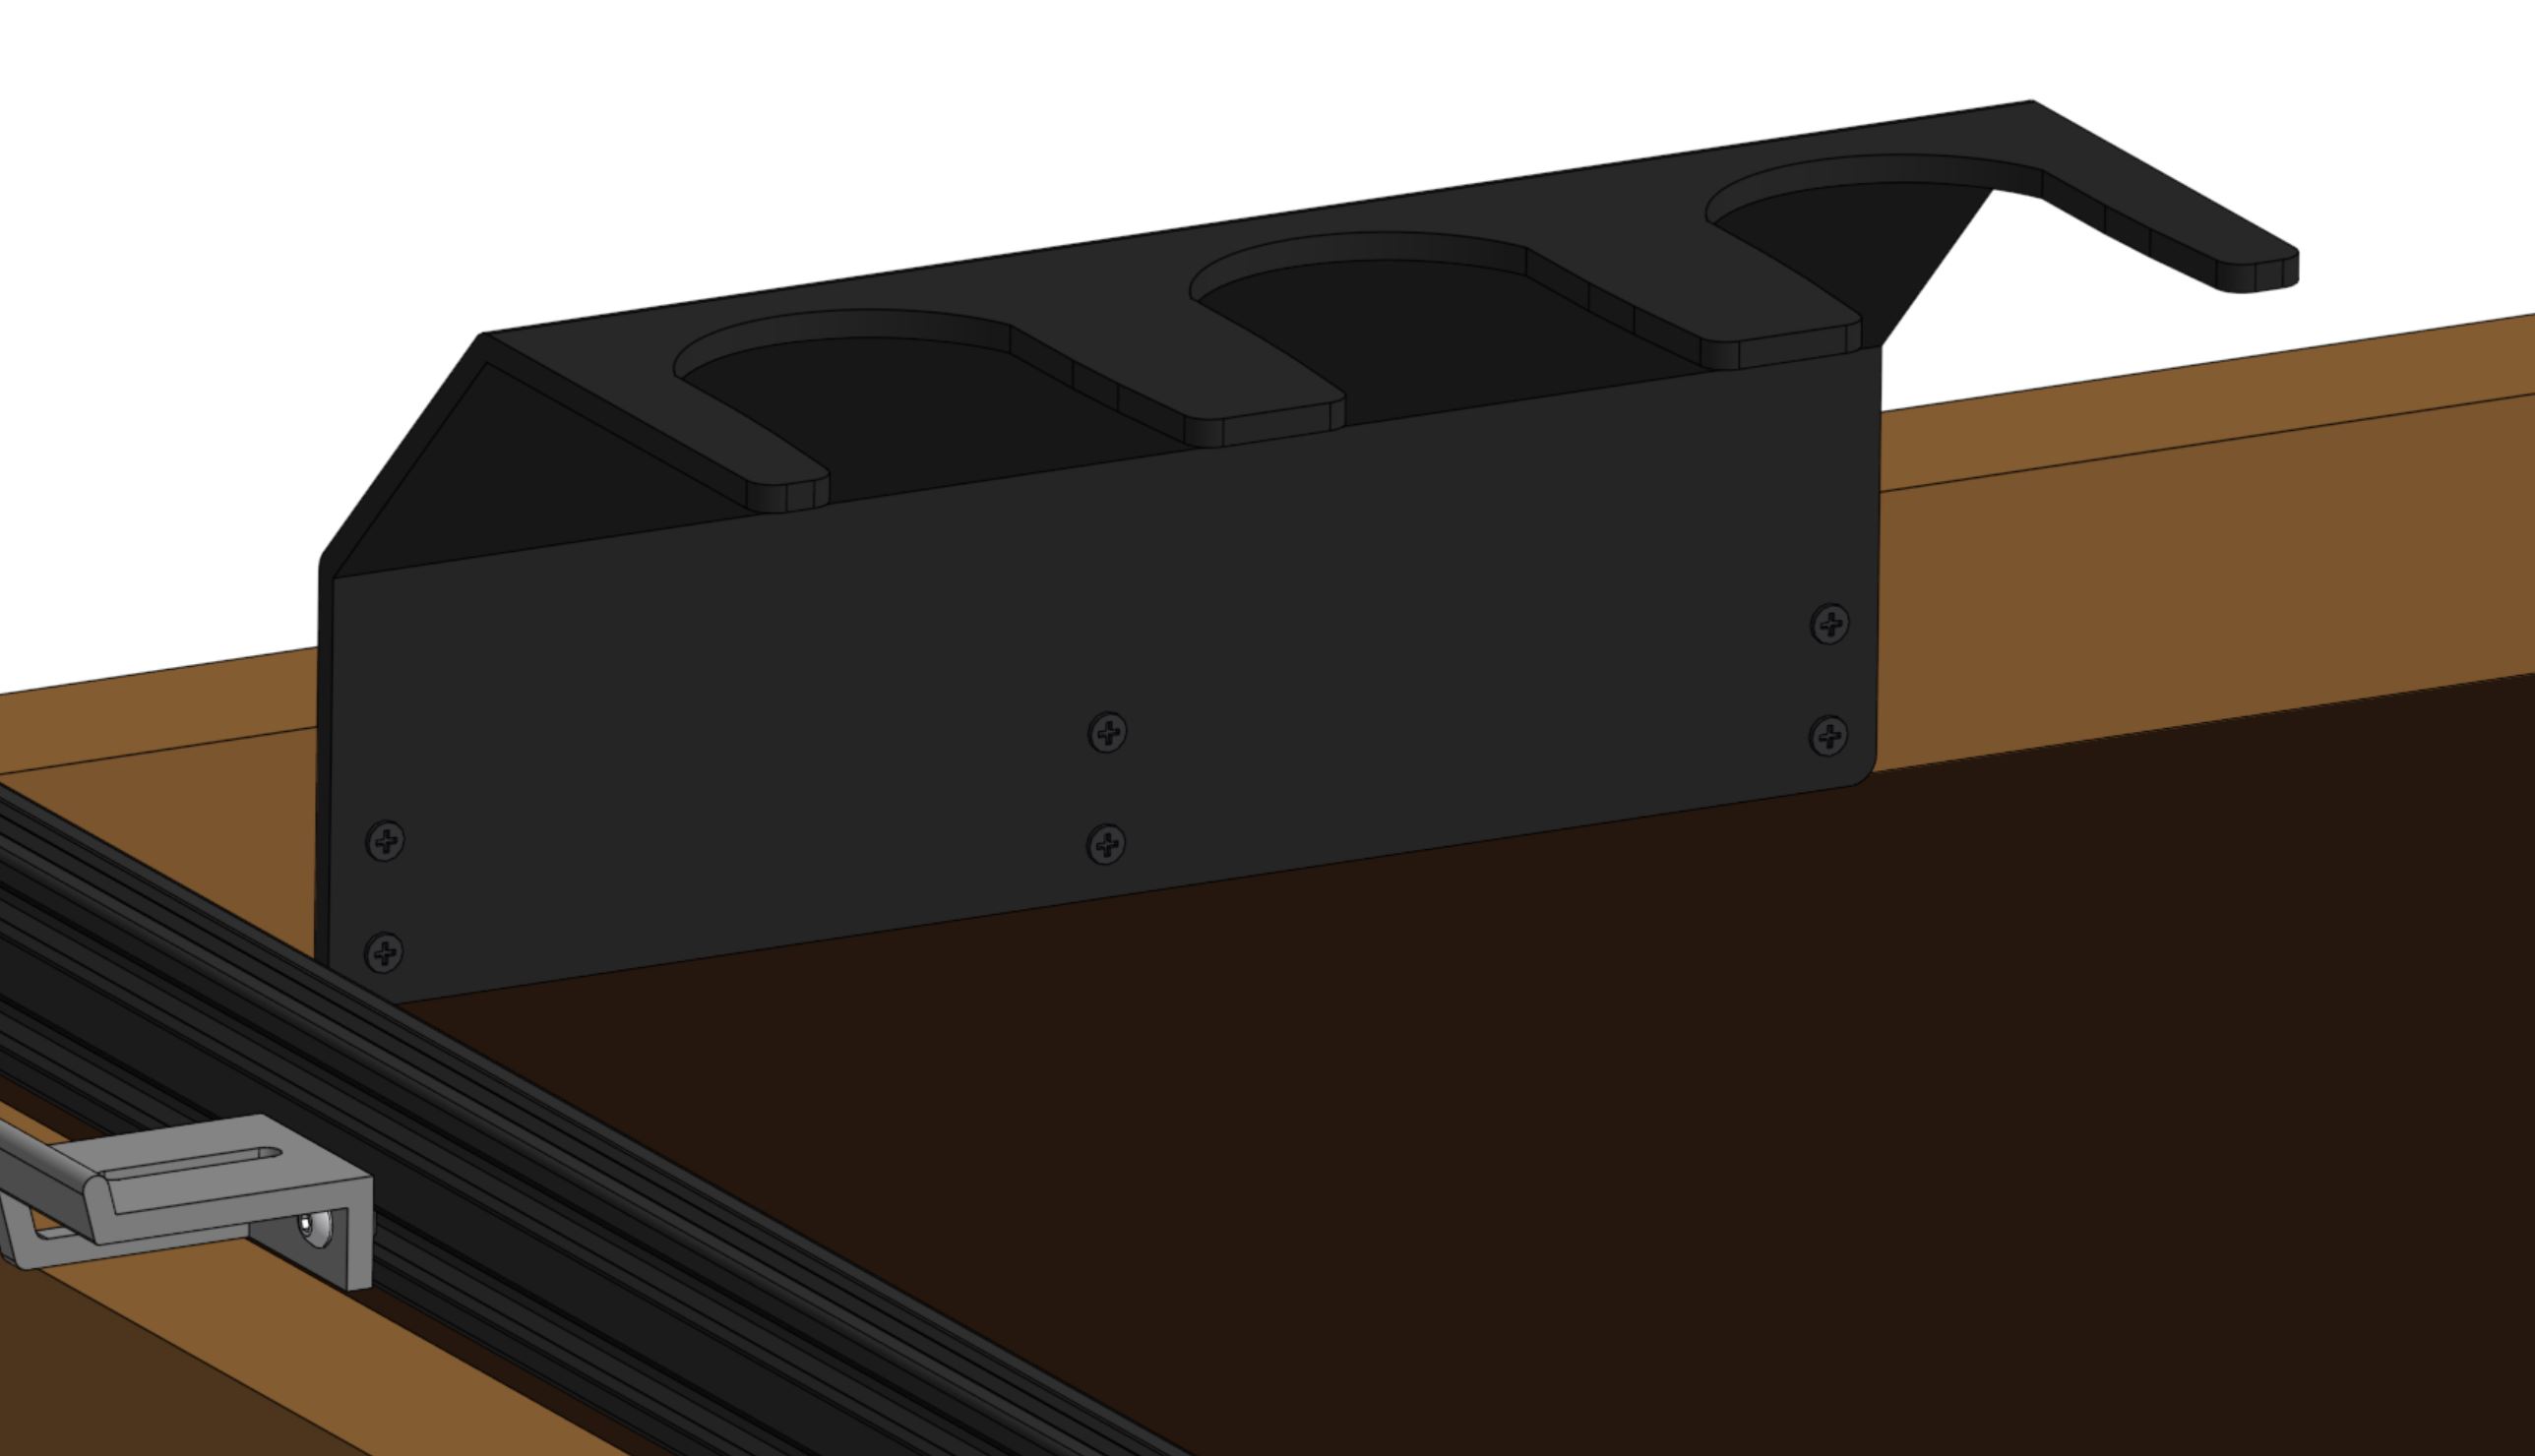
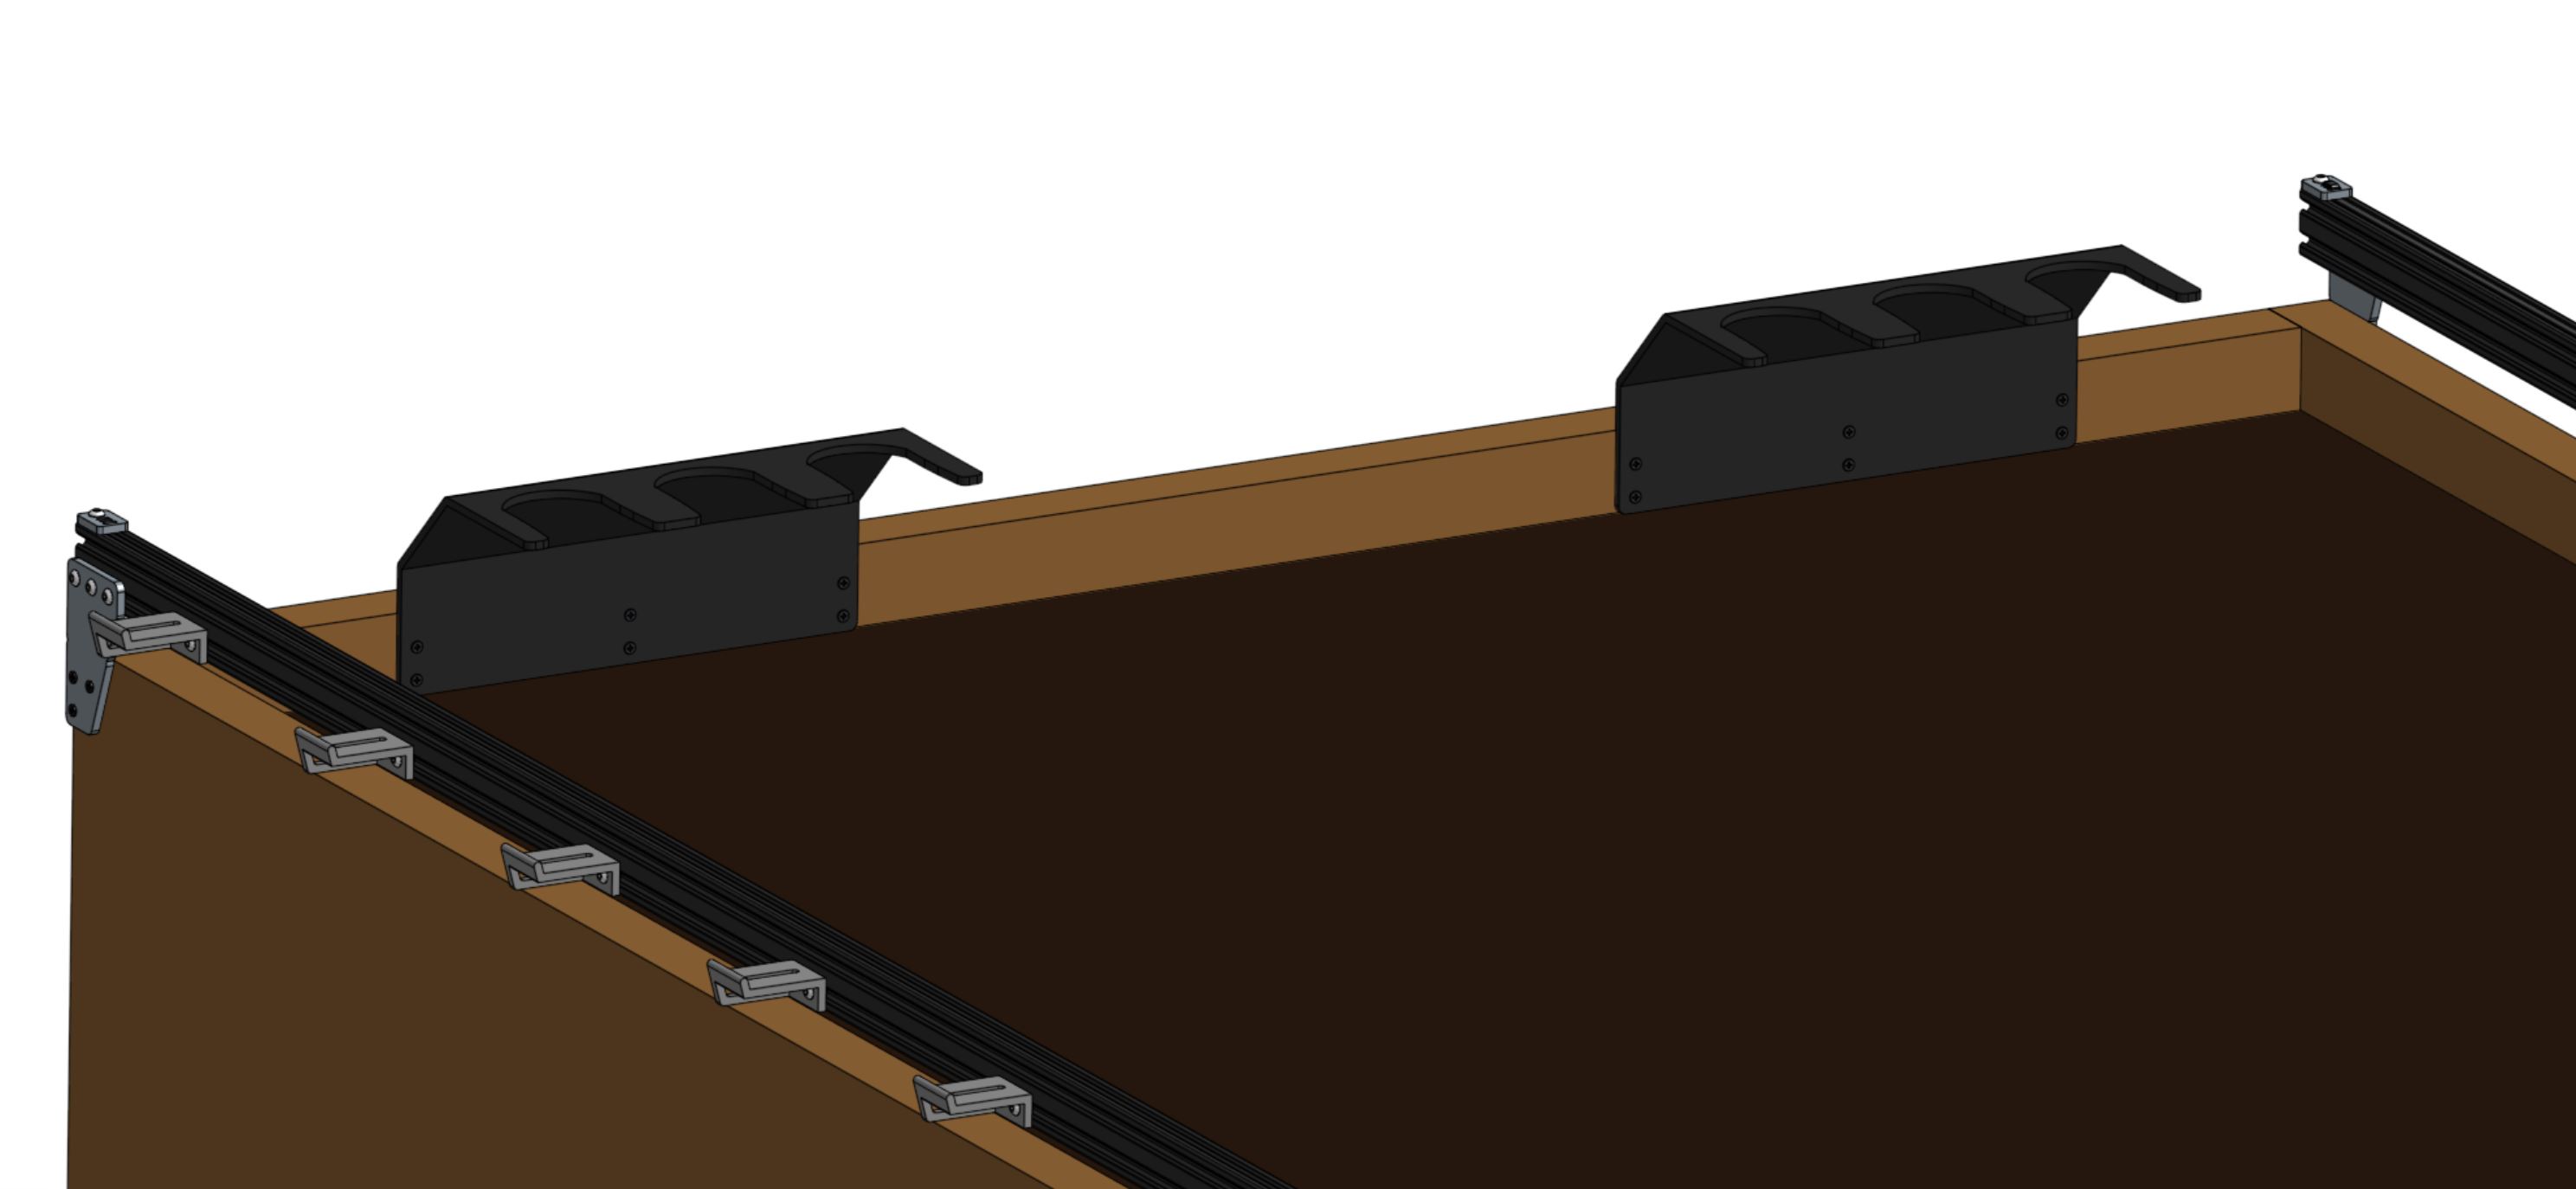
Toolbays
AgriBot comes with two toolbays that hold three tools, seed bins, or seed trays each.
These simple hardware components act as holsters for your tools and are shaped in such a way that AgriBot can automatically mount and dismount tools for the task at hand.
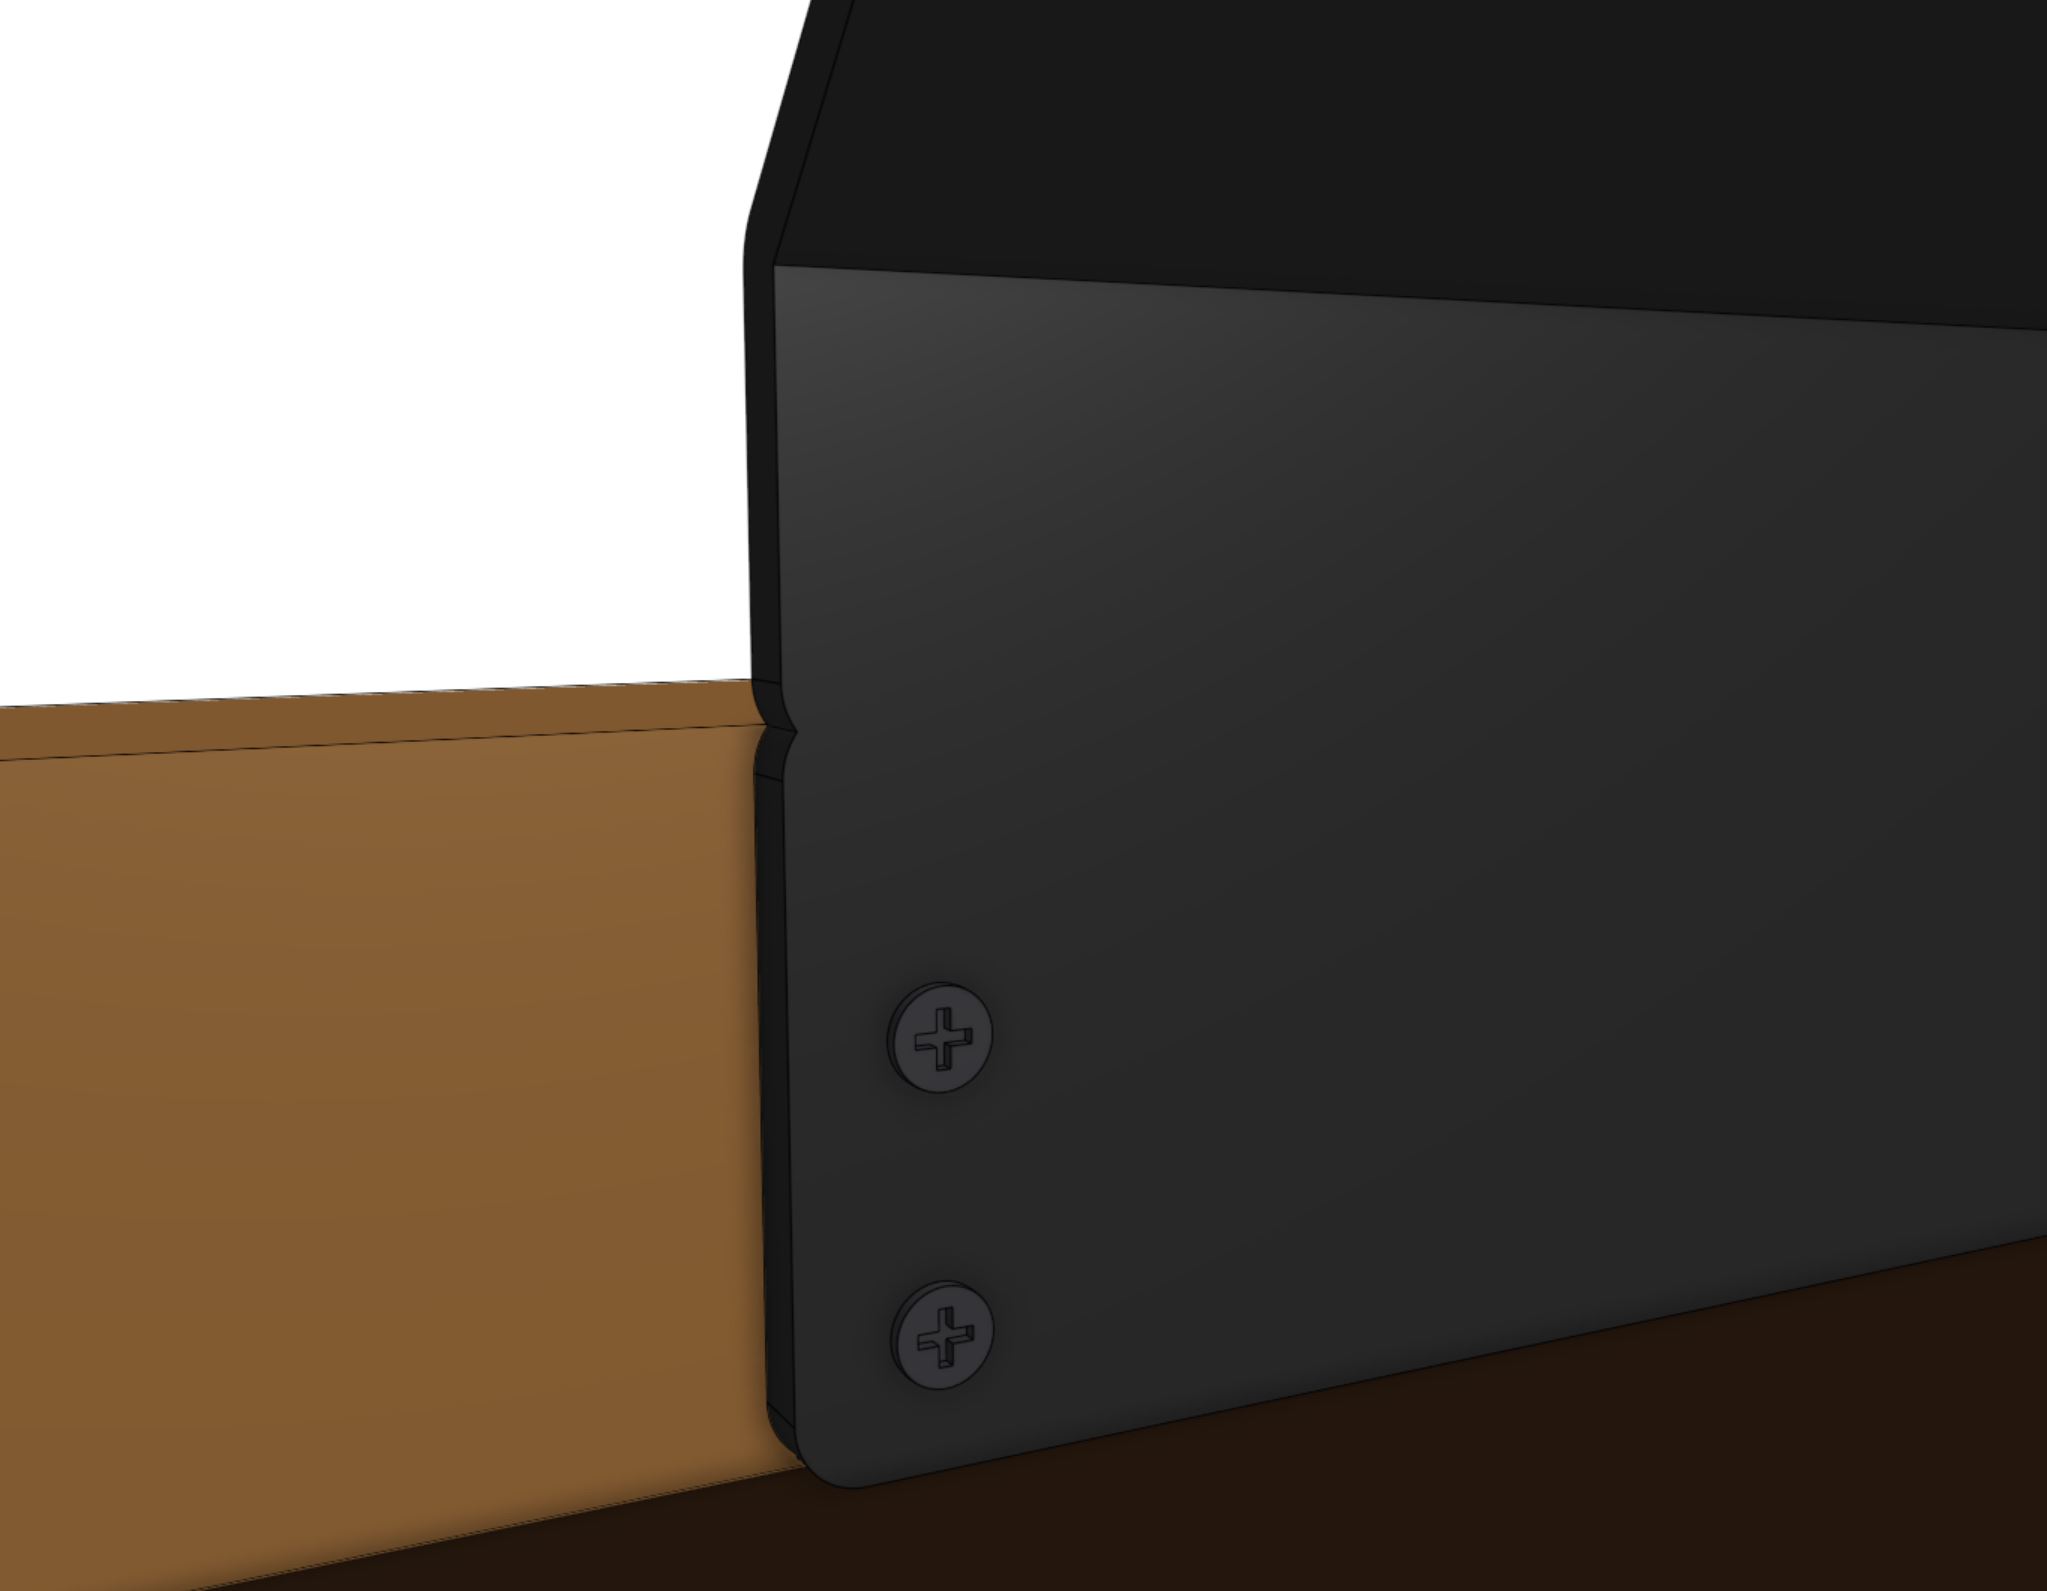
Step 1: Attach a toolbay to the supporting infrastructure
Position and attach a toolbay to your supporting infrastructure using six wood screws.
Step 3: Insert the tools
Place your tools and seed containers in any slot you want.
Just remember that you will need to log in to the web app and let AgriBot know what tool is where!