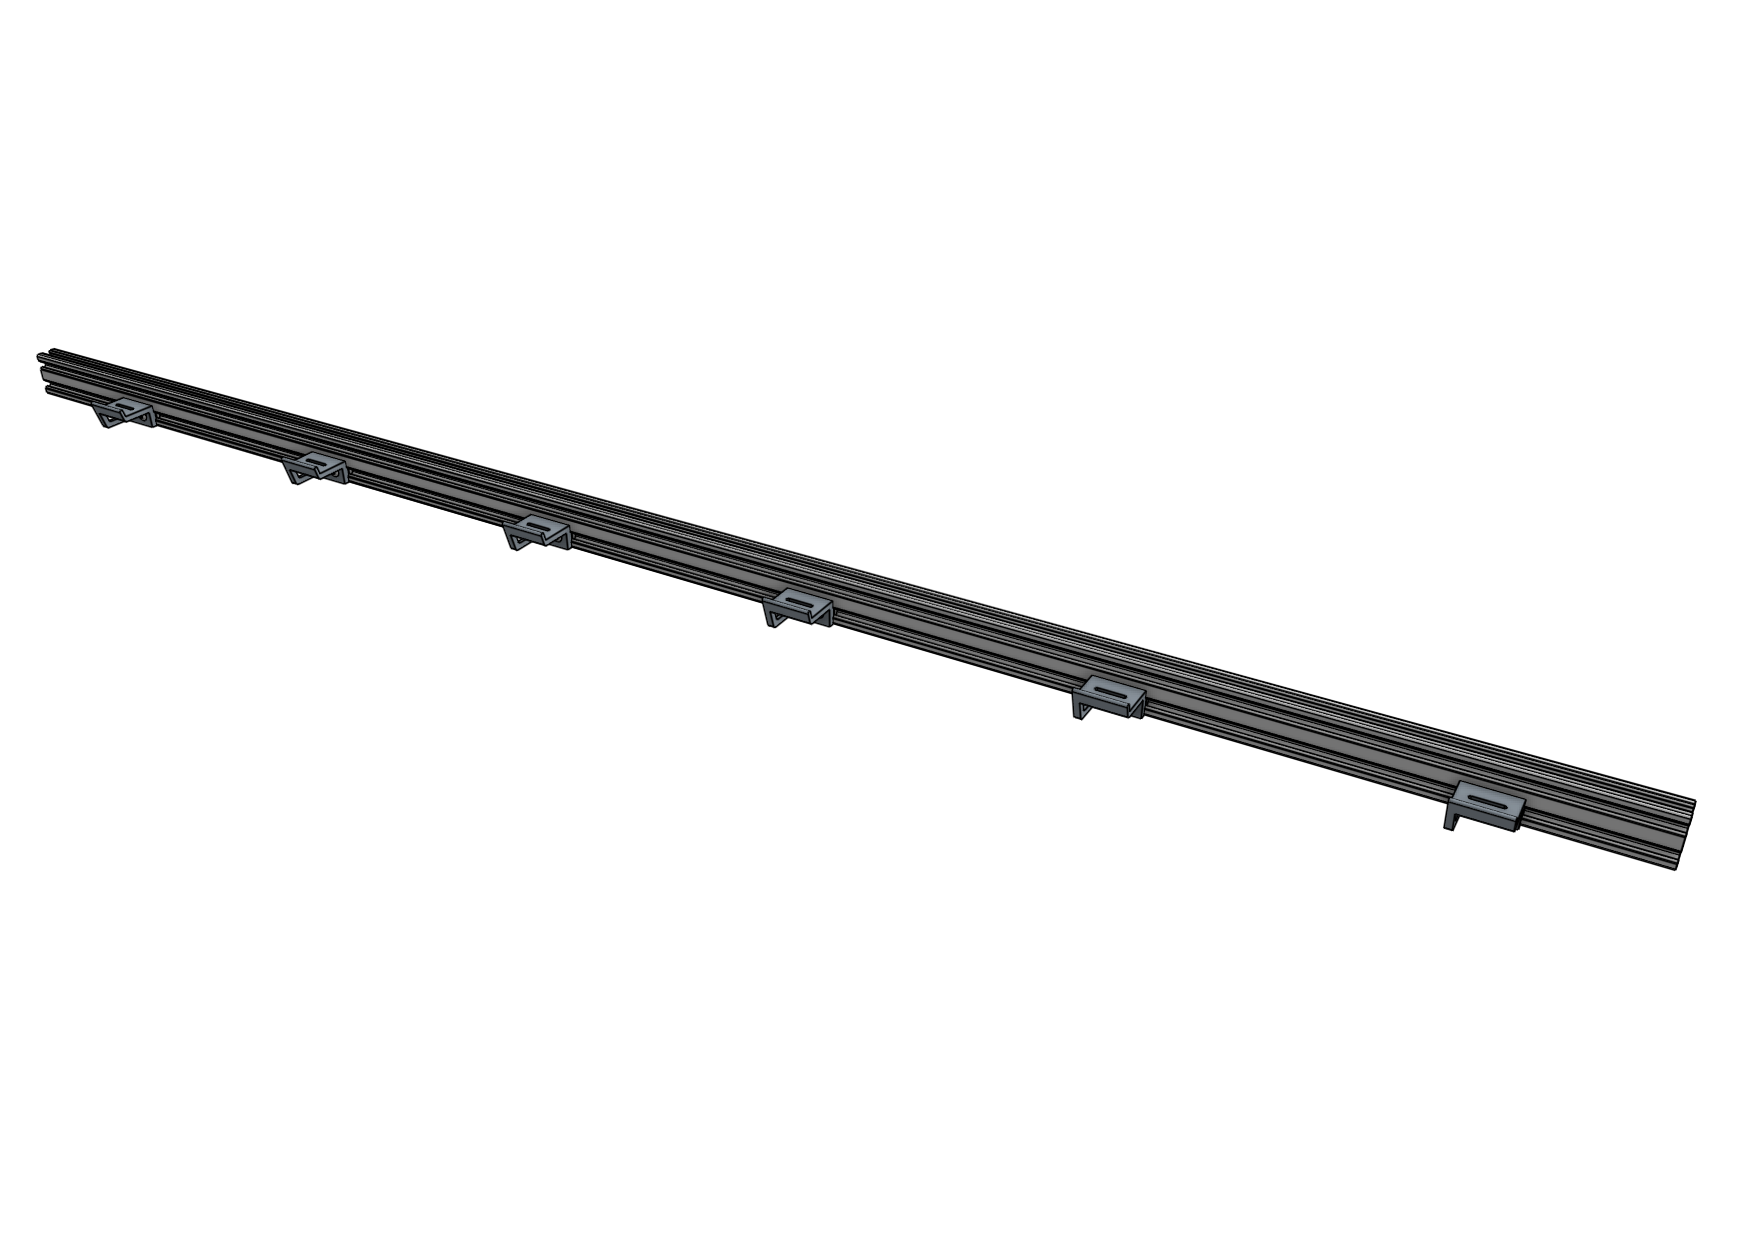
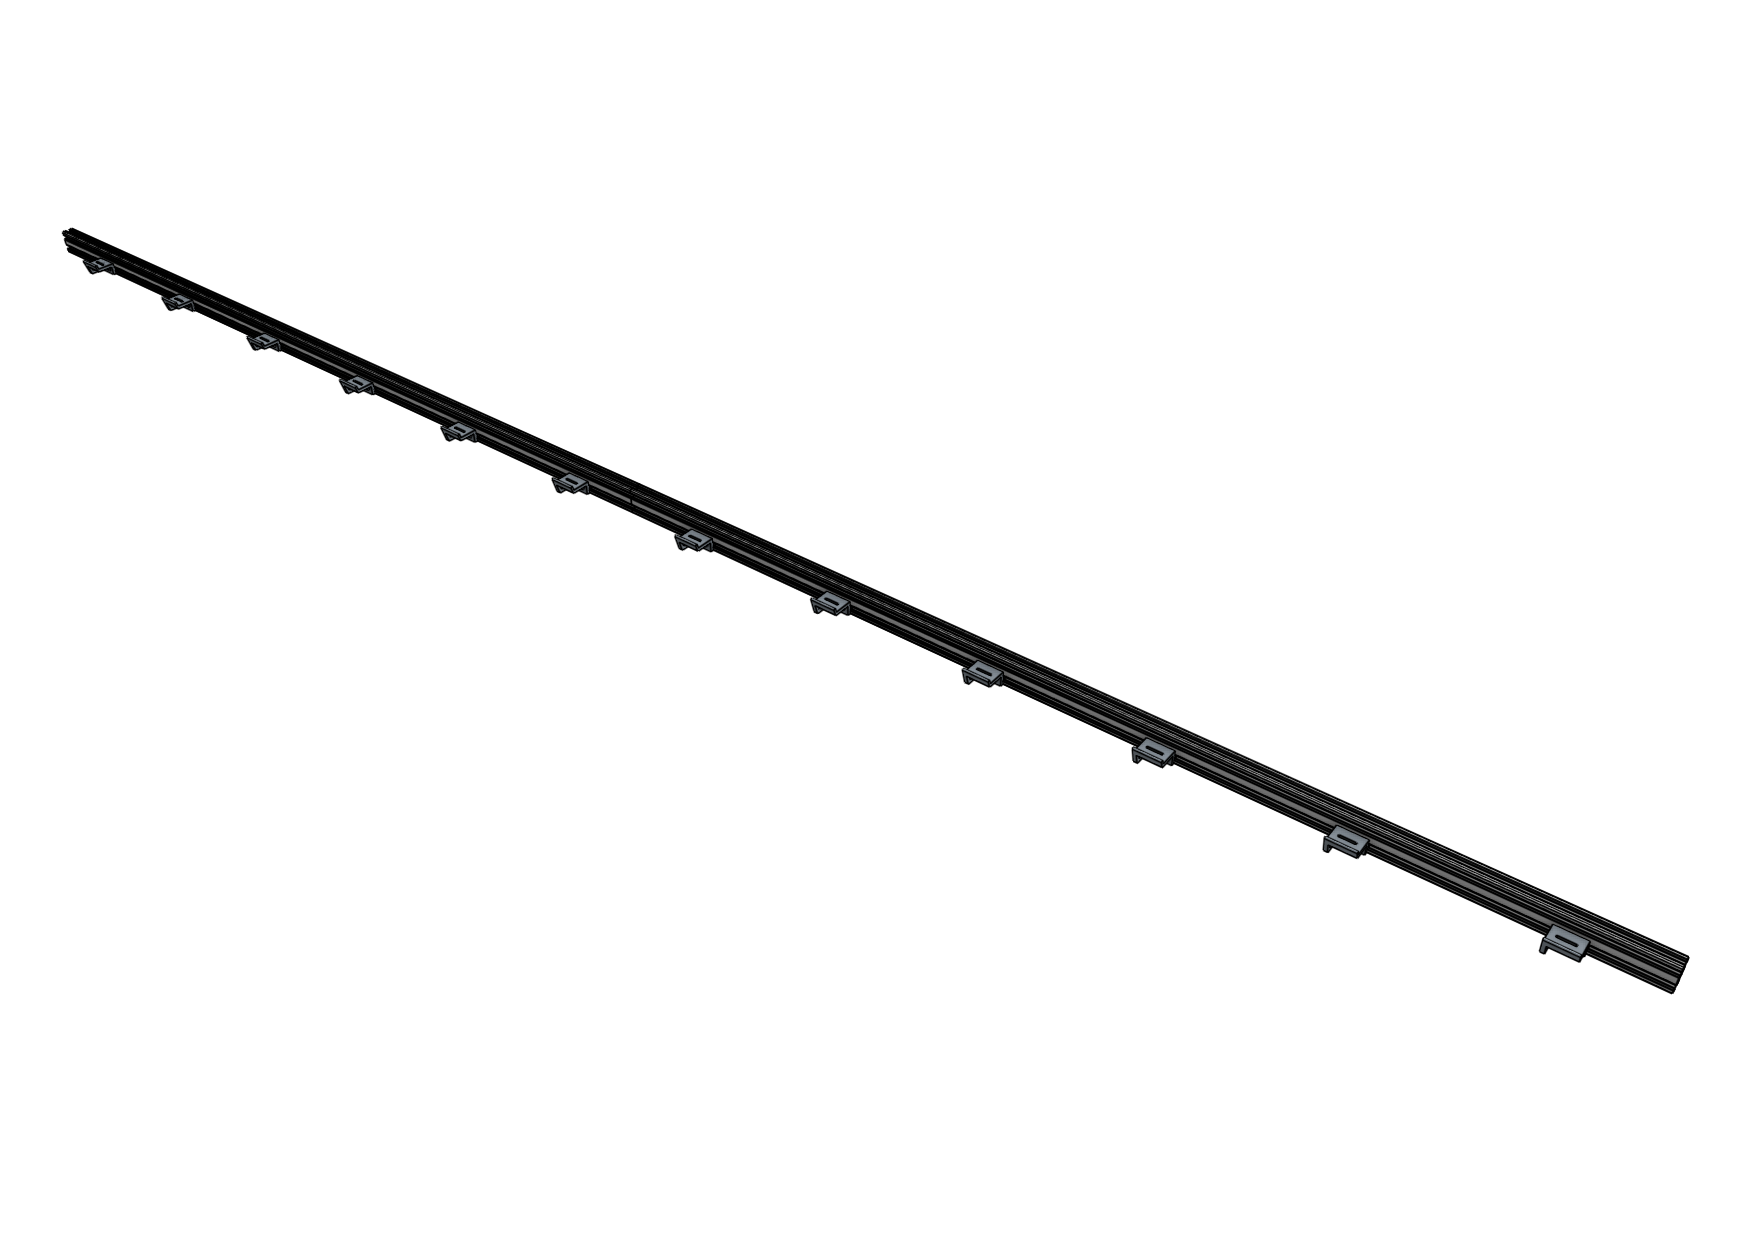
Tracks
AgriBot’s tracks allow the gantry to move precisely along the x-axis.
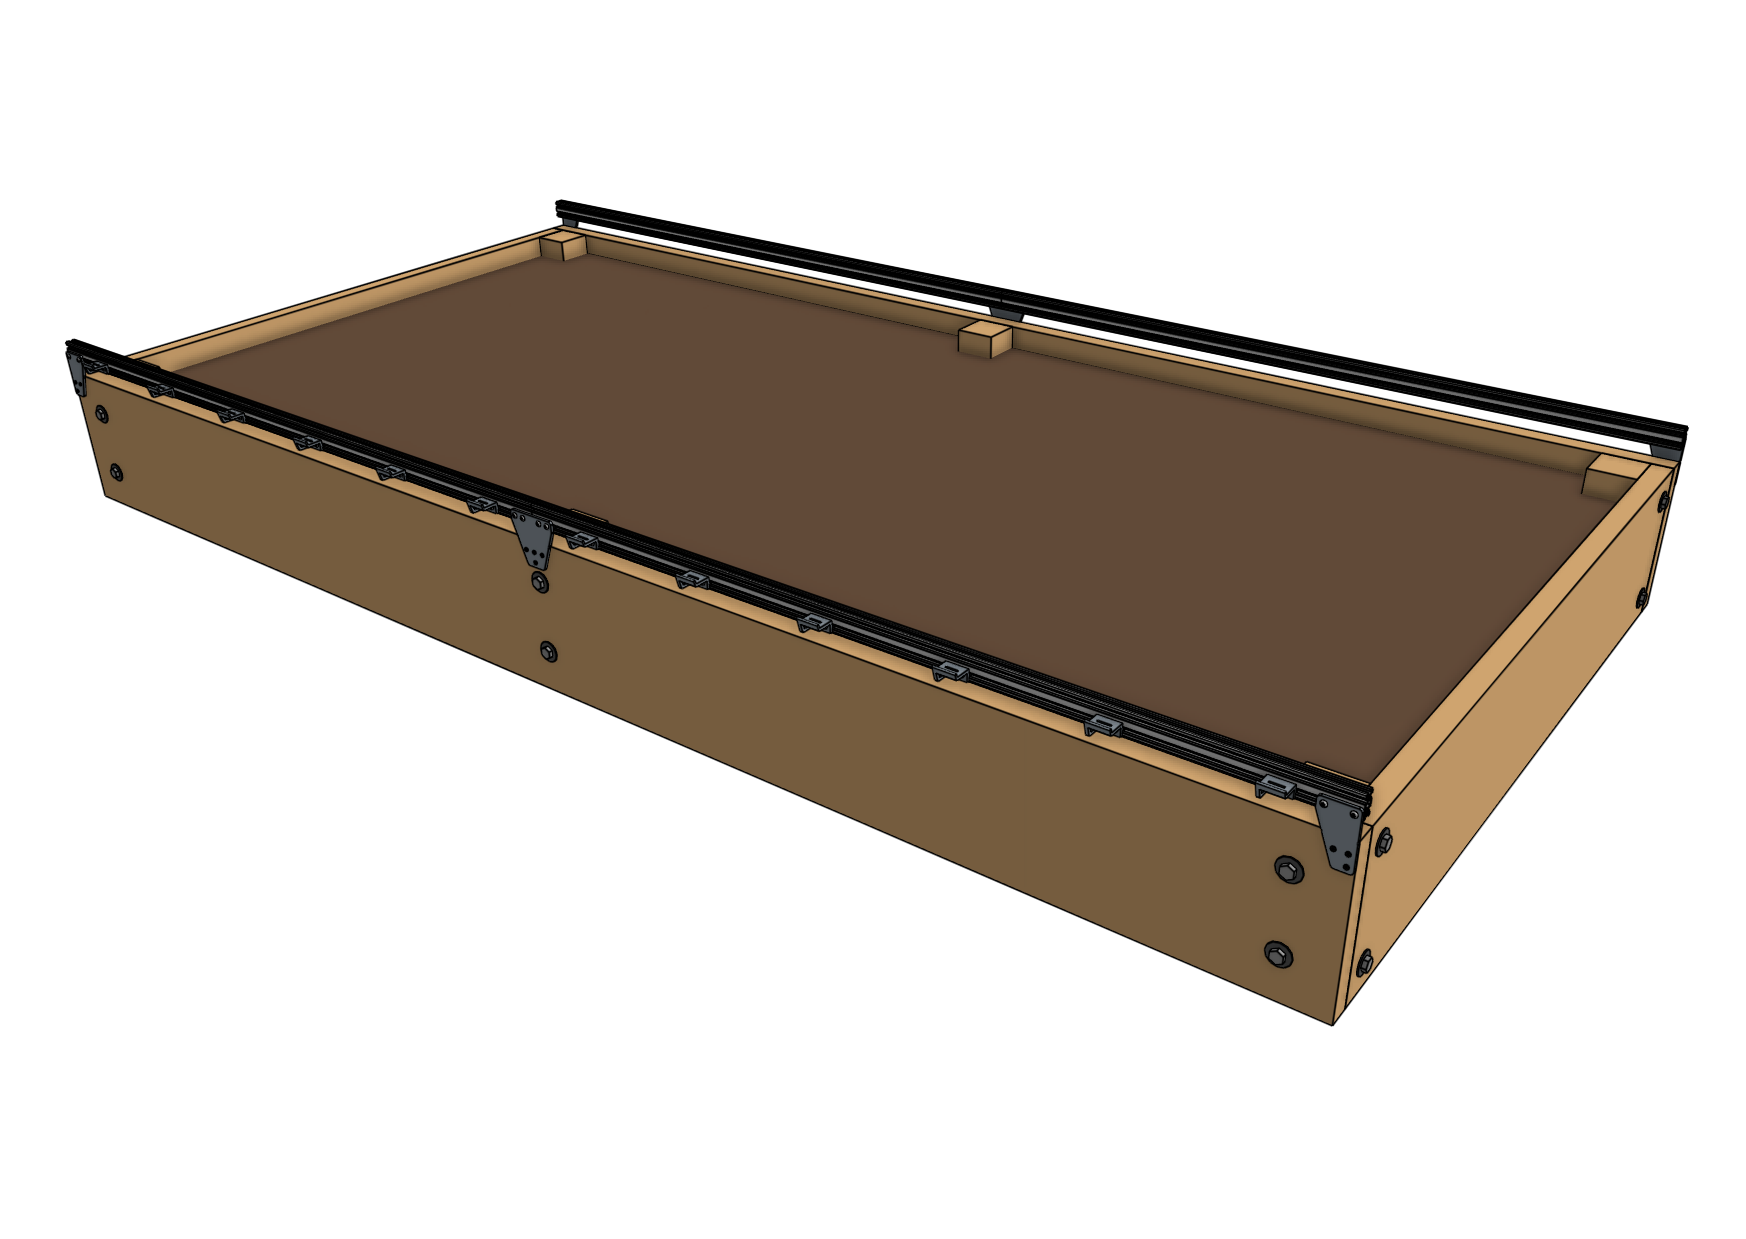
They are designed to attach to a raised bed or similar supporting infrastructure.
Each track is composed of 1.5m long aluminum extrusions positioned end-to-end to form a total track length of 3m for normal models and 6m for XL model.

The two tracks must be a parallel distance apart between 0.5m and 1.5m for normal, and 1.5m and 3m for XL so that the gantry may span the distance between them.
Tracks may be spaced closer together than the maximum, in which case you may consider cutting the gantry main beam so that it does not inconveniently extend beyond the tracks.
Shortening the tracks
The easiest way to shorten the tracks is to remove extrusions.
Should you want an overall track length different than the 1.5m increments the extrusions afford, then you will need to use a hacksaw or bandsaw to cut the extrusions to your desired length.
You can shorten your tracks to a minimum length of around 0.5m.
Lengthening the tracks
If you would like to extend your tracks, you will need additional extrusions, track joining plates, cable carrier supports, and hardware, as well as longer x-axis cable carrier, belt, wiring, and tubing.
Step 1: Lay out the track extrusions
Lay out all of the track extrusions in the location that you want to attach them to your supporting infrastructure.
Make sure that extrusions are fully butted against each other.
This will help you attach the plates in the correct location.
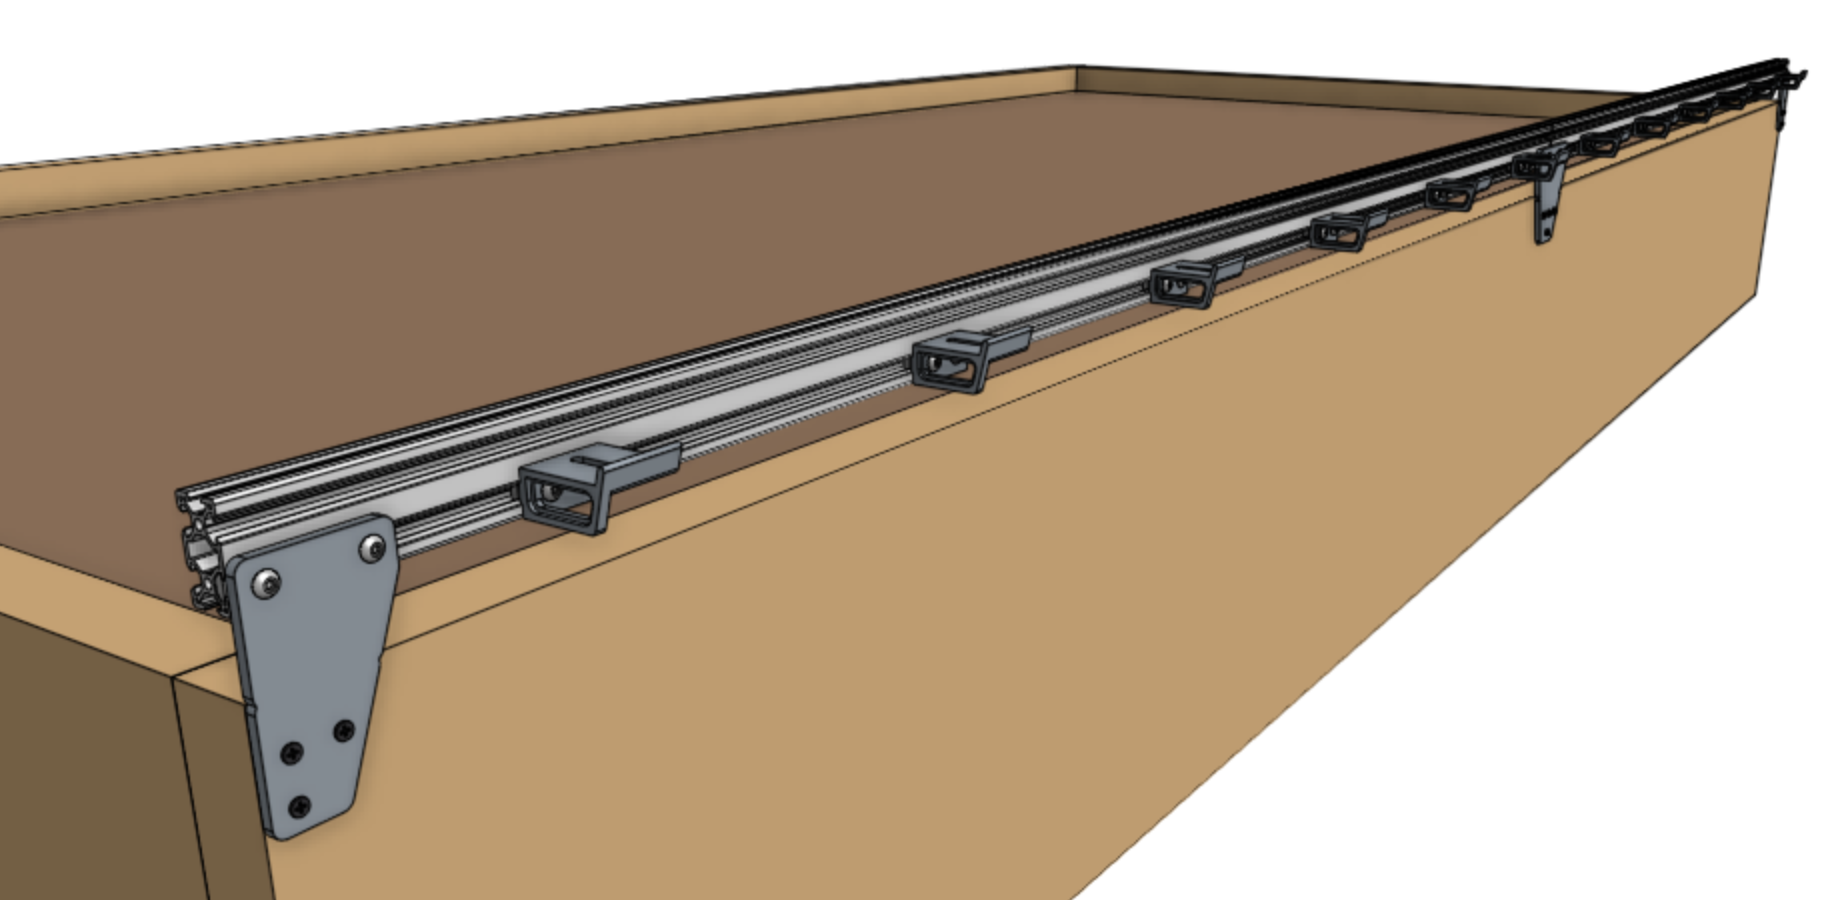
Step 2: Attach the horizontal cable carrier supports
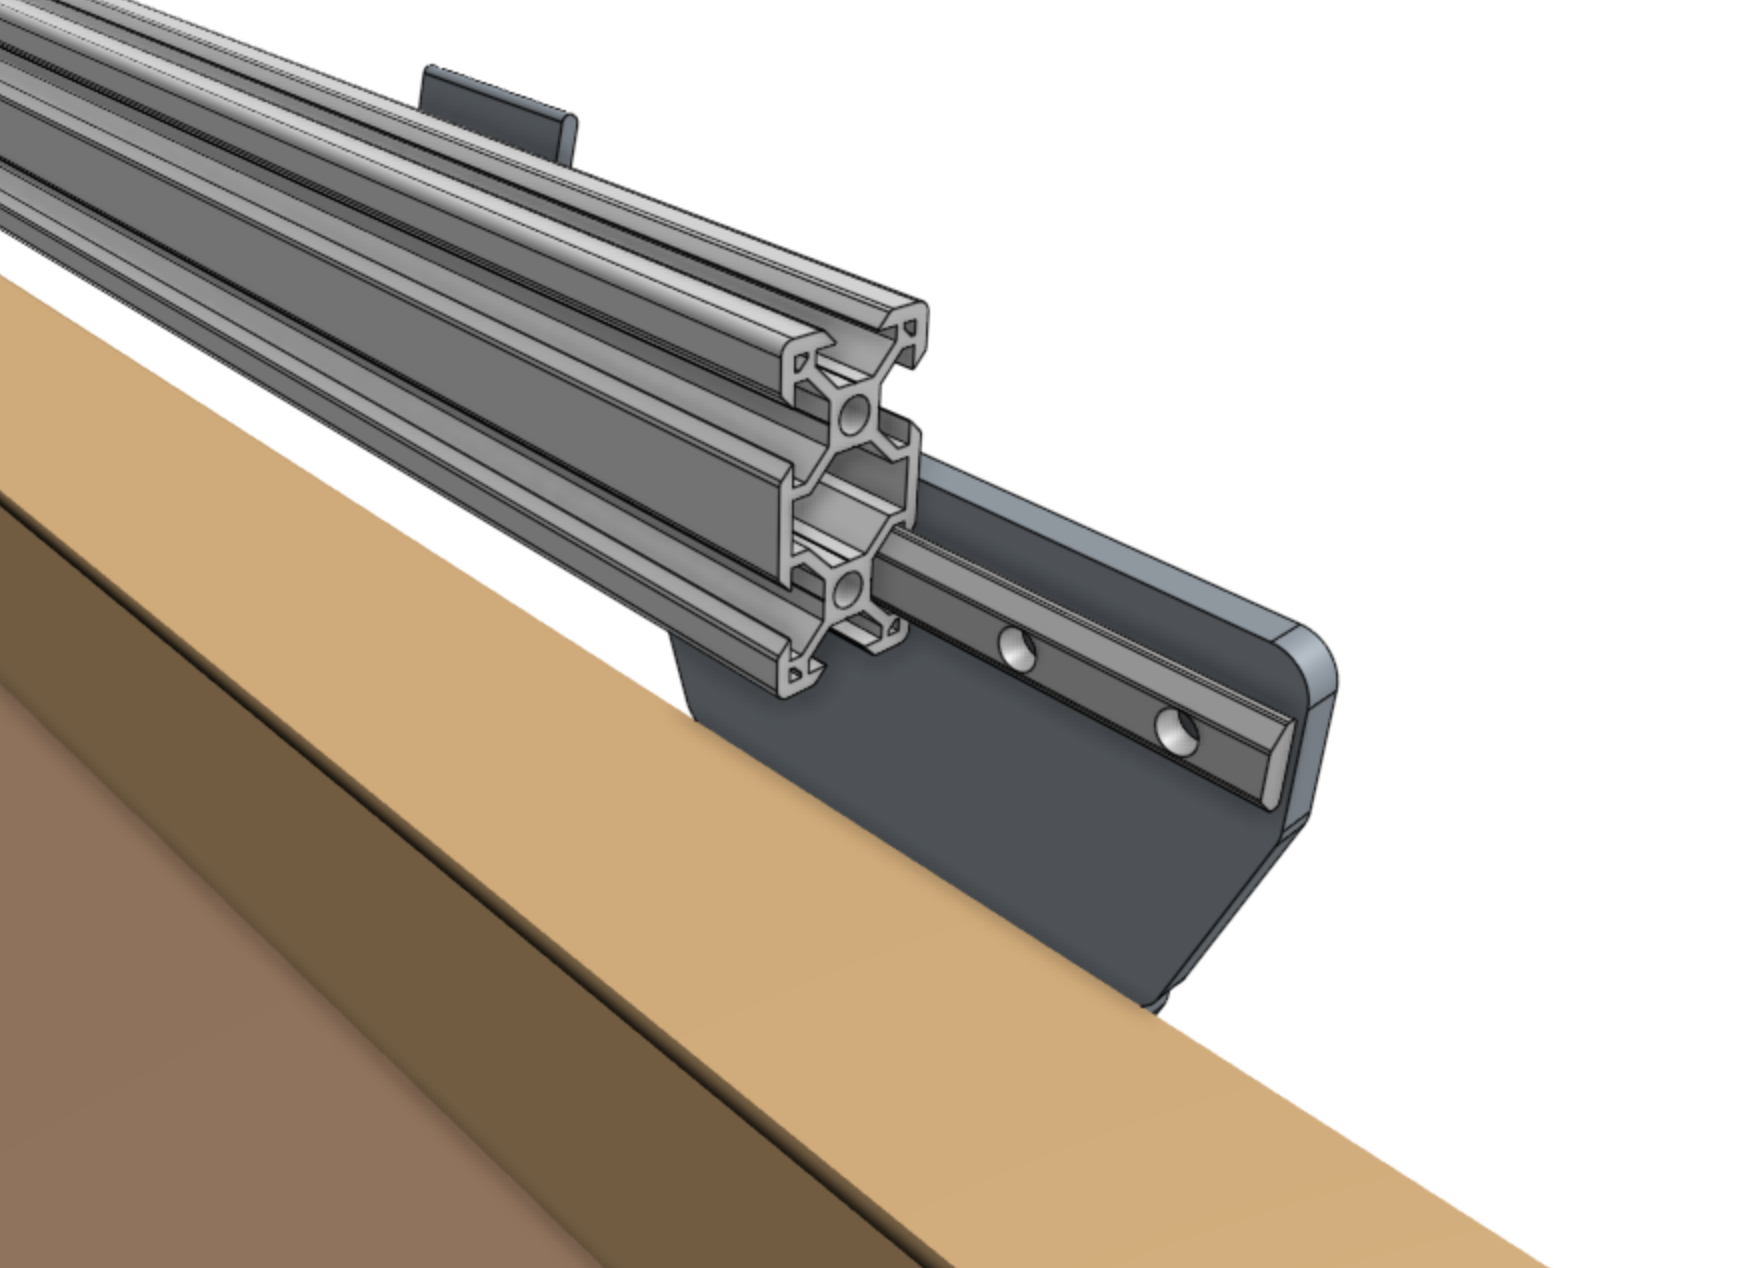
Attach six 30mm horizontal cable carrier supports to the lower slot of a track extrusion using 40mm nut bars and M5 x 10mm screws.
The supports should be spaced evenly along the length of the extrusion, and they should be attached to the track extrusions on the side of the bed that you intend to be the left side of the AgriBot (when looking from the front).
Repeat for all of the track extrusions on the side of the bed that will eventually have the electronics box (two extrusions total for normal, four for XL).

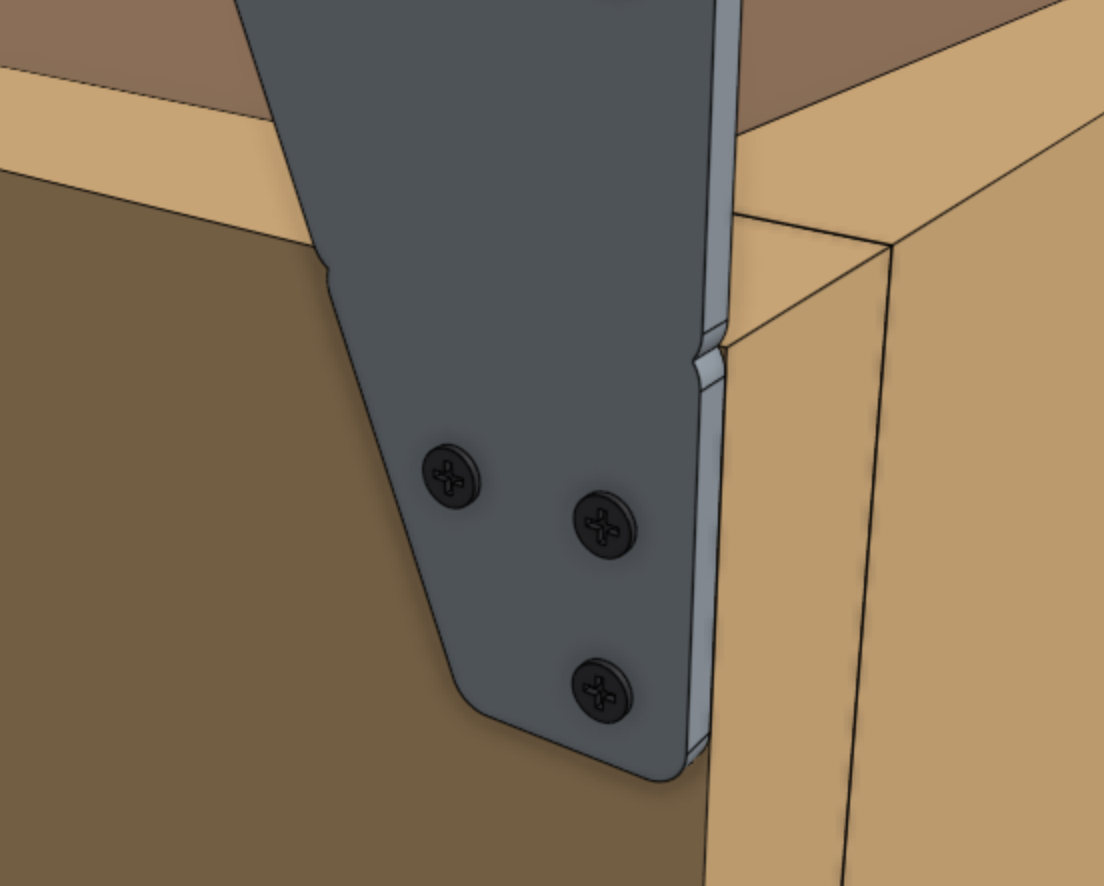
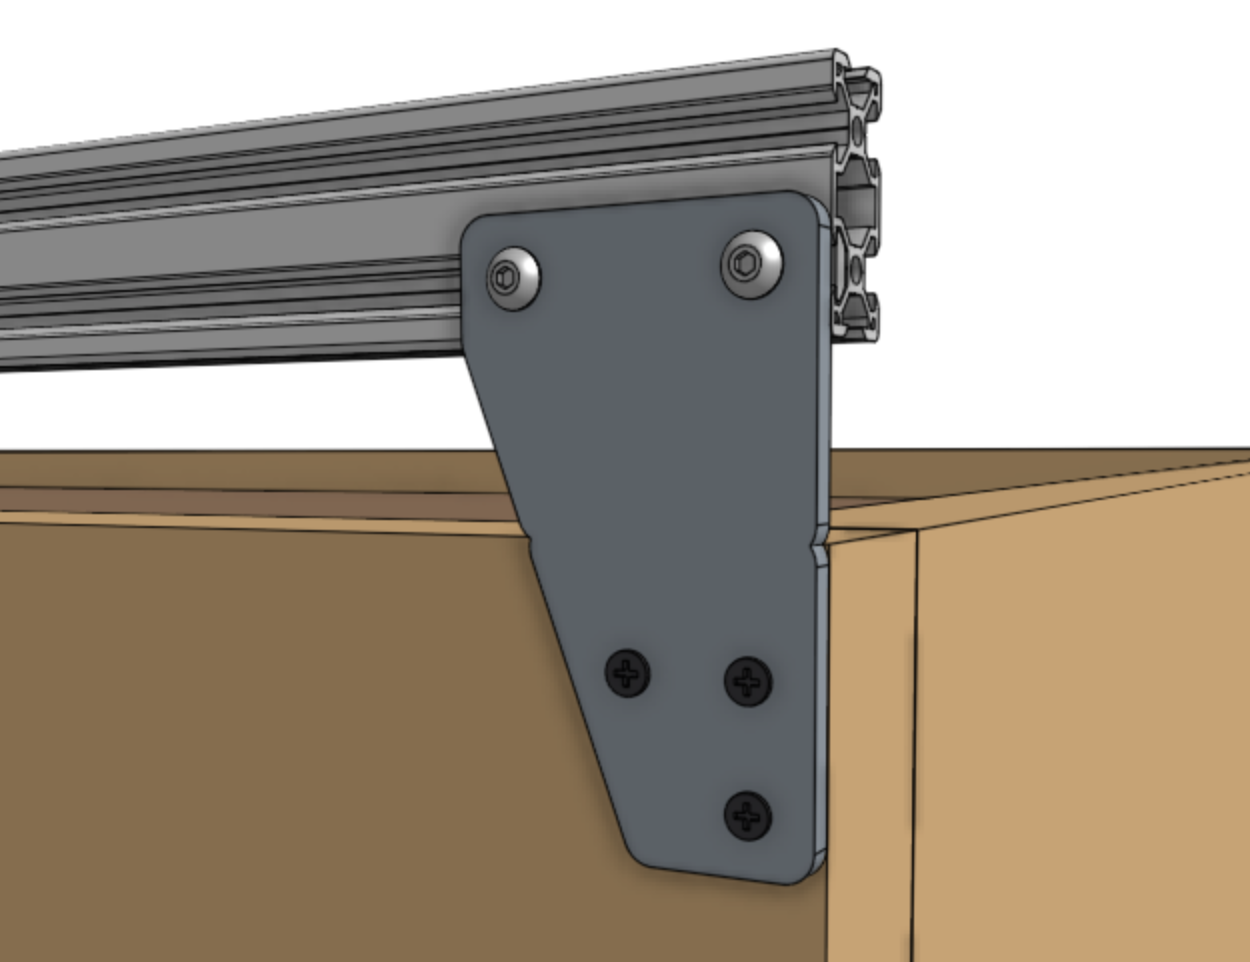
Step 3: Attach a track end plate
Position a track end plate as shown below and screw it into the supporting infrastructure with three wood screws.
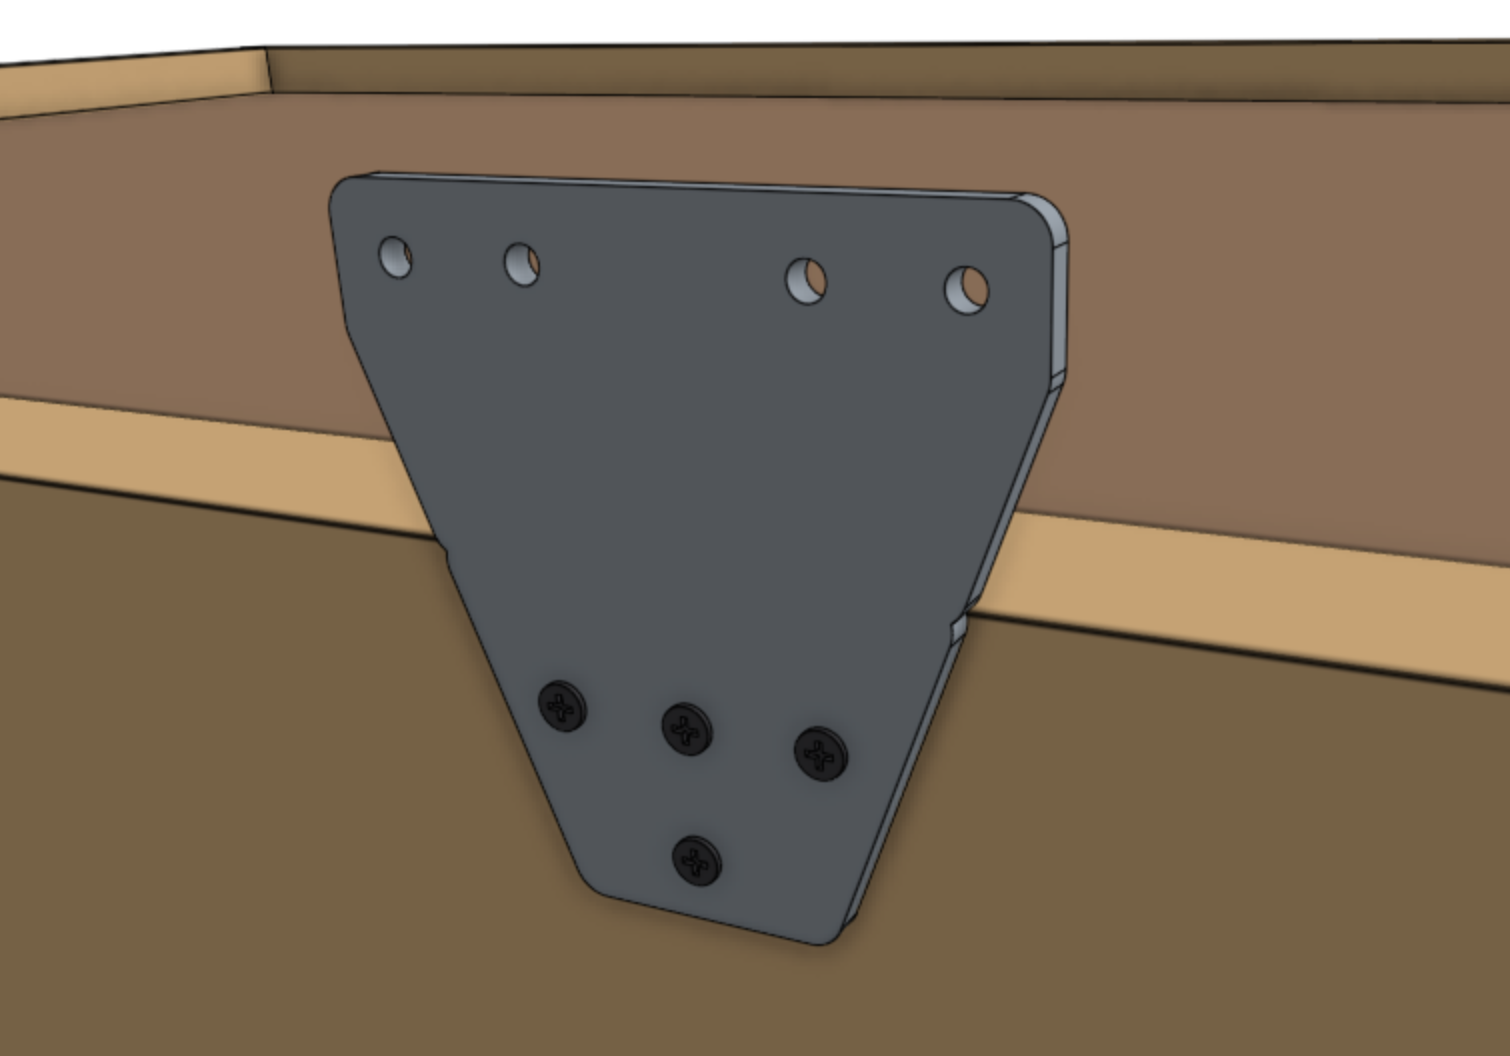
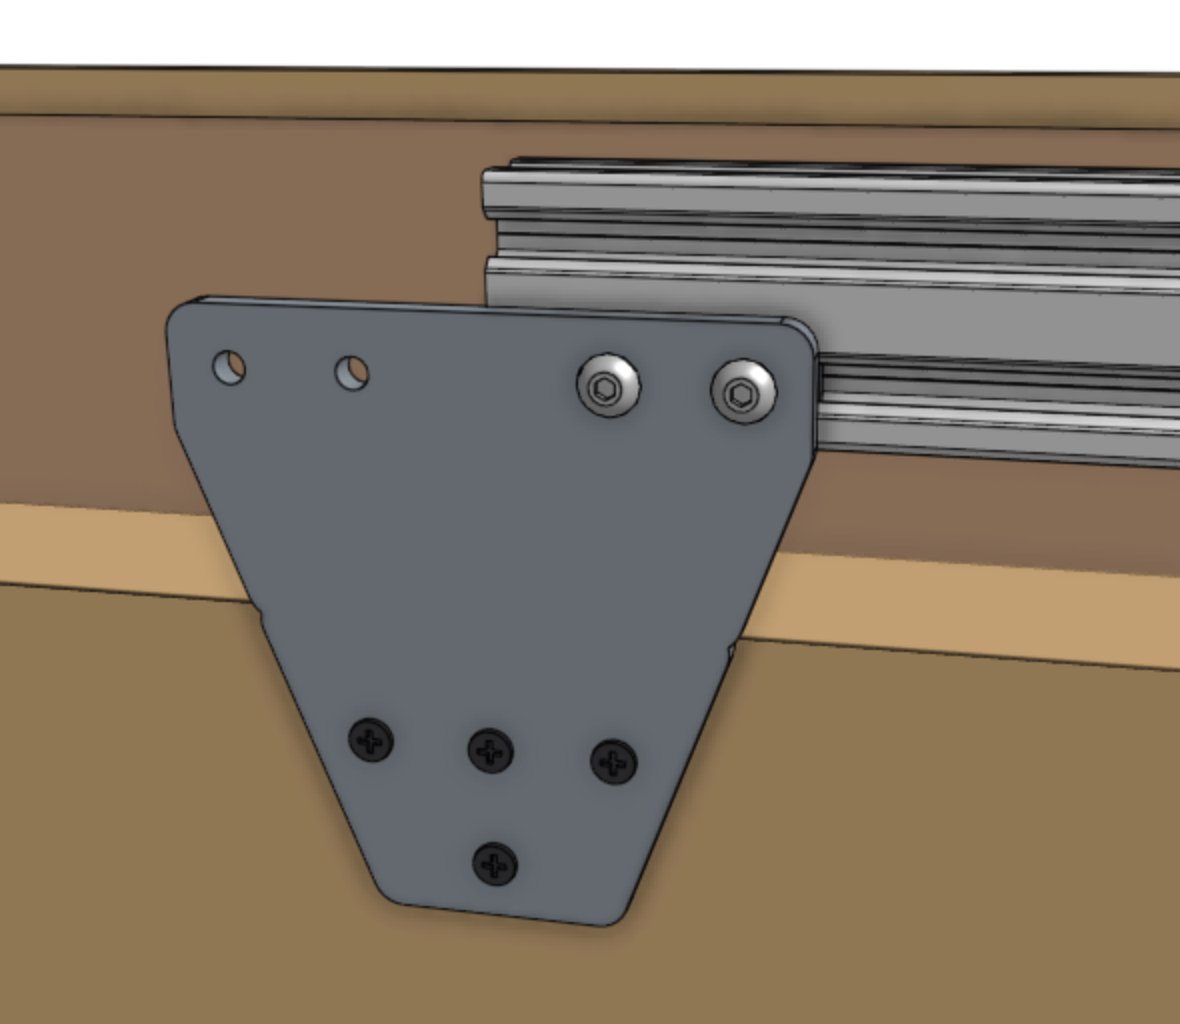
Step 4: Attach a track joining plate
Position a track joining plate such that one half of it will be able to attach to each track extrusion and so that it is vertically aligned with the first track end plate.
Screw the plate into the supporting infrastructure with four wood screws.
Step 5: Attach the first track extrusion
Attach one end of the first track extrusion to the track end plate using a 60mm nut bar and two M5 x 10mm screws.
Attach the other end of the extrusion to the track joining plate using a 100mm nut bar and two M5 x 10mm screws. Do not fully tighten the screws on the track joining plate yet.

Step 6: Attach the next extrusion
Slide the lower V-slot of the second track extrusion onto the 100mm nut bar.
If it does not slide on easily, you may need to loosen the screws holding the first extrusion in place.
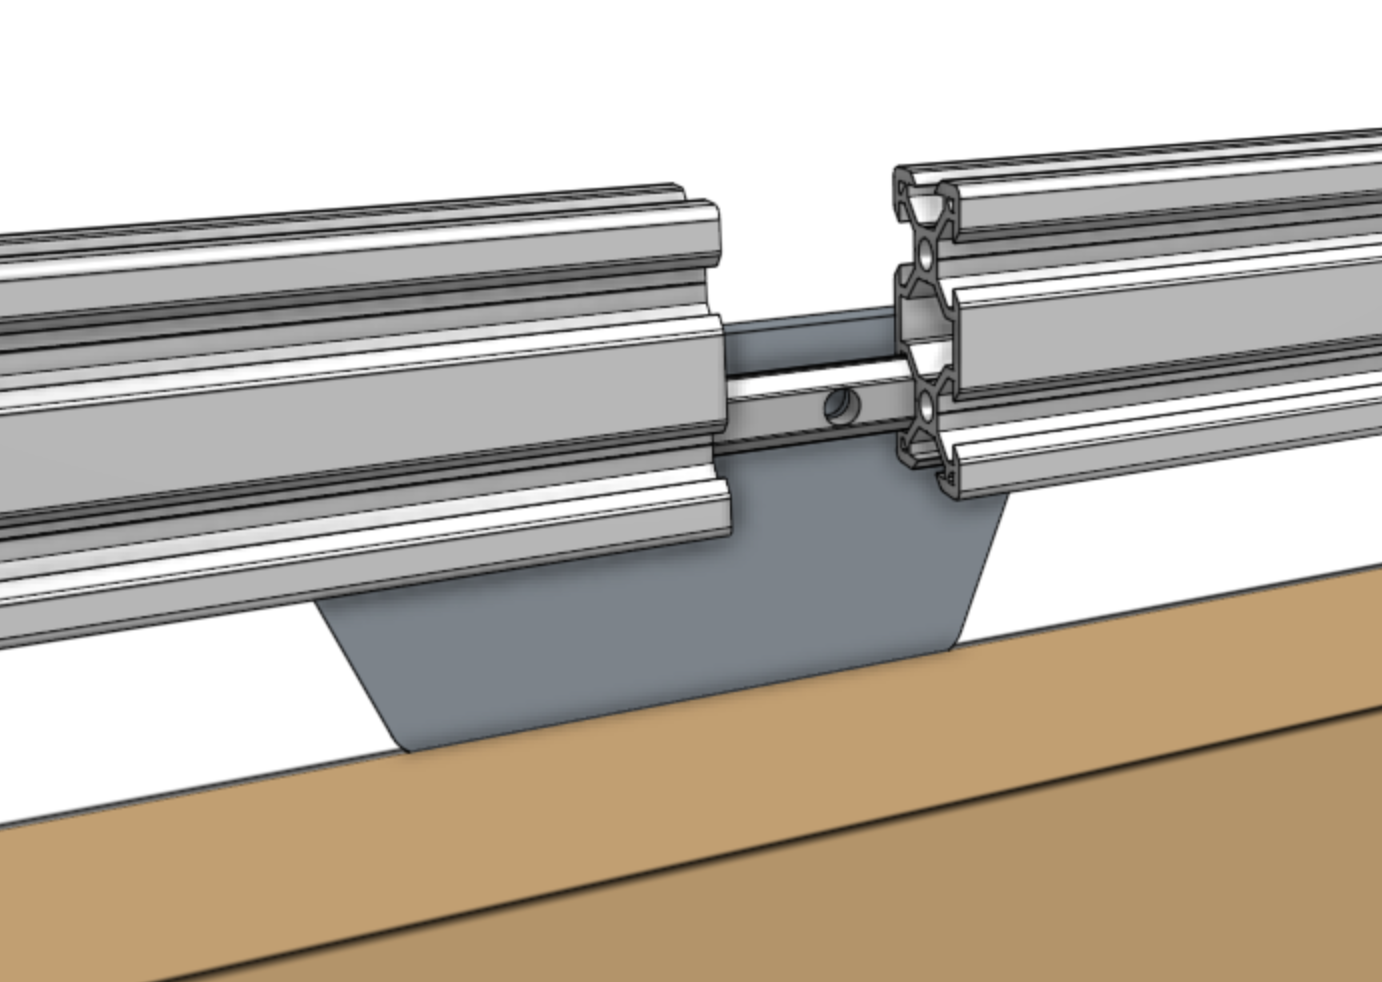
Push the second extrusion into place so there is no gap between the extrusions, then add two M5 x 10mm screws.

Step 7: Attach the next track joining plate
This step applies to XL kits only.
If you have a standard sized kit (3m long), proceed to the next step.
Position another track joining plate such that one half of it will be able to attach to the free end of the track extrusion that was just put in place, and so that it is vertically aligned with the other track mounting plates.
Screw the plate into the supporting infrastructure with four wood screws, and then secure the extrusion with another 100mm nut bar and tighten all screws.

Repeat to install subsequent track joining plates and track extrusions.
Step 8: Attach the second track end plate
Position the second track end plate and secure it to the supporting infrastructure with three wood screws.
Then fasten the final track extrusion to the plate using a 60mm nut bar and M5 x 10mm screws.
Step 9: Install the other track
Repeat steps 3 through 8 for the track on the other side of the bed.
Note that the second track will not have any horizontal cable carrier supports.
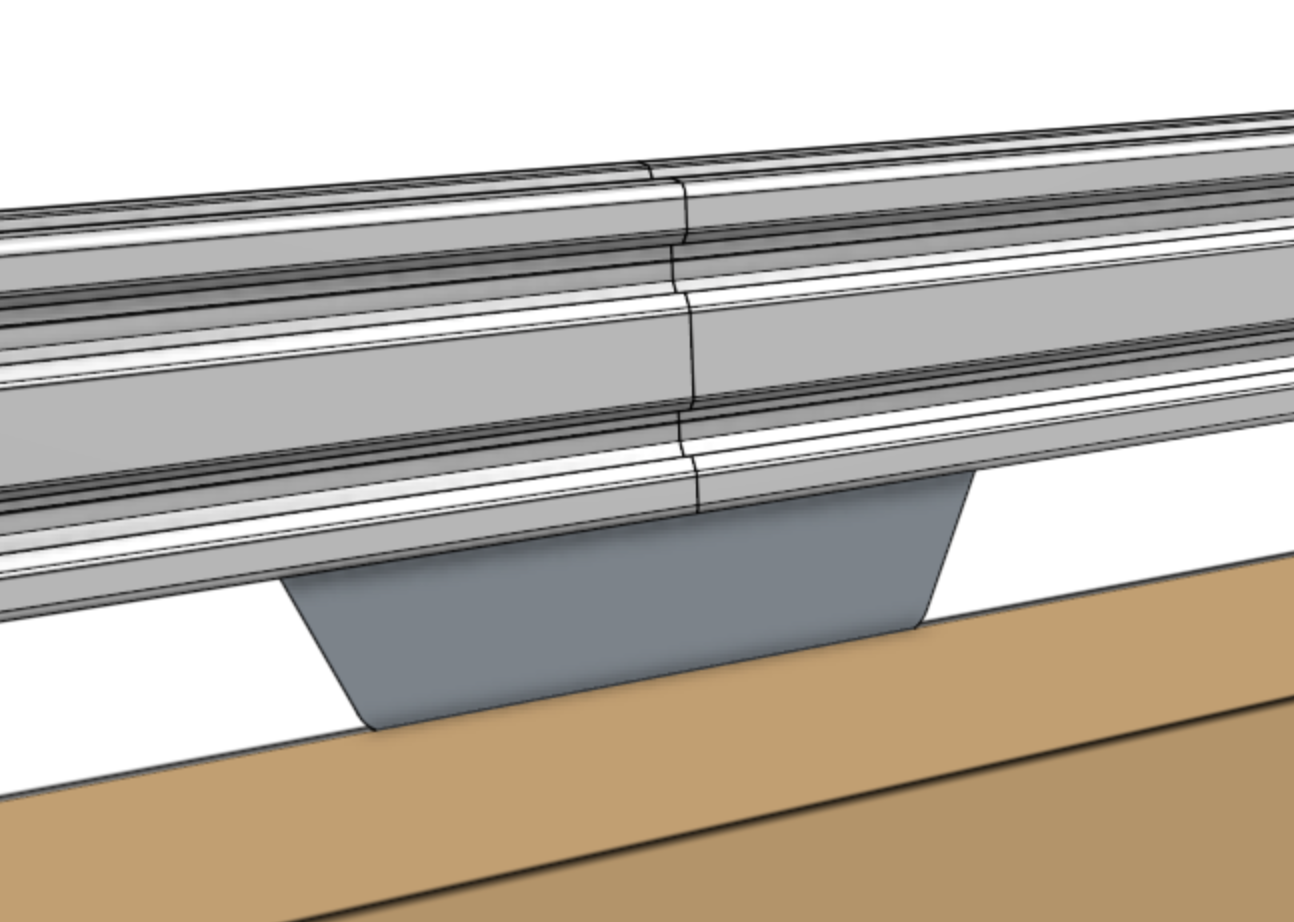
Step 10: Sand away bumps
If needed, use 150 grit sand paper to sand away any bumps on the diagonal surfaces of the extrusions that the AgriBot wheels ride upon.
This will ease the movements of the AgriBot and improve longevity.
Make sure that both the upper surfaces and lower surfaces are smooth to the touch and that there is no bump or uneven edges in the transition from one extrusion to another.